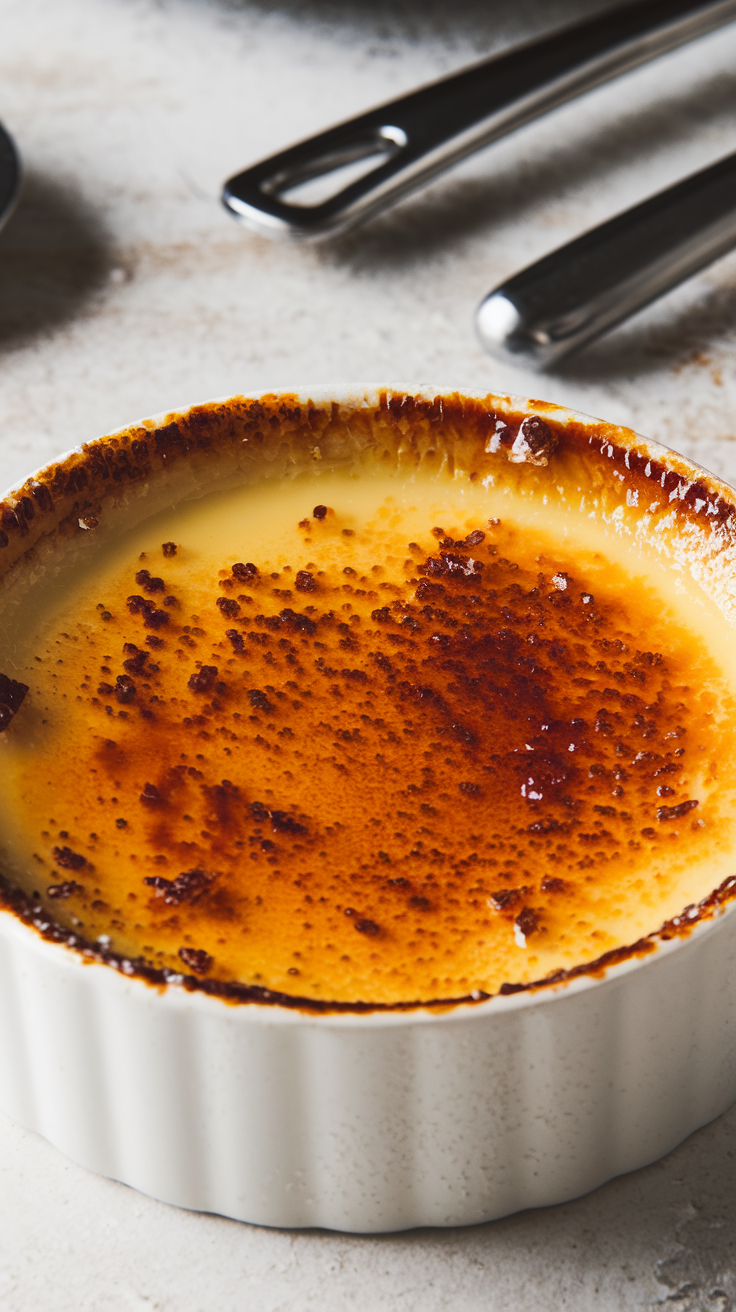
Crème brûlée—literally “burnt cream”—is the dessert equivalent of a magic trick. Imagine this: a delicate, glass-like caramelized crust shatters under your spoon to reveal a pool of silky, vanilla-specked custard beneath. It’s luxurious, yet deceptively simple.
Fun fact: This French classic dates back to the 1690s, but Spain and England both claim earlier versions (crema catalana and “burnt cream,” respectively). Regardless of its origins, one thing’s certain: nothing beats homemade crème brûlée.
I’ve cracked (pun intended!) the code to mastering this dessert at home, even if you’ve never held a kitchen torch. Let’s dive into the recipe, troubleshoot common pitfalls, and explore fun twists to make it your own. Your inner pastry chef is about to shine! ✨
What Is Crème Brûlée? A Bite-Sized History
Crème brûlée is a baked custard dessert made with egg yolks, cream, sugar, and vanilla. Its signature caramelized sugar topping is traditionally torched just before serving.
- Origins: While France popularized it in the 17th century, similar recipes appeared in Spanish and English cookbooks earlier. The modern version we love today was perfected in Parisian kitchens.
- Why It’s Timeless: With just 4 core ingredients, it’s a study in simplicity. The contrast between the crisp sugar crust and velvety custard is pure culinary genius.
- Fun Fact: Chefs didn’t use kitchen torches until the 1980s! Before that, they relied on red-hot fire pokers (talk about drama!).
Ingredients You’ll Need (And Easy Substitutions)
Quality matters here—this isn’t the time for skimpy substitutes!
- Heavy Cream (1 ½ cups): The backbone of the custard’s richness. For a lighter version, use half-and-half (but expect a slightly less creamy texture).
- Egg Yolks (4 large): They thicken the custard. Save the whites for macarons!
- Granulated Sugar (⅓ cup + extra for torching): Superfine sugar works best for torching.
- Vanilla Bean (1) or Pure Vanilla Paste (1 tsp): Splurge on a Madagascar vanilla bean for those gorgeous black specks.
- Pinch of Salt: Balances the sweetness.
Substitutions:
- Dairy-Free: Swap heavy cream for full-fat coconut milk.
- Sugar-Free: Use erythritol for the custard, but not for torching (it won’t caramelize).
Essential Tools for Crème Brûlée Success
No professional kitchen required! Here’s what you’ll need:
- Ramekins (4-6 oz): Ceramic or oven-safe glass.
- Kitchen Torch: A $15 torch from Amazon works perfectly.
- Fine-Mesh Sieve: For ultra-smooth custard.
- Baking Dish (for water bath): A 9×13” pan is ideal.
- Thermometer (optional): To ensure the custard hits 170°F.
No Torch? Use your oven’s broiler! Place chilled custards on a baking sheet, sprinkle with sugar, and broil 1-2 minutes until bubbly and golden. Watch closely—it burns fast!
Step-by-Step Crème Brûlée Recipe
Total Time: 4 hours (mostly chilling) | Serves: 4
Step 1: Preheat & Prep
- Preheat oven to 325°F.
- Boil a kettle of water for the water bath.
Step 2: Warm the Cream
- Split the vanilla bean lengthwise, scrape out seeds, and add both pod and seeds to a saucepan with cream.
- Heat over medium until steaming (do not boil). Let steep 10 minutes. Remove the pod.
Step 3: Temper the Eggs
- Whisk egg yolks, ⅓ cup sugar, and salt in a bowl until pale.
- Slowly pour the warm cream into the yolks, whisking constantly (this prevents scrambled eggs!).
Step 4: Strain & Pour
- Strain the mixture through a sieve into a spouted measuring cup.
- Divide among ramekins (fill ¾ full).
Step 5: Bake in a Water Bath
- Place ramekins in a baking dish. Pour hot water into the dish until halfway up the ramekins.
- Bake 30-40 minutes until edges are set but centers jiggle slightly.
Step 6: Chill
- Cool ramekins on a wire rack, then refrigerate at least 3 hours (overnight is better!).
Step 7: Torch the Sugar
- Sprinkle 1-2 tsp sugar evenly over each custard. Torch in circular motions until golden and bubbly.
- Let sit 1-2 minutes to harden. Serve immediately!
Common Mistakes (And How to Fix Them)
- Cracked Custard: Overbaking is the culprit. Pull them out when the center wobbles like Jell-O.
- Soggy Sugar Top: Use superfine sugar, layer it thinly, and torch thoroughly.
- Lumpy Texture: Always strain the custard! Egg bits love to clump.
- Burned Crust: Hold the torch 2-3 inches away and keep it moving.
Creative Flavor Variations
Once you’ve mastered the classic, try these twists!
- Citrus: Add orange or lemon zest to the cream.
- Chocolate: Whisk 2 oz melted dark chocolate into the warm cream.
- Lavender: Steep 1 tsp culinary lavender in the cream (strain before using).
- Pumpkin Spice: Mix 2 tbsp pumpkin purée and ½ tsp spice into the custard.
Pro Tips from Pastry Chefs
- Chill Like a Pro: Let custards set fully in the fridge—this prevents a weepy crust.
- Room-Temperature Ramekins: Cold dishes can cause cracks during baking.
- Serve Smart: Pair with fresh berries, espresso, or a drizzle of salted caramel.
- Storage: Keep torched crème brûlée in the fridge up to 2 days, but the crust will soften.
Conclusion
Crème brûlée isn’t just a dessert—it’s an experience. Whether you’re hosting a dinner party or treating yourself on a Tuesday, this recipe guarantees showstopping results.
Ready to torch like a pro? Grab your ramekins, channel your inner French pastry chef, and let that sugar sizzle.