
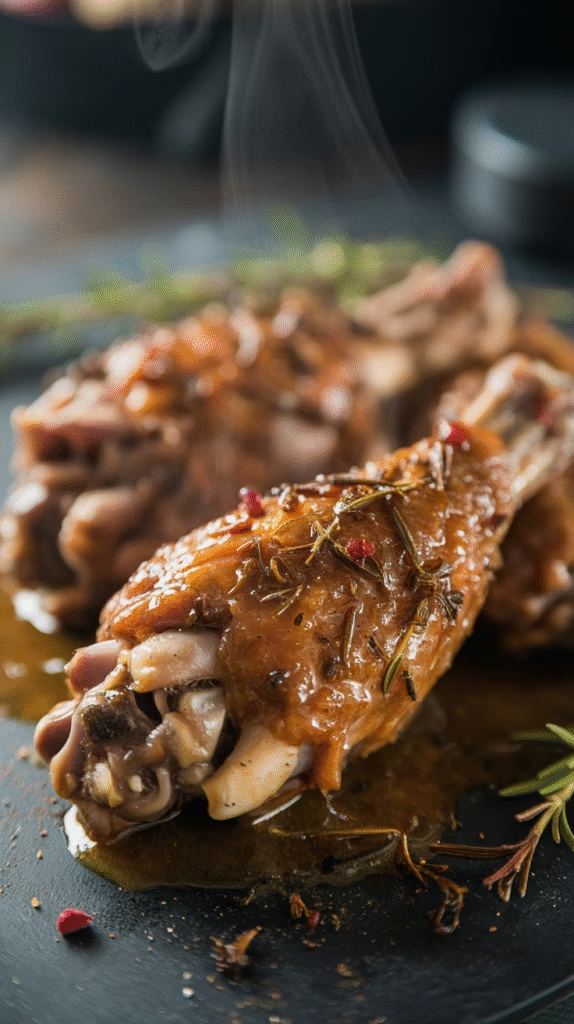
ave you ever had a bite of perfectly smothered turkey wings that just melted in your mouth? There’s something magical about this classic Southern dish that brings people together! According to a recent food trend report, home-cooked comfort foods have seen a 65% increase in popularity since 2023. Whether you’re cooking for a special occasion or just want to elevate your weeknight dinner, these smothered turkey wings deliver big on flavor without breaking the bank. I’ve been perfecting this recipe for years, and I’m excited to share all my tips and tricks with you!
What Are Smothered Turkey Wings?
Turkey wings are the perfect candidate for this cooking method because of their size and structure. Unlike chicken wings, turkey wings are substantial enough to make a satisfying main course. They contain dark meat that’s rich in flavor and has enough connective tissue to break down during the long cooking process, resulting in that coveted fall-off-the-bone tenderness.
From a nutritional standpoint, turkey wings offer a great alternative to other poultry options. They’re higher in protein than chicken wings and contain essential nutrients like iron, zinc, and B vitamins. While they do have more fat than turkey breast, this fat contributes to the richness of the dish and helps keep the meat moist during cooking.

Essential Ingredients for Perfect Smothered Turkey Wings
The Turkey Wings
For this recipe, you’ll need about 3-4 pounds of turkey wings, which typically serves 4-6 people. Look for wings that are plump and meaty. Fresh wings are ideal, but frozen will work just fine—just make sure they’re completely thawed before cooking. Ask your butcher to separate the wings at the joints if they come whole, or you can do this at home with a sharp knife.
The Aromatics
The foundation of flavor in smothered turkey wings comes from aromatics:
- 2 large onions, thinly sliced
- 1 green bell pepper, diced
- 3-4 cloves of garlic, minced
- 2 stalks of celery, finely chopped
These vegetables not only add depth of flavor but also help create the body of your gravy as they break down during cooking.
Herbs and Spices
The perfect blend of seasonings makes all the difference:
- 2 teaspoons of paprika (smoked paprika adds an extra dimension)
- 1 tablespoon of dried thyme (or 2 tablespoons fresh)
- 1 teaspoon of sage
- 2 teaspoons of garlic powder
- 2 teaspoons of onion powder
- 1 teaspoon of black pepper
- Salt to taste (about 2 teaspoons)
- ½ teaspoon of cayenne pepper (optional, for heat)
For the Gravy
- ⅓ cup of all-purpose flour (for dredging and gravy)
- 3 cups of chicken or turkey broth (homemade is best, but store-bought works too)
- 2 tablespoons of vegetable oil or butter for browning
- 1 bay leaf
- 1 tablespoon of Worcestershire sauce (optional, for depth)
Equipment You’ll Need
The right equipment makes preparing smothered turkey wings much easier:
- A large Dutch oven or deep skillet with a lid – This is essential for proper browning and the slow-cooking process. A Dutch oven is ideal because of its excellent heat retention and distribution.
- Tongs – For safely turning the hot wings during browning without piercing the skin.
- A whisk – To ensure your gravy is smooth and lump-free.
- Meat thermometer – To check for doneness. Turkey wings should reach an internal temperature of 165°F (74°C) to be safe to eat.
- Sharp knife and cutting board – For preparing your vegetables and separating wings if needed.
If you want to try alternative cooking methods, a slow cooker or Instant Pot can also work well for this recipe with some adaptations, which we’ll cover later.
Step-by-Step Preparation Instructions
Cleaning and Preparing the Turkey Wings
- Start by thoroughly rinsing the turkey wings under cold water.
- Pat them dry with paper towels – this is crucial for getting a good sear.
- Trim any excess skin if desired, but leave some for flavor and moisture.
- Separate the wings at the joints if they’re whole, creating drumettes and flats. You can discard the wing tips or save them for making stock.
Seasoning the Wings
- In a small bowl, combine all your dry seasonings: paprika, thyme, sage, garlic powder, onion powder, black pepper, salt, and cayenne if using.
- Rub this seasoning mixture generously over all sides of the turkey wings, making sure to get under the skin where possible.
- For maximum flavor, let the seasoned wings sit in the refrigerator for at least 30 minutes, or up to overnight if you have time. This allows the flavors to penetrate the meat.
The Secret to Perfect Smothering Technique
Browning the Wings
- Heat your Dutch oven or deep skillet over medium-high heat and add 2 tablespoons of oil or butter.
- While the oil is heating, lightly dredge the seasoned wings in flour, shaking off any excess. This will help create a beautiful crust and thicken your gravy later.
- Working in batches to avoid overcrowding, place the wings in the hot oil and brown on all sides, about 3-4 minutes per side. You’re not cooking them through at this point – just developing flavor and color.
- Transfer the browned wings to a plate and set aside.
Creating the Flavor Base
- In the same pot with the remaining oil and browned bits (this is flavor gold!), add your sliced onions, bell peppers, celery, and minced garlic.
- Sauté the vegetables until they begin to soften, about 5-7 minutes, scraping up the browned bits from the bottom of the pot.
- Sprinkle 2-3 tablespoons of flour over the vegetables and stir continuously for about 2 minutes to cook out the raw flour taste. This will create your roux, which thickens the gravy.
- Slowly pour in your broth while whisking constantly to prevent lumps from forming.
- Add the bay leaf and Worcestershire sauce (if using), and bring the mixture to a simmer.
The Slow-Cooking Process
- Return the browned turkey wings to the pot, nestling them into the gravy so they’re partially submerged.
- Reduce heat to low, cover with a tight-fitting lid, and simmer for 1.5 to 2 hours, or until the meat is very tender and nearly falling off the bone.
- Turn the wings occasionally during cooking to ensure they cook evenly and absorb flavor from all sides.
- Check for doneness by inserting a fork into the thickest part of the wing – it should enter easily with little resistance. For food safety, verify with a meat thermometer that the internal temperature has reached 165°F (74°C).
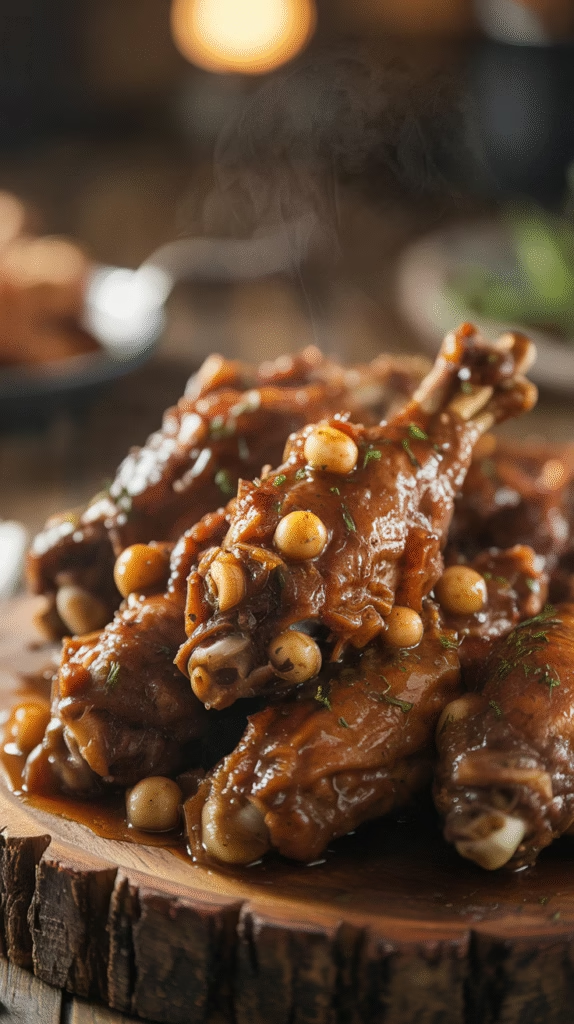
Making the Perfect Gravy
The gravy is arguably the star of smothered turkey wings, so it deserves special attention:
- About 30 minutes before the wings are done, check the consistency of your gravy. If it’s too thick, add a little more broth. If it’s too thin, you have a couple of options:
- Remove the lid and continue cooking to reduce the liquid
- Create a slurry with 1 tablespoon of cornstarch and 2 tablespoons of cold water, then stir it into the simmering gravy
- Taste your gravy and adjust seasonings as needed. This is the time to add more salt, pepper, or herbs if necessary.
- For extra richness, you can stir in a tablespoon of butter right before serving.
- Remove the bay leaf before serving.
Slow Cooker and Instant Pot Variations
Slow Cooker Method
- Follow the steps for seasoning and browning the wings as described above.
- Transfer the browned wings to your slow cooker.
- Sauté the vegetables and make the roux in a separate pan, then add the broth and bring to a simmer.
- Pour this gravy over the wings in the slow cooker.
- Cover and cook on low for 6-8 hours or on high for 3-4 hours.
- The result will be extremely tender meat, though the gravy might be thinner than the stovetop version. You can thicken it at the end if needed.
Instant Pot Method
- Use the sauté function to brown the seasoned and floured wings in batches.
- Remove the wings, then sauté the vegetables.
- Sprinkle with flour and make the roux directly in the Instant Pot.
- Add the broth, stirring well to incorporate the roux.
- Return the wings to the pot, seal, and cook on Manual/Pressure Cook for 25 minutes.
- Allow for a 15-minute natural pressure release before opening.
- If the gravy needs thickening, use the sauté function after removing the wings and simmer until reduced to your liking.
While these methods are convenient, the traditional stovetop method typically yields the best flavor and texture. The slow, steady heat allows the flavors to develop more fully and the gravy to reach the perfect consistency.
Serving Suggestions and Perfect Pairings
Smothered turkey wings are the star of the show but shine brightest when paired with complementary sides:
Traditional Sides
- Creamy mashed potatoes or buttery rice to soak up that delicious gravy
- Southern-style green beans with bacon
- Collard greens or mustard greens
- Cornbread or buttermilk biscuits
- Mac and cheese for the ultimate comfort food combination
Beverage Pairings
- A full-bodied red wine like Zinfandel or Syrah
- Sweet tea (the house wine of the South!)
- Lemonade for a refreshing contrast
- For beer lovers, try an amber ale or brown ale
Presentation Tips
For family-style serving, place the wings on a large platter with plenty of gravy poured over top. Garnish with fresh chopped parsley or thyme for a pop of color.
For individual servings, place 1-2 wings on each plate with a generous ladle of gravy, and position your sides alongside. Drizzle a little extra gravy over the potatoes or rice for good measure!
Storing and Reheating Leftover Smothered Turkey Wings
Smothered turkey wings actually taste even better the next day, as the flavors have more time to meld:
Storage
- Let the wings cool completely before refrigerating.
- Store the wings in their gravy in an airtight container.
- Properly stored, they’ll keep in the refrigerator for 3-4 days.
- For longer storage, freeze for up to 3 months in a freezer-safe container.
Reheating
- Stovetop: Place the wings and gravy in a covered pot over low heat, adding a splash of broth if the gravy has thickened too much. Heat slowly until warmed through.
- Oven: Place in a covered baking dish at 325°F for about 20-30 minutes or until heated through.
- Microwave: While not ideal, it works in a pinch. Use medium power and stop to stir the gravy occasionally.
Refreshing the Gravy
When reheating, your gravy might need some attention:
- If it’s too thick, add a little broth or water.
- If it’s separated, whisk vigorously while heating.
- A fresh crack of black pepper or pinch of herbs can revive the flavors.
Repurposing Leftovers
- Shred the meat off the bones and use it in a pot pie or turkey salad.
- Make a turkey wing sandwich with gravy as a spread on crusty bread.
- Add to a hearty soup with vegetables for a completely new meal.
Frequently Asked Questions
Can I use other turkey parts for this recipe?
Absolutely! This smothering technique works beautifully with turkey thighs, drumsticks, or even a whole cut-up turkey. Cooking times may vary based on the size of the pieces.
How do I know when the turkey wings are done?
The meat should be very tender and nearly falling off the bone. For food safety, use a meat thermometer to ensure the internal temperature has reached 165°F (74°C).
Can I make this recipe ahead of time?
Yes! In fact, this dish often tastes better the next day. Complete the recipe, cool completely, then refrigerate. Reheat gently before serving.
How can I make this recipe gluten-free?
Substitute the all-purpose flour with a gluten-free flour blend or cornstarch for dredging and thickening. Also, be sure to use gluten-free broth and Worcestershire sauce.
What’s the difference between smothered turkey wings and braised turkey wings?
Smothering specifically refers to cooking with a flour-thickened gravy, while braising is a more general term for cooking slowly in liquid. Smothered dishes are a subset of braised dishes with roots in Southern cooking.
Conclusion
There you have it—the ultimate guide to creating mouth-watering smothered turkey wings that will have everyone asking for seconds! This dish truly represents the heart of comfort cooking, bringing together simple ingredients to create something extraordinary. The slow-cooking process transforms humble turkey wings into a feast fit for special occasions yet simple enough for Sunday dinner.
What makes this recipe so special is how it connects us to cooking traditions that have been passed down through generations. There’s a reason these techniques have stood the test of time—they work! The combination of proper seasoning, patient browning, and slow cooking creates layers of flavor that simply can’t be rushed.
