Look, I get it. You’re tired of standing over a hot stove, flipping individual slices of French toast while your family hovers around the kitchen like hungry vultures. Meanwhile, you’re sweating bullets and wondering why you didn’t just serve cereal instead. Well, friend, I’ve got news for you – baked French toast changes everything.
This isn’t just another breakfast recipe; it’s your ticket to weekend morning sanity. I discovered this method during one particularly chaotic Sunday when I had eight people to feed and exactly zero patience for traditional stovetop cooking. The result? Pure breakfast magic that practically cooks itself while you sip your coffee like a civilized human being.
Why Baked French Toast Beats the Traditional Method
Here’s the thing about regular French toast – it’s basically breakfast torture disguised as a treat. You dip, you flip, you serve, and by the time everyone’s eating, your first batch is cold and you’re still cooking. Sound familiar?
Baked French toast solves every single one of these problems. You prep everything the night before, pop it in the oven, and boom – you’re serving restaurant-quality breakfast to a crowd without breaking a sweat. Plus, every slice comes out perfectly golden and evenly cooked. No more burnt corners or soggy middles that make you question your life choices.
I’ve been making this recipe for three years now, and honestly, I can’t remember the last time I made stovetop French toast. Why would I torture myself like that when this method exists?.
Essential Ingredients for Perfect Baked French Toast
Let me break down what you’ll need for this game-changing recipe. I’m talking about ingredients that actually matter – no fancy stuff that you’ll use once and forget about.
The Bread Foundation
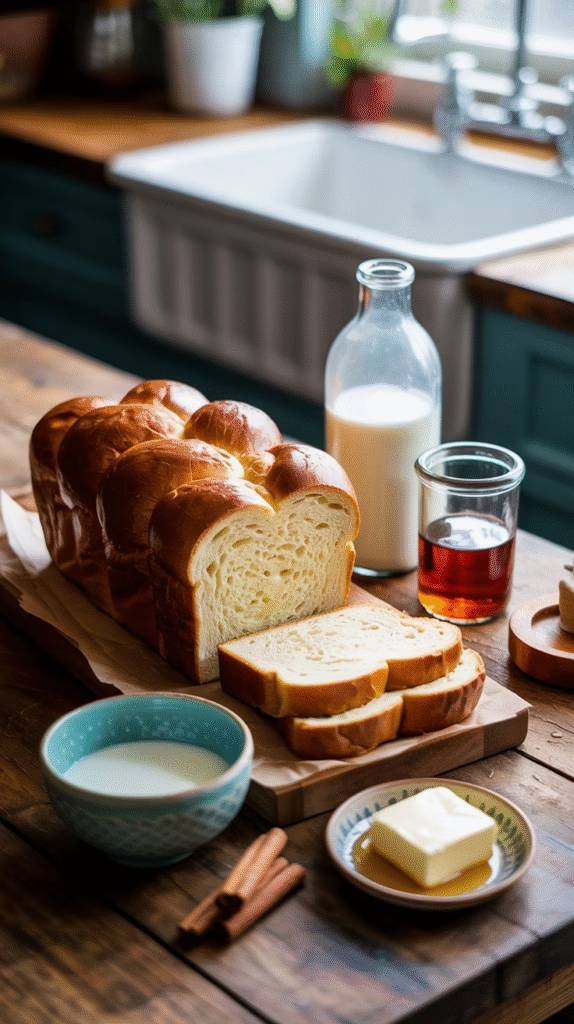
Choose thick-cut bread that can handle the custard soaking. I personally swear by challah or brioche because they’re rich and sturdy, but don’t stress if you can’t find them. Day-old French bread works beautifully too, and honestly, even thick-cut Texas toast from the grocery store gets the job done.
Here’s a pro tip I learned the hard way: slightly stale bread actually works better than fresh. Fresh bread gets too soggy, while day-old bread absorbs the custard mixture without falling apart. If your bread is too fresh, just leave the slices out for a few hours or pop them in a low oven for a few minutes.
The Custard Base Components
The custard mixture makes or breaks your baked French toast, so let’s get this right:
Eggs are your binding agent. I use about six large eggs for a 9×13 pan, but don’t get too hung up on exact numbers. The key is having enough eggs to create that rich, custardy texture without making it taste like scrambled eggs soaked in bread.
Milk and cream combination creates the perfect richness. I mix whole milk with a splash of heavy cream because it gives you that luxurious texture without being overly heavy. Half-and-half works great too if that’s what you have on hand.
Vanilla extract is non-negotiable. Use the real stuff, not imitation. Trust me on this one – your taste buds will thank you later.
Step-by-Step Preparation Method
Alright, let’s walk through this process together. I’m going to assume you’re making this for a crowd because, honestly, that’s when baked French toast really shines.
Preparing Your Baking Dish
Butter your 9×13 inch baking dish generously. I mean really go for it here – this isn’t the time to be stingy with butter. The butter prevents sticking and contributes to that gorgeous caramelized bottom layer that everyone fights over.
Some people use cooking spray, but butter tastes better and creates a richer flavor profile. Plus, when you’re making something this indulgent, why hold back?
Arranging the Bread
Cut your bread into thick slices – about an inch thick works perfectly. Arrange the slices in your prepared dish, overlapping them slightly. They should fit snugly but not be crammed in there like sardines.
Here’s where I get a little obsessive: I make sure the prettiest sides of the bread face up because that’s what people see when you serve it. Does it matter functionally? Probably not. Does it make me feel like I’ve got my life together? Absolutely.
Creating the Perfect Custard Mixture
Whisk your eggs thoroughly – you don’t want any streaky white bits in your final product. Add the milk, cream, vanilla, cinnamon, nutmeg, sugar, and salt. Whisk until everything’s completely combined and smooth.
The mixture should taste slightly sweeter than you think it needs to be because the bread will absorb some of that sweetness. If you’re feeling adventurous, this is where you could add a splash of bourbon or rum, but that’s totally optional (and maybe not appropriate for the kids’ breakfast :)).
The Soaking Process
Pour the custard mixture evenly over the arranged bread. Make sure every slice gets coated – use your hands to gently press down on any pieces that aren’t cooperating. The bread should absorb most of the liquid, but don’t panic if there’s some pooling at the bottom.
This is where the magic happens: cover the dish with plastic wrap and refrigerate overnight. The long soaking time allows the bread to absorb all those flavors and creates that perfect custard-like texture throughout.
Baking Techniques for Golden Perfection
Morning time! This is where baked French toast really proves its worth – minimal effort for maximum payoff.
Oven Temperature and Timing
Preheat your oven to 350°F (175°C). Remove the dish from the fridge about 30 minutes before baking to take the chill off. This helps ensure even cooking throughout.
Bake for 45-50 minutes until the top is golden brown and the center is set. You’ll know it’s done when a knife inserted in the center comes out mostly clean with just a few moist crumbs clinging to it.
Achieving the Perfect Texture
The key to perfect texture is not overbaking. Nobody wants French toast that’s dry and tough. The center should still have a slight jiggle when you gently shake the pan – it’ll finish setting as it cools slightly.
If the top starts browning too quickly, tent it with foil for the last 10-15 minutes of baking. This prevents burning while allowing the interior to finish cooking properly.
Creative Variations and Add-Ins
Now that you’ve mastered the basic technique, let’s talk about making this recipe your own. IMO, the beauty of baked French toast lies in its versatility.
Fruit Combinations
Fresh berries work beautifully – just scatter them over the bread before adding the custard. Blueberries, raspberries, and sliced strawberries all add gorgeous color and fresh flavor. The berries release their juices during baking, creating natural flavor pockets throughout the dish.
Sliced bananas and a sprinkle of chopped walnuts create a delicious banana bread vibe. Add them right before baking so the bananas don’t get too mushy during the overnight soak.
Apple slices with extra cinnamon transform this into an apple pie-inspired breakfast that’ll make your kitchen smell absolutely incredible.
Serving Suggestions and Toppings
You’ve created this beautiful baked French toast masterpiece – now let’s talk about how to serve it properly. The presentation matters, people!
Classic Toppings
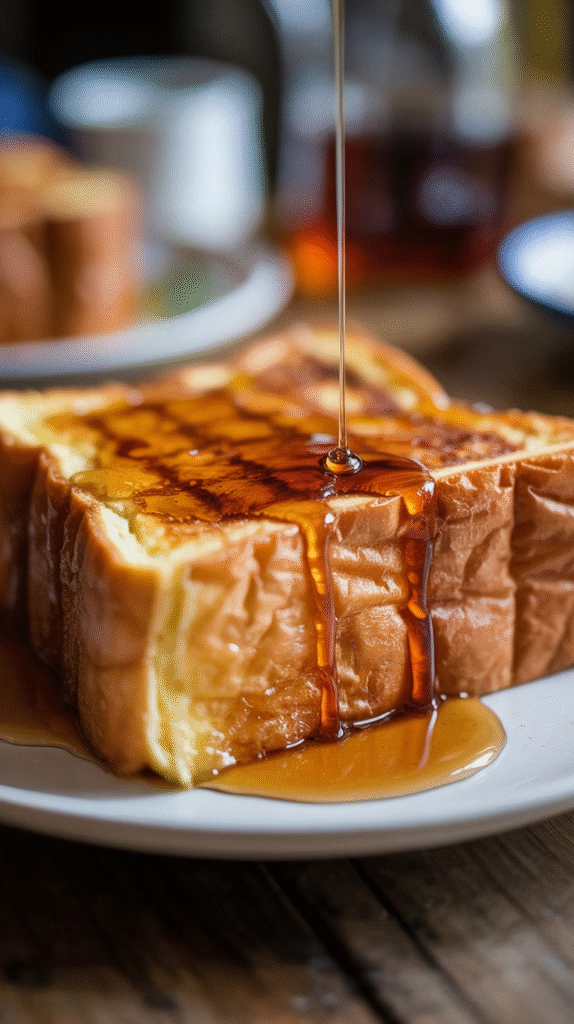
Pure maple syrup is the gold standard – use the real stuff, not the fake pancake syrup. The flavor difference is night and day, and your baked French toast deserves the good stuff.
Fresh whipped cream takes this from breakfast to brunch-worthy indulgence. I make mine with just a touch of vanilla and barely any sugar since the French toast is already sweet.
A light dusting of powdered sugar makes everything look bakery-professional. Use a fine-mesh sieve for even distribution, and add it right before serving so it doesn’t dissolve.
Creative Serving Ideas
Berry compote made with fresh or frozen berries, a little sugar, and lemon juice creates an elegant restaurant-style presentation. The tartness balances the rich custard beautifully.
Caramel or butterscotch sauce appeals to those with a serious sweet tooth. Warm it slightly before drizzling for the best consistency.
Greek yogurt with honey offers a lighter option that still feels indulgent. The tanginess cuts through the richness while adding protein to keep everyone satisfied longer.
Make-Ahead Tips and Storage
This is where baked French toast really shines – the make-ahead friendly nature that saves your sanity during busy mornings.
Overnight Preparation
The overnight soak is actually essential, not optional. This isn’t just about convenience (though that’s a huge bonus). The extended soaking time allows the bread to fully absorb the custard mixture, creating that perfect texture throughout.
You can prepare this up to 24 hours in advance without any loss in quality. In fact, I think it tastes even better after a full overnight soak because all the flavors have time to meld together.
Storage and Reheating
Leftover baked French toast keeps well in the refrigerator for up to three days. Cover it tightly with plastic wrap or transfer individual portions to airtight containers.
Reheating is simple – just pop individual portions in the microwave for 30-45 seconds, or warm larger portions in a 300°F oven for about 10 minutes. The texture holds up remarkably well, unlike stovetop French toast that turns into cardboard when reheated.
You can even freeze portions for up to three months. Wrap individual servings in plastic wrap, then place in freezer bags. Thaw overnight in the refrigerator before reheating.
Troubleshooting Common Issues
Let’s address the problems that can turn your French toast dreams into breakfast nightmares. I’ve made every mistake possible, so you don’t have to.
Nutritional Considerations and Substitutions
Look, baked French toast isn’t exactly health food, but there are ways to make it a bit more nutritious without sacrificing flavor.
Healthier Swaps
Whole grain bread adds fiber and nutrients while still working perfectly with this recipe. The nutty flavor actually complements the custard beautifully.
Reduce the sugar if you’re serving it with sweet toppings like syrup or fruit compote. You can cut it by about half without major flavor impact.
Use a combination of whole eggs and egg whites to reduce cholesterol while maintaining that custardy texture. I use four whole eggs plus two egg whites for a good balance.
Dietary Adaptations
For dairy-free versions, substitute the milk with unsweetened almond milk or oat milk. The texture will be slightly different but still delicious. Use vegan butter for greasing the pan.
Gluten-free bread works perfectly with this method. Just make sure it’s sturdy enough to handle the soaking process.
For lower-sugar versions, try using sugar substitutes or natural sweeteners like stevia. You might need to adjust quantities based on the sweetener you choose.
The Final Verdict
After years of perfecting this recipe and serving it to countless family gatherings and weekend brunches, I can confidently say that baked French toast is the superior method. It’s easier, more consistent, and frankly just tastes better than the traditional stovetop approach.
The make-ahead convenience factor alone makes this worth adding to your regular breakfast rotation. There’s something deeply satisfying about having a gorgeous, restaurant-quality breakfast ready with minimal morning effort.
Whether you stick with the classic version or experiment with creative variations, this recipe will become your go-to for special occasions and lazy weekend mornings alike. Your family will think you’ve become some kind of breakfast wizard, and honestly, you don’t have to tell them how easy it actually is 🙂
So next time you’re planning a family breakfast or brunch gathering, skip the stovetop stress and give baked French toast a try. Your future self will thank you when you’re sitting down to eat with everyone else instead of standing over a hot stove.