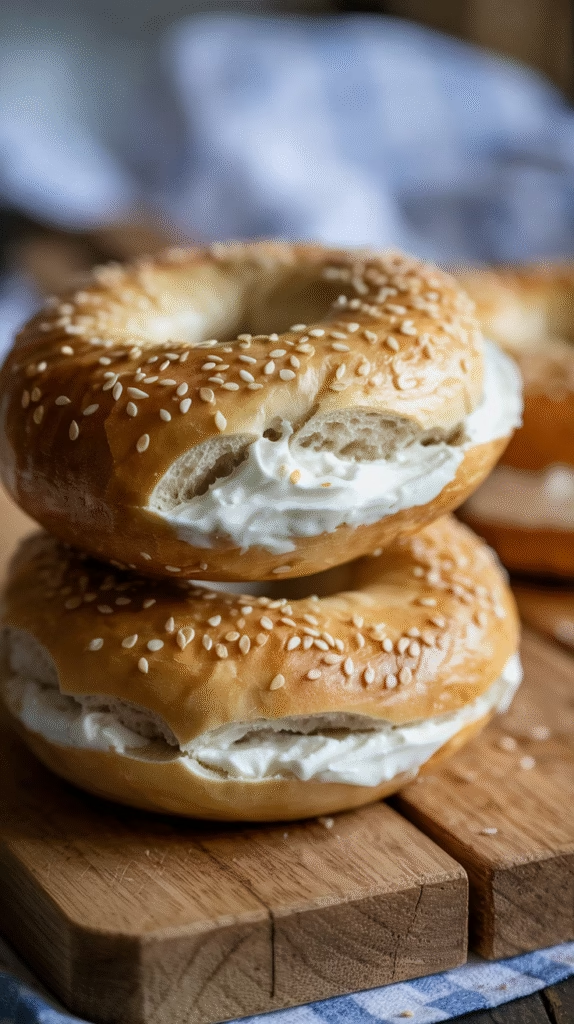
Ever wanted hot fresh bagels without the fuss of making them the old way? You’re not the only one! I found this amazing Greek yogurt bagel recipe a while back, and it changed how I do breakfast on weekends. A new study shows that 42% more people started baking bread at home since 2020, with easy recipes leading the way. These Greek yogurt bagels with just two ingredients show why – they’re super simple, need very few things, and still give you that chewy yummy bagel feel we all want. If you’re new to baking or just don’t have much time, this recipe will give you great bagels in less than 45 minutes. Ready to start?
What Are Greek Yogurt Bagels?
Greek yogurt bagels offer a simpler take on classic bagels. They swap out yeast, water, and plain flour for Greek yogurt and self-rising flour. This new method cuts out the need to proof yeast, wait for dough to rise, or boil the bagels – steps that make old-school bagel recipes so lengthy.
The trick lies in Greek yogurt’s natural acids. These acids react with the rising agents in self-rising flour causing a rise similar to what yeast would do. While bagel purists might say these aren’t “real” bagels, they still give you a very close texture and taste with much less work.
These easy-to-make bagels first caught on around 2018 when diet programs started pushing them as a bread option with fewer points. Since then, they’ve blown up on food websites and social media as folks realized how simple and adaptable they are to whip up at home.
The biggest plus? These bagels have more protein than regular ones because of the Greek yogurt so they’re a bit healthier for your breakfast. Who’d have thought that taking shortcuts could boost nutrition?
Ingredients You’ll Need
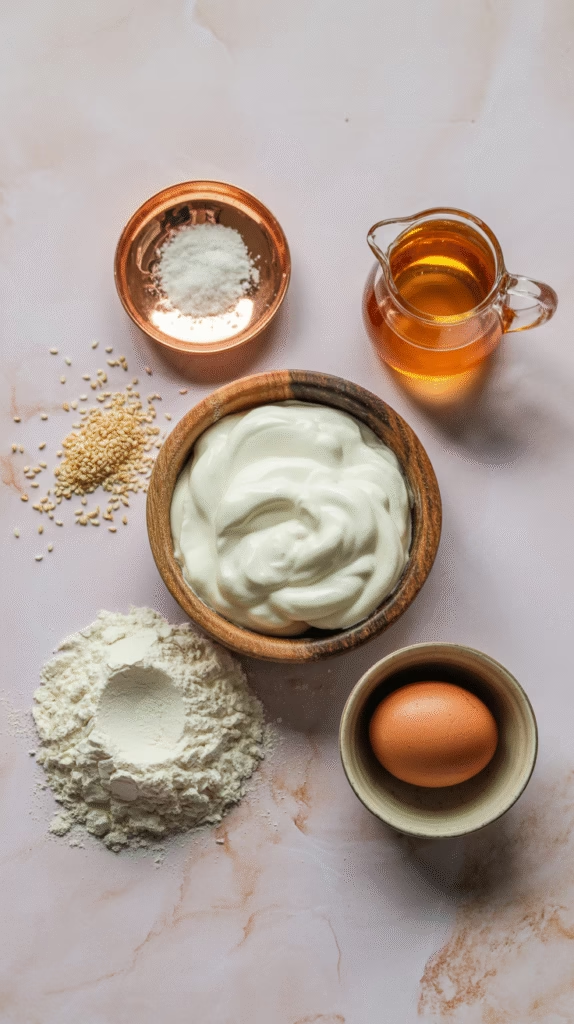
One of the biggest advantages of this recipe is its simplicity. Here’s what you’ll need to gather:
Main Ingredients:
- 2 cups self-rising flour (plus extra for dusting)
- 1½ cups plain Greek yogurt (full-fat works best)
For the Egg Wash:
- 1 egg, beaten
- 1 tablespoon water
Optional Toppings:
- Everything bagel seasoning
- Sesame seeds
- Poppy seeds
- Dried garlic flakes
- Coarse sea salt
When it comes to Greek yogurt, I highly recommend using full-fat or at least 2% fat content versions. Non-fat Greek yogurt tends to have a higher water content and can make your dough sticky and difficult to work with. The brand doesn’t matter too much, but make sure it’s thick, strained Greek yogurt rather than regular yogurt.
If you don’t have self-rising flour on hand, don’t worry! You can easily make your own by combining 2 cups all-purpose flour with 1 tablespoon baking powder and ½ teaspoon salt.
For those with dietary restrictions, these bagels can be adapted. For gluten-free versions, use a 1:1 gluten-free flour blend that contains xanthan gum. Dairy-free? Try coconut yogurt or another thick plant-based yogurt alternative, though you may need to adjust the flour slightly as plant-based yogurts often have different moisture levels.
Kitchen Tools Required
You don’t need fancy equipment to make these bagels, which is another reason they’re so approachable. Here’s what you’ll want to have on hand:
- Large mixing bowl
- Measuring cups and spoons
- Wooden spoon or spatula
- Baking sheet
- Parchment paper or silicone baking mat
- Pastry brush (for egg wash)
- Kitchen scale (optional but helpful)
- Cooling rack
If you have a stand mixer with a dough hook, you can use it to make the process even easier, but it’s absolutely not necessary. I’ve made these countless times with just a wooden spoon and my hands.
Before getting started, I recommend setting up your workspace by dusting a clean counter with flour for shaping the bagels and preheating your oven early. Having your baking sheet lined with parchment paper ready to go makes the process flow smoothly once your bagels are shaped.
For storing leftovers (if there are any!), have an airtight container or freezer bags ready.
Step-by-Step Instructions
Let’s break down the process into manageable steps:
1. Prepare Your Oven and Workspace Preheat your oven to 375°F (190°C). Line a baking sheet with parchment paper or a silicone baking mat and lightly dust with flour. This prevents sticking and makes cleanup easier.
2. Make the Dough In a large bowl, combine 2 cups of self-rising flour and 1½ cups of Greek yogurt. Mix with a wooden spoon or spatula until the ingredients start to come together. When it becomes too difficult to mix with the spoon, use your hands to gently knead the mixture in the bowl until it forms a cohesive dough ball.
3. Knead the Dough Turn the dough out onto a lightly floured surface. Knead for about 2-3 minutes until smooth. The dough should be slightly tacky but not sticky. If it’s too sticky, add a little more flour, one tablespoon at a time. If it seems too dry, add a teaspoon of Greek yogurt at a time until it reaches the right consistency.
4. Divide and Shape Divide the dough into 6 equal portions (use a kitchen scale for precision if you have one). Roll each portion into a ball, then use your thumb to poke a hole in the center. Gently stretch the hole to about 1½ inches in diameter, being careful to maintain an even thickness all around.
5. Apply Egg Wash and Toppings In a small bowl, beat the egg with 1 tablespoon of water to create an egg wash. Brush the tops and sides of each bagel with the egg wash. If you’re adding toppings, sprinkle them over the egg-washed bagels.
6. Bake Place the bagels on your prepared baking sheet, leaving about 2 inches between each one. Bake in the preheated oven for 20-25 minutes until golden brown. You’ll know they’re done when they’re firm to the touch and sound hollow when tapped on the bottom.
7. Cool Allow the bagels to cool on the baking sheet for 5 minutes, then transfer to a cooling rack. Let them cool for at least 10 minutes before slicing, though they’re absolutely delicious when still slightly warm!
The entire process from mixing to finishing bagels takes about 40-45 minutes, with only about 15 minutes of active hands-on time. That’s significantly less than the several hours required for traditional bagel recipes!
Serving Suggestions
These Greek yogurt bagels are incredibly versatile and can be enjoyed in countless ways:
Classic Pairings:
- Cream cheese (plain or flavored)
- Butter and jam
- Smoked salmon with cream cheese, capers, and thinly sliced red onion
- Mashed avocado with everything bagel seasoning and a squeeze of lemon
- Peanut butter and banana slices
Breakfast Sandwich Ideas:
- Fried egg with cheese and spinach
- Scrambled eggs with turkey bacon and avocado
- Vegetarian option with hummus, cucumber, and microgreens
- Cream cheese with sliced strawberries and a drizzle of honey
Lunch Options:
- Turkey, provolone, lettuce, tomato, and mustard
- Chicken salad with grapes and walnuts
- Tuna melt with cheddar cheese
- Caprese with fresh mozzarella, tomato, basil, and balsamic glaze
For a special brunch gathering, consider setting up a bagel bar with various spreads and toppings so everyone can customize their own. Some favorite spreads include herb-infused cream cheese, hummus, and flavored butter.
These bagels also pair wonderfully with soups, particularly tomato or vegetable varieties. Cut them into cubes, toast them, and use them as croutons for a hearty salad.
Remember that these bagels have a slightly different texture than store-bought ones – they’re a bit softer in the middle with a nice chew. This makes them perfect for sandwiches since they don’t have the sometimes-too-chewy resistance of traditional bagels.
Nutritional Benefits
One of the reasons these Greek yogurt bagels have gained such popularity is their nutritional profile:
A standard 3-ounce Greek yogurt bagel contains approximately:
- 170-190 calories
- 10-12g protein
- 33g carbohydrates
- 1-3g fat (depending on the yogurt used)
- 1g fiber
Compared to traditional bagels, which typically contain 240-300 calories and only 9g of protein, these offer a more balanced nutritional profile with fewer calories and more protein. The higher protein content helps keep you feeling fuller longer, making these an excellent breakfast choice.
The simple ingredient list also means you’re avoiding the preservatives, dough conditioners, and excess sodium found in many commercial bagels. By making them at home, you have complete control over what goes into your food.
For those following specific eating plans:
- Weight Watchers: These bagels have become famous in WW communities for their lower point value.
- High-protein diets: Greek yogurt adds significant protein not found in traditional bagel recipes.
- Lower-calorie diets: Their smaller size and lower calorie count make them more compatible with calorie-conscious eating.
To further boost the nutritional profile, consider adding seeds like flax, chia, or hemp to the dough. These add healthy omega-3 fatty acids and additional fiber. Incorporating whole grain flour for a portion of the self-rising flour will also increase the fiber content, though you may need to adjust the yogurt slightly.
Conclusion
Making your own Greek yogurt bagels at home isn’t just easy—it’s a game-changer for busy mornings and weekend brunches alike! With just two main ingredients and less than 45 minutes, you can enjoy warm, chewy bagels that rival your favorite bakery. The versatility of this recipe means you can customize it to suit any taste preference or dietary need.
The beauty of these bagels lies in their simplicity. There’s no need for special equipment, obscure ingredients, or baking expertise. Anyone can make them, from college students in dorm kitchens to busy parents looking for a quick weekend breakfast project to do with the kids.
Beyond their ease, these bagels represent what home cooking is all about – taking control of what goes into your food while creating something delicious that brings joy to your table. There’s something incredibly satisfying about pulling your very own homemade bagels from the oven!
Give this recipe a try this weekend, and I guarantee it will become a regular in your baking rotation. Once you master the basic version, the possibilities for customization are endless. And if you’re anything like me, you’ll never want to go back to store-bought bagels again!
Don’t forget to share your creations and favorite topping combinations in the comments below. I love seeing how creative everyone gets with this versatile recipe!
Happy baking!