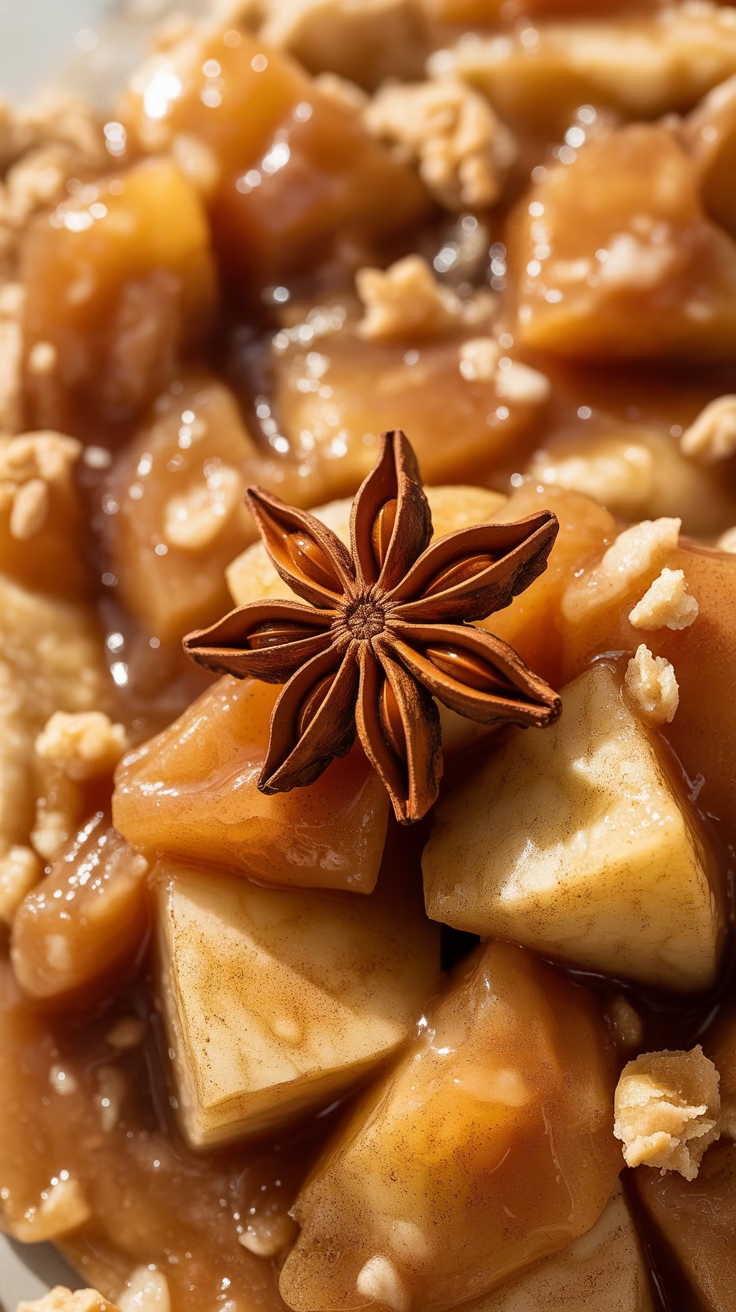
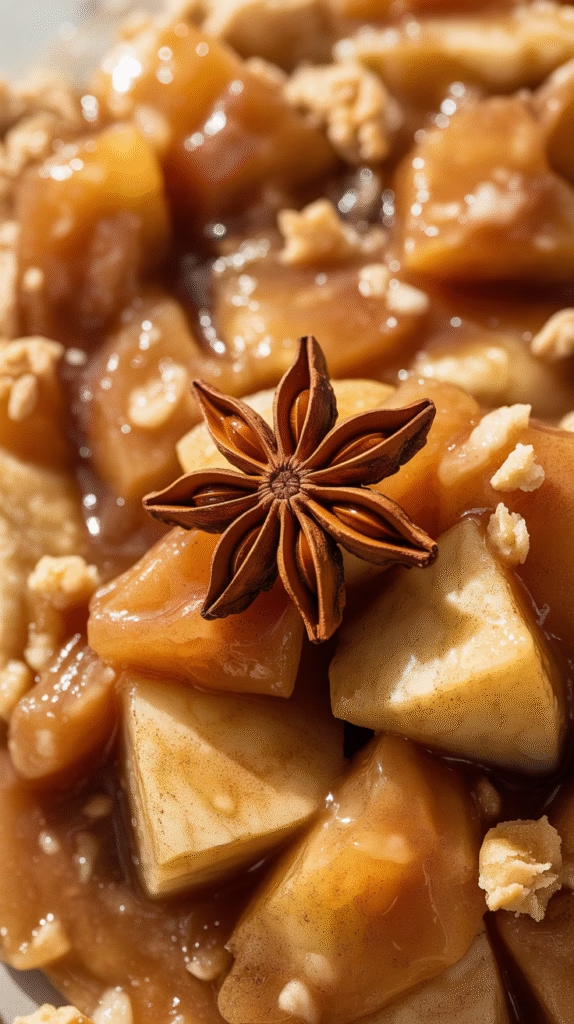
Is there anything more comforting than the smell of apple pie filling simmering on the stove? That sweet, cinnamon-spiced aroma that fills your kitchen and makes everyone wonder what delicious treat you’re preparing? I don’t think so!
Every fall, my family gathers for our annual apple picking tradition, and we always end up with way more apples than we can eat. That’s when this homemade apple pie filling recipe comes to the rescue! It’s my grandmother’s recipe that I’ve tweaked over the years, and it never disappoints.
The best part? This versatile filling isn’t just for pies! You can use it as a topping for pancakes, mix it into oatmeal, layer it in parfaits, or simply enjoy it warm with a scoop of vanilla ice cream. And trust me, once you taste homemade apple pie filling, you’ll never go back to the canned stuff. It’s fresher, more flavorful, and you control exactly what goes into it – no preservatives or artificial flavors!
Did you know that the average American eats about 16 pounds of fresh apples each year? With this easy 30-minute recipe, you’ll be able to transform those apples into something truly special. By the end of this post, you’ll know exactly which apples work best, how to store your filling for later use, and creative variations to keep things interesting!
The Perfect Apples for Pie Filling
Not all apples are created equal when it comes to pie filling! The variety you choose can make or break your recipe, affecting both texture and flavor.
For the best apple pie filling, look for firmer varieties that hold their shape during cooking. My top recommendations include:
- Granny Smith: The classic pie apple with a tart flavor that balances the sweetness in your filling
- Honeycrisp: Offers the perfect balance of sweet and tart with a satisfying crunch
- Braeburn: Maintains its shape well and provides a hint of spice
- Pink Lady: Stays firm when cooked with a sweet-tart flavor profile
- Jonagold: A blend of Jonathan and Golden Delicious varieties with excellent flavor
Here’s my secret: I never use just one variety! Mixing different types of apples creates complex flavors that make your filling stand out. I typically use 60% Granny Smith for structure and tartness, and 40% Honeycrisp or Pink Lady for sweetness.
When selecting apples, firmness is key. Avoid softer varieties like McIntosh or Red Delicious, which turn mushy when cooked.
If you’re wondering when to splurge on organic, apples are a good candidate. They consistently rank on the “Dirty Dozen” list of produce with the highest pesticide residues, so buying organic when possible is worth considering.
Essential Ingredients for Classic Apple Pie Filling
Let’s break down what you’ll need to make perfect apple pie filling every time:
For 1 standard 9-inch pie filling:
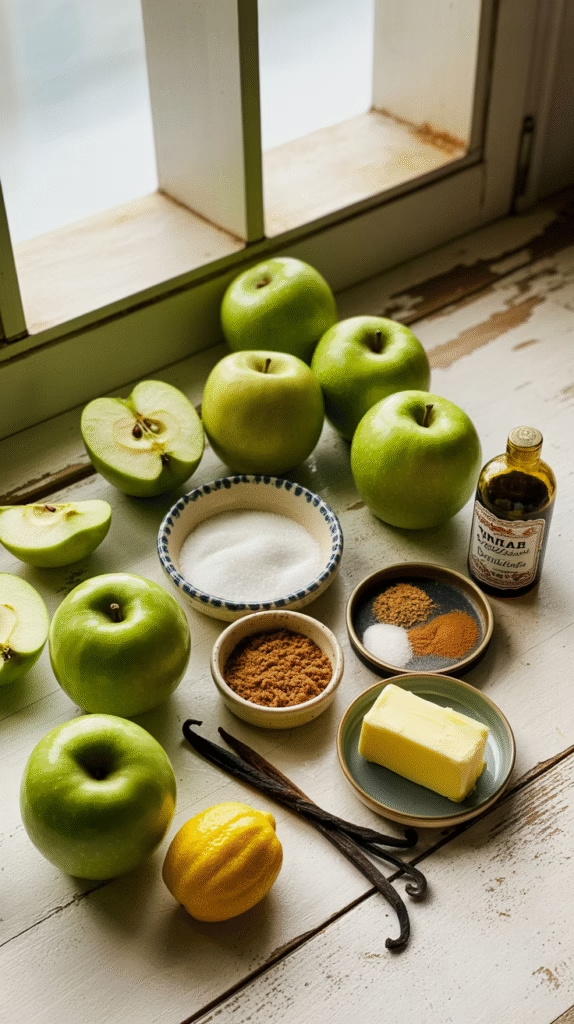
- 6-8 medium apples (about 3 pounds): The star of the show! Choose from the varieties we discussed above.
- ¾ cup granulated sugar: Provides the base sweetness.
- ¼ cup brown sugar: Adds depth and a subtle molasses flavor that complements the apples.
- 2 tablespoons lemon juice: Brightens the flavor and prevents the apples from browning.
- 1 tablespoon cinnamon: The classic apple pie spice!
- ¼ teaspoon nutmeg: For that warm, nutty undertone.
- ⅛ teaspoon salt: Enhances all the other flavors.
- 3 tablespoons cornstarch: Creates the perfect thick texture. (Can substitute with 4 tablespoons of all-purpose flour)
- ¾ cup water or apple cider: Provides the liquid base for your filling.
- 2 tablespoons butter: Adds richness and a silky texture.
- 1 teaspoon vanilla extract: Optional but recommended for depth of flavor.
Don’t worry if you need to make substitutions! For a vegan version, use plant-based butter or coconut oil. If you’re avoiding refined sugar, try coconut sugar or maple syrup (though you may need to adjust the cornstarch slightly for the latter).
Step-by-Step Instructions
Making apple pie filling is surprisingly simple! Here’s how to do it:
Prep Work (10 minutes)
- Wash your apples thoroughly under cool water.
- Peel the apples using a vegetable peeler or paring knife.
- Core the apples and cut them into evenly sized slices, about ¼-inch thick. Pro tip: Consistent slice thickness ensures even cooking. Too thin, and they’ll turn to mush; too thick, and they won’t cook through properly.
- Toss the sliced apples with lemon juice in a large bowl to prevent browning.
Cooking (20 minutes)
- In a small bowl, mix together the granulated sugar, brown sugar, cinnamon, nutmeg, salt, and cornstarch until well combined.
- In a large heavy-bottomed pot or Dutch oven, combine the sliced apples, sugar-spice mixture, and water (or apple cider).
- Stir gently but thoroughly to coat all the apple slices.
- Place over medium heat and bring to a simmer, stirring occasionally.
- Once simmering, reduce heat to medium-low and cook for 10-15 minutes, stirring frequently to prevent sticking. How to tell when it’s done: The apples should be fork-tender but still hold their shape, and the sauce should coat the back of a spoon.
- Remove from heat and stir in the butter and vanilla extract until the butter is completely melted.
- Allow the filling to cool for at least 30 minutes before using in a pie, or cool completely before storing.
If your filling ends up too thick, simply add a tablespoon or two of water or apple juice. Too thin? Mix a tablespoon of cornstarch with a tablespoon of cold water and stir it into the simmering filling.
Secret Tips for Elevated Flavor
Want to take your apple pie filling from good to unforgettable? Try these flavor boosters:
Splash of Bourbon: Add 1-2 tablespoons of bourbon or rum in the last few minutes of cooking for a sophisticated flavor twist. The alcohol cooks off, leaving just the warm, caramel-like notes.
Brown Butter Magic: Instead of adding regular butter, try brown butter! Melt butter in a small pan until it turns golden and smells nutty, then add to your filling for an incredible depth of flavor.
Unexpected Spice Combinations: While cinnamon is classic, don’t be afraid to experiment with:
- A pinch of cardamom for a floral, exotic note
- ¼ teaspoon ground ginger for a spicy kick
- A dash of allspice for complexity
Texture Contrast: Add ⅓ cup of dried cranberries or golden raisins to create exciting texture variation and little bursts of concentrated flavor.
Natural Sweeteners: Replace half the granulated sugar with pure maple syrup or honey for nuanced sweetness and added dimension.
My absolute favorite secret? Add a tiny pinch (seriously, just a tiny pinch!) of black pepper. It enhances the spices without making the filling taste peppery. It’s a trick I learned from my grandmother and it works amazingly well!
Storage and Make-Ahead Instructions
One of the best things about this recipe is that you can make it ahead of time! Here’s how to store it properly:
Refrigerator Storage
Let your filling cool completely, then transfer to airtight containers. Glass jars work wonderfully for this. Properly stored, your apple pie filling will keep in the refrigerator for up to 1 week.
Freezer Storage
For longer storage, freezing is your best friend:
- Cool the filling completely.
- Transfer to freezer-safe containers, leaving about ½ inch of headspace (the filling will expand as it freezes).
- For easy portioning, freeze in silicone muffin cups, then transfer the frozen portions to a large freezer bag.
- Label with the date and contents.
Frozen apple pie filling will keep for up to 3 months. To use, thaw overnight in the refrigerator before using in your recipe.
Canning Option
For shelf-stable storage, you can process your apple pie filling in a water bath canner:
- Prepare your jars, lids, and canning equipment according to manufacturer’s instructions.
- Fill hot, sterilized pint jars with hot filling, leaving ½ inch headspace.
- Remove air bubbles, wipe jar rims, and seal with lids and bands.
- Process in a boiling water bath for 20 minutes (adjust for altitude if necessary).
- Properly canned filling will keep for up to 1 year in a cool, dark place.
Important safety note: Always follow tested canning recipes and procedures to ensure food safety.
Signs your filling has spoiled include off odors, mold, bubbling, or an unusual color change. When in doubt, throw it out!
Creative Ways to Use Apple Pie Filling (Beyond Pie)
Why limit this delicious filling to just pies? Here are my favorite alternative uses:
Breakfast Bonanza:
- Warm it up and spoon over pancakes or waffles
- Swirl into your morning oatmeal or yogurt
- Stuff into crepes or use as a topping for French toast
Dessert Delights:
- Layer with vanilla pudding and crushed graham crackers for an easy parfait
- Use as a topping for vanilla ice cream or pound cake
- Mix into cheesecake batter for apple cheesecake bars
Quick Treats:
- Spoon over a block of cream cheese and serve with graham crackers for an instant appetizer
- Use as a filling for crescent roll dough and bake for quick apple turnovers
- Mix into muffin batter for apple pie muffins
Unique Applications:
- Use as a condiment for roast pork or pork chops
- Add a spoonful to a grilled cheese sandwich with sharp cheddar
- Warm and serve over baked brie with crackers
My personal favorite way to use leftover filling is to warm it slightly and layer it with vanilla Greek yogurt and granola for a delicious breakfast parfait. It feels indulgent but is actually quite nutritious!
Common Mistakes to Avoid
Even experienced bakers make these mistakes with apple pie filling. Here’s how to avoid them:
Overcooking the Apples: Pay close attention to your cooking time. Remember, the apples will continue to soften as the filling cools, and if you’re baking it in a pie, they’ll cook even more. Aim for fork-tender but not mushy.
Texture Issues: Too thick? Add a splash of water or apple juice. Too thin? Mix a teaspoon of cornstarch with a teaspoon of cold water and stir into the simmering filling.
Wrong Apple Variety: Avoid soft apple varieties like McIntosh or Red Delicious for this recipe.
Inconsistent Apple Slices: Take the time to cut uniform slices so everything cooks evenly.
Incorrect Spice Balance: Start with the recommended amounts and adjust to your taste. Remember, you can always add more, but you can’t take it away!
Adding Thickener at the Wrong Time: Always mix your cornstarch with the sugar and spices before adding to the apples. This prevents clumping and ensures even distribution.
Improper Cooling: Allow your filling to cool adequately before transferring to storage containers to prevent condensation, which can lead to watery filling.
FAQ Section
Can I make this recipe with frozen apples? Yes! No need to thaw them first. You may need to increase the cooking time by about 5 minutes, and you might need a touch more thickener as frozen apples release more liquid.
How do I adjust the sweetness level? For tarter filling, reduce the sugar by up to ¼ cup. For sweeter filling, increase by up to ¼ cup. Taste as you go – you can always add more sugar, but you can’t take it away!
Is this recipe suitable for canning? Yes, but please follow proper canning procedures for safety. The recipe as written is safe for water bath canning.
How can I make this filling vegan? Simply substitute the butter with plant-based butter or coconut oil. Everything else in the recipe is already vegan-friendly!
Can I use this filling in a crisp or crumble? Absolutely! It works perfectly in any apple dessert recipe that calls for a filling.
How do I know when my filling is thick enough? When hot, the filling should coat the back of a spoon. Remember that it will continue to thicken as it cools.
Can I double or triple this recipe? Yes! The recipe multiplies well. Use a larger pot and increase the cooking time by a few minutes.
The Perfect Homemade Apple Pie Filling
There’s something incredibly satisfying about making your own apple pie filling from scratch. Not only does it taste infinitely better than the canned version, but your kitchen will smell amazing, and you’ll have the pride of knowing exactly what went into it.
Remember, the best filling starts with the right apples – firm varieties that hold their shape while cooking. Don’t be afraid to mix varieties for complex flavor, and always cut your slices to a consistent thickness for even cooking.
This recipe is wonderfully versatile, so make a big batch and experiment with different uses beyond just pie! From breakfast toppings to quick desserts, this filling will become a staple in your kitchen.
I’d love to hear how your apple pie filling turns out! Did you try any of the flavor variations? Have you discovered a new way to use it? Let me know in the comments below. Happy baking!
Homemade Apple Pie Filling Recipe
Course: DessertCuisine: AmericanDifficulty: Easy8
servings15
minutes10
minutes145
kcal25
minutesThis classic homemade apple pie filling is made with tender, perfectly spiced apples that hold their shape beautifully. It’s the perfect balance of sweet and tart flavors with warm cinnamon and a touch of lemon brightness. Use it fresh for pies, or can it for later use!
Ingredients
6-7 large apples (about 3 pounds), peeled and sliced (Granny Smith, Honeycrisp, or mixed varieties)
3/4 cup granulated sugar
1/4 cup brown sugar, packed
2 tablespoons cornstarch
1 teaspoon ground cinnamon
1/4 teaspoon ground nutmeg
1/8 teaspoon ground allspice
1/4 teaspoon salt
2 tablespoons fresh lemon juice
1 teaspoon vanilla extract
2 tablespoons unsalted butter
Directions
- Wash, peel, core, and slice apples into 1/4-inch thick slices. Place in a large bowl and toss with lemon juice to prevent browning.
- In a small bowl, whisk together granulated sugar, brown sugar, cornstarch, cinnamon, nutmeg, allspice, and salt.
- Add the sugar mixture to the sliced apples and toss until evenly coated. Let sit for 5 minutes to allow apples to release their juices.
- Heat a large skillet over medium heat. Add the apple mixture and cook, stirring gently, for 8-10 minutes until apples are tender but still hold their shape and the liquid has thickened.
- Remove from heat and stir in vanilla extract and butter until melted. Let cool completely before using in pie crust or storing.
Notes
- Apple Selection: Use a mix of tart and sweet apples for best flavor. Granny Smith, Honeycrisp, Braeburn, and Gala work well.
Texture Tip: Don’t overcook the apples – they should be tender but not mushy.
Make Ahead: This filling can be made up to 3 days in advance and stored in the refrigerator.
Freezing: Can be frozen for up to 6 months in freezer-safe containers.
Canning: This recipe can be doubled and processed in a water bath canner for long-term storage.