
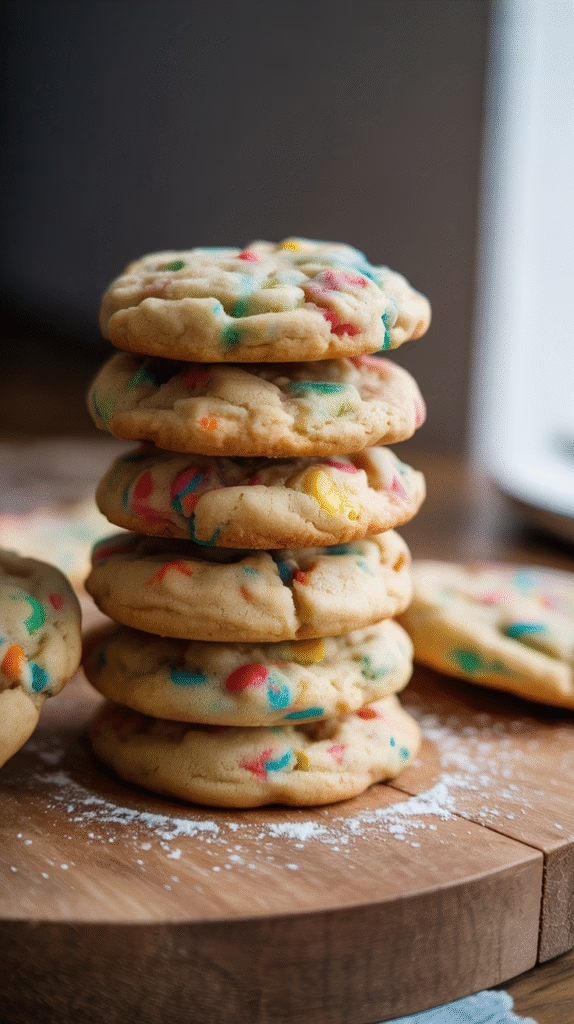
Oh my goodness, who doesn’t love a good funfetti cookie?! There’s something magical about biting into a soft, buttery cookie filled with colorful sprinkles that instantly brings joy to any day. I’ve been perfecting this funfetti cookie recipe for years, and I’m thrilled to finally share it with you!
These cookies are perfect for birthdays, holidays, or just because you deserve a colorful treat. With their crisp edges and chewy centers, these funfetti cookies will become your new go-to recipe. Did you know that “funfetti” was originally a cake mix flavor created by Pillsbury in 1989? Now it’s become a beloved flavor profile for all kinds of desserts!
I promise these homemade funfetti cookies are worth the small effort they require. Unlike store-bought options, these cookies have that perfect homemade taste and texture that just can’t be replicated. Plus, you can customize the sprinkle colors for any occasion!
What Makes the Perfect Funfetti Cookie?
The perfect funfetti cookie is all about balance – crispy around the edges but soft and chewy in the center. It should have a rich, buttery vanilla flavor that lets the fun of the sprinkles shine through without being overly sweet.
Quality matters when it comes to funfetti cookies. Using real butter instead of margarine creates a richer flavor profile that forms the foundation of these delicious treats. The slight hint of almond extract (my secret ingredient!) enhances the vanilla and gives these cookies that special “bakery” taste that will have everyone asking for your recipe.
The sprinkles themselves are crucial! “Jimmies” (the long, thin sprinkles) work best for funfetti cookies because they hold their shape and color during baking. Nonpareils (the tiny ball sprinkles) tend to bleed their color more easily into the dough, which can create a muddied appearance rather than that distinct, colorful funfetti look.
Homemade funfetti cookies blow store-bought versions out of the water. Most packaged cookies contain preservatives and artificial flavors that just can’t compare to the pure, buttery goodness of homemade. Plus, when you make them yourself, you control the amount and type of sprinkles – I always add extra!
Essential Ingredients for Homemade Funfetti Cookies
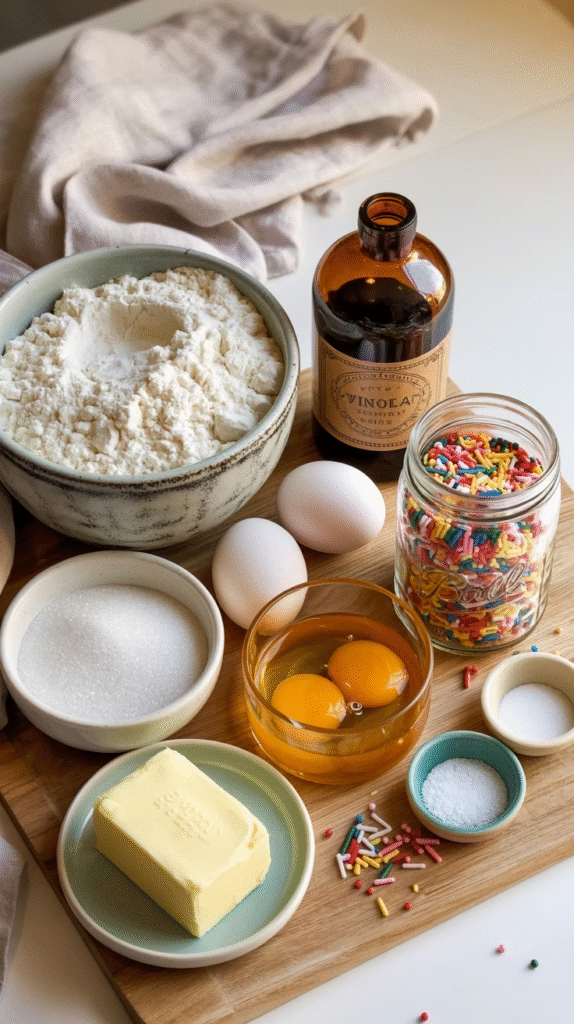
Here’s everything you’ll need to make these colorful delights:
- All-purpose flour (2½ cups): Provides the structure for your cookies. For best results, measure by weight (310g) or use the spoon-and-level method.
- Baking soda (1 tsp): Helps the cookies rise and creates that perfect chewy texture.
- Baking powder (½ tsp): Works with the baking soda to provide the ideal rise.
- Salt (1 tsp): Enhances all the flavors and balances the sweetness.
- Unsalted butter (1 cup/2 sticks): Use room temperature butter for the best incorporation. The butter should be soft enough to leave a slight indentation when pressed, but not so soft that it’s melting.
- Granulated sugar (1 cup): Provides sweetness and helps create those slightly crisp edges.
- Light brown sugar (½ cup, packed): Adds moisture and a subtle depth of flavor.
- Eggs (2 large): Bind everything together and add richness. Room temperature eggs incorporate more easily.
- Vanilla extract (2 tsp): Use pure vanilla extract for the best flavor.
- Almond extract (¼ tsp): My secret ingredient! This small amount enhances the vanilla flavor without tasting distinctly like almond.
- Rainbow jimmies sprinkles (¾ cup): The star of the show! Jimmies work best as they don’t bleed their color as much during mixing.
For those with dietary restrictions, there are several substitutions you can make:
- Gluten-free: Use a 1:1 gluten-free all-purpose flour blend. I recommend Bob’s Red Mill or King Arthur Measure for Measure.
- Dairy-free: Substitute the butter with a high-quality plant-based butter stick (Earth Balance or Country Crock Plant Butter work well).
- Egg-free: Replace each egg with either a flax egg (1 Tbsp ground flaxseed mixed with 3 Tbsp water) or ¼ cup unsweetened applesauce.
Kitchen Tools You’ll Need
You don’t need fancy equipment to make amazing funfetti cookies, but here are the basics that will make your baking experience easier:
- Mixing bowls: One large bowl for the wet ingredients and one medium bowl for the dry ingredients.
- Electric mixer: A stand mixer is convenient but a handheld electric mixer works perfectly too.
- Measuring cups and spoons: For accurate measurements.
- Baking sheets: I prefer light-colored aluminum baking sheets as they promote even baking.
- Parchment paper or silicone baking mats: These prevent sticking and make cleanup a breeze.
- Cookie scoop: Not essential but helpful for uniform cookies. A 2-tablespoon scoop works perfectly.
- Cooling rack: Allows air to circulate around the cookies as they cool.
Optional but helpful tools include:
- Kitchen scale: For precise measurements, especially for flour.
- Offset spatula: Makes transferring cookies from the baking sheet to the cooling rack easier.
- Airtight containers: For storing your finished cookies.
Don’t worry if you don’t have all of these items – a good metal spoon can substitute for a cookie scoop, and any flat surface lined with parchment can work for cooling in a pinch!
Step-by-Step Funfetti Cookie Recipe
Preparation (15 minutes)
- Preheat your oven to 350°F (175°C) and line two baking sheets with parchment paper or silicone mats.
- In a medium bowl, whisk together the flour, baking soda, baking powder, and salt. Set aside.
- In a large bowl, use your electric mixer to cream the butter, granulated sugar, and brown sugar together until light and fluffy, about 3-4 minutes. Don’t skimp on this step – proper creaming incorporates air that helps create the perfect texture!
- Add the eggs one at a time, beating well after each addition. Scrape down the sides of the bowl as needed.
- Mix in the vanilla extract and almond extract until fully incorporated.
- Gradually add the dry ingredients to the wet ingredients, mixing on low speed just until combined. Over-mixing can lead to tough cookies, so stop once the flour disappears.
- Gently fold in the rainbow sprinkles by hand using a rubber spatula. Mix just enough to distribute them evenly – too much mixing can cause the colors to bleed.
Baking (10-12 minutes per batch)
- Using a cookie scoop or tablespoon, portion the dough into 2-tablespoon balls and place them on the prepared baking sheets, leaving about 2 inches between each cookie.
- For extra visual appeal, press a few additional sprinkles onto the tops of the dough balls.
- Bake for 10-12 minutes, or until the edges are just set and lightly golden. The centers will look slightly underbaked – that’s perfect! They’ll continue cooking as they cool and will give you that ideal chewy center.
- Allow the cookies to cool on the baking sheet for 5 minutes before transferring to a wire rack to cool completely.
Your cookies should have a slight dome when they come out of the oven and will flatten slightly as they cool. The perfect funfetti cookie will be golden around the edges but still soft in the center.
Expert Tips for Funfetti Cookie Success
After years of baking these colorful treats, I’ve learned a few secrets to ensure perfect funfetti cookies every time:
- Chill the dough: If your cookies are spreading too much, refrigerate the dough for 30 minutes before baking. This solidifies the butter and helps prevent excessive spreading.
- Room temperature ingredients: Make sure your butter and eggs are at room temperature for the best incorporation and texture.
- Don’t overbake: These cookies should look slightly underdone in the center when you remove them from the oven. They’ll continue cooking on the hot baking sheet.
- Measure flour correctly: Too much flour results in dry, cakey cookies. Either weigh your flour (310g) or use the spoon-and-level method.
- Add sprinkles at the end: Fold in sprinkles as the very last step and be gentle to prevent color bleeding.
- Enhance the vanilla flavor: The combination of vanilla and a touch of almond extract creates that classic “birthday cake” flavor that makes funfetti treats so special.
- Cookie texture troubleshooting:
- For thicker cookies: Chill the dough for 1-2 hours before baking.
- For chewier cookies: Add an extra egg yolk to the dough.
- For softer cookies: Replace some granulated sugar with more brown sugar.
- For crispier edges: Bake 1-2 minutes longer.
Fun Variations on Classic Funfetti Cookies
One of the best things about funfetti cookies is how customizable they are! Here are some fun variations to try:
Seasonal Sprinkle Variations
- Valentine’s Day: Red, pink, and white sprinkles
- Christmas: Red, green, and white sprinkles
- Halloween: Orange, black, and purple sprinkles
- Fourth of July: Red, white, and blue sprinkles
- School Colors: Use your local school or college colors for game day treats!
Delicious Add-Ins
- White Chocolate Funfetti: Fold in ½ cup of white chocolate chips along with the sprinkles
- Funfetti Cookies & Cream: Add ⅓ cup crushed Oreo pieces to the dough
- Birthday Cake Funfetti: Add ¼ cup dry vanilla cake mix to the flour mixture
- Funfetti S’mores: Press a mini marshmallow and piece of chocolate into the center of each dough ball before baking
Format Variations
- Funfetti Cookie Bars: Press the dough into a 9×13-inch baking pan and bake for 25-30 minutes at 350°F for easy cookie bars
- Funfetti Cookie Sandwiches: Spread vanilla buttercream or cream cheese frosting between two cooled cookies
- Funfetti Cookie Cake: Press all the dough into a 10-inch round pan and bake for about 25 minutes for a festive cookie cake
- Mini Funfetti Cookies: Use a teaspoon to make bite-sized cookies, reducing the baking time to 7-8 minutes
Storing and Freezing Your Funfetti Cookies
These cookies taste amazing fresh, but proper storage ensures they stay delicious for days!
Storage Tips
- Room Temperature: Store cooled cookies in an airtight container at room temperature for up to 5 days. Place a slice of bread in the container to keep the cookies soft.
- Refreshing Cookies: To revive slightly stale cookies, microwave for 10 seconds or warm in a 300°F oven for 3-4 minutes.
Freezing Instructions
- Freezing Dough: Roll the dough into balls, place on a baking sheet, and freeze until solid (about 1 hour). Transfer to a freezer bag and store for up to 3 months. Bake straight from frozen, adding 1-2 minutes to the baking time.
- Freezing Baked Cookies: Place cooled cookies in a single layer in a freezer-safe container with parchment between layers. Freeze for up to 2 months. Thaw at room temperature for about 1 hour before enjoying.
Gifting Your Cookies
Funfetti cookies make wonderful gifts! Stack 4-6 cookies in a clear cellophane bag, tie with colorful ribbon, and attach a handwritten tag. For larger gifts, arrange cookies in a decorative tin lined with parchment paper.
Frequently Asked Questions About Funfetti Cookies
Q: Why did my sprinkles bleed into the dough? A: This usually happens when using nonpareils (the tiny ball sprinkles) instead of jimmies. Another cause can be overmixing after adding the sprinkles. Gently fold them in as the last step.
Q: Can I make the dough ahead of time? A: Absolutely! The dough can be refrigerated for up to 3 days. Let it sit at room temperature for about 30 minutes before scooping and baking.
Q: Why did my cookies spread too much? A: This could be due to butter that’s too soft, not enough flour, or a too-warm oven. Try chilling the dough for 30 minutes before baking.
Q: Can I use natural food coloring sprinkles? A: Yes, but be aware that naturally colored sprinkles tend to fade more during baking. They’ll still taste delicious!
Q: How do I adjust this recipe for high altitude? A: At elevations above 3,500 feet: Increase flour by 2 tablespoons, reduce baking soda and baking powder each by ⅛ teaspoon, add 1 tablespoon of water, and increase oven temperature by 25°F.
Q: Can I double this recipe? A: Yes! This recipe doubles beautifully. Just make sure to use a large enough bowl to properly mix all ingredients.
Conclusion
Aren’t these funfetti cookies just the happiest treats ever? I hope this recipe brings as much joy to your kitchen as it has to mine! The beauty of these cookies is in their versatility – perfect for birthdays, holiday celebrations, or just brightening up an ordinary day.
Remember, the key to these perfect funfetti cookies is using quality ingredients and following the steps carefully for that ideal chewy texture. Don’t be afraid to experiment with different sprinkle colors to match your occasion!
I’d love to see your creations if you try this recipe – tag me on social media or leave a comment below. Now go ahead and get baking – a colorful, delicious adventure awaits!
