
Are you craving that authentic Italian pizza experience without leaving your home? You’re in the right place! I’ve spent years perfecting my homemade pizza technique, and today I’m sharing all my secrets with you. There’s something magical about pulling a bubbling, fragrant pizza from your own oven – it’s an experience that just can’t be matched by delivery!
The Secret to Authentic Italian Pizza Dough
Let me tell you – the foundation of any amazing pizza is the dough. This isn’t just any dough; it’s a living, breathing thing that requires attention and care. But don’t worry, it’s totally worth it!
My Italian grandmother always said that great pizza starts with great flour. If possible, get your hands on some “00” flour (doppio zero) – it’s finely ground and has a lower gluten content than all-purpose flour, which gives your pizza that perfect chewy-yet-tender texture. Can’t find it? Don’t stress! All-purpose flour works too, though the texture will be slightly different.
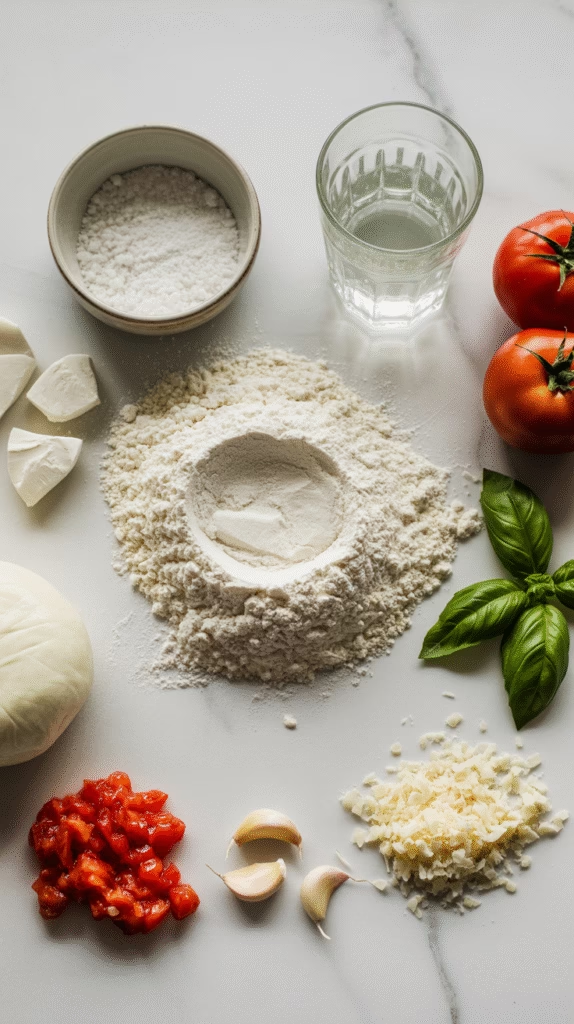
Here’s what you’ll need for the dough (makes 2 medium pizzas):
- 500g (4 cups) “00” flour (or all-purpose flour)
- 325ml (1⅓ cups) lukewarm water
- 7g (2¼ tsp) active dry yeast
- 10g (2 tsp) salt
- 15ml (1 tbsp) extra virgin olive oil
- 5g (1 tsp) sugar
The magic happens during fermentation! While you could technically make same-day pizza dough, letting it slow-ferment in the refrigerator for 24-72 hours creates a depth of flavor that’s absolutely worth the wait. The cold slows down the yeast activity while allowing enzymes to work their magic, developing complex flavors that simply can’t be rushed.
I usually make my dough the night before pizza day. There’s nothing better than knowing that dough is quietly developing flavor while I go about my day!
Essential Equipment for Homemade Pizza Success
You don’t need a professional pizza oven to make incredible pizza, I promise! Here’s what helps me achieve restaurant-quality results:
A pizza stone or steel is game-changing. It retains heat beautifully and helps achieve that coveted crispy bottom crust. I started with a $30 stone and it transformed my pizza game! If you don’t have one, an inverted baking sheet preheated in the oven works surprisingly well in a pinch.
A pizza peel makes transferring your pizza to the hot stone much easier. I learned this the hard way after several “pizza folding accidents” that weren’t pretty! If you don’t have one, the back of a baking sheet dusted with cornmeal or semolina works too.
The best investment I ever made was a simple digital kitchen scale. Measuring ingredients by weight rather than volume ensures consistency every time. Seriously, this $15 tool has saved me from countless baking disasters!
Step-by-Step Pizza Dough Preparation
Let’s make some magic happen! Here’s my foolproof method:
- In a large bowl, combine the lukewarm water (around 95°F/35°C) with sugar and yeast. Let it sit for about 5-10 minutes until it gets foamy. This tells you your yeast is alive and ready to party!
- Add the olive oil to the water mixture. In a separate bowl, whisk together the flour and salt.
- Gradually incorporate the flour mixture into the water, either by hand or using a stand mixer with a dough hook on low speed. Mix until everything comes together.
- Turn the dough onto a floured surface and knead for about 8-10 minutes until smooth and elastic. The dough should be slightly tacky but not sticky – it should clear the sides of the bowl but still stick slightly to the bottom. This is where experience comes in handy! If it’s too sticky, add a little flour; if too dry, a few drops of water.
- Here’s my favorite test: the windowpane test! Take a small piece of dough and gently stretch it. If you can stretch it thin enough to see light through it without tearing, you’ve developed the gluten properly!
- Place the dough in an oiled bowl, cover with plastic wrap or a damp towel, and let it rise at room temperature for 1-2 hours until doubled in size.
- Punch down the dough (so satisfying!), divide it into 2 equal portions, form each into a tight ball, and place them on a floured baking sheet. Cover and refrigerate for at least 8 hours, preferably 24-48 hours.
- On pizza day, take the dough out of the refrigerator 1-2 hours before baking to let it warm up. This makes it much easier to stretch!
Classic Italian Pizza Sauce from Scratch
The best Italian pizza sauce is actually incredibly simple – Italians let the tomatoes shine!
For an authentic Neapolitan-style sauce:
- 1 can (28oz) whole San Marzano tomatoes
- 1 tsp salt
- 1 tbsp extra virgin olive oil
- 1-2 cloves of garlic, finely minced (optional)
- A few fresh basil leaves
Simply drain excess liquid from the tomatoes, then crush them by hand for a rustic texture. Mix in the remaining ingredients and you’re done! This sauce isn’t cooked before topping the pizza – it cooks with the pizza itself, preserving the bright, fresh tomato flavor.
If you prefer a cooked sauce (which I sometimes do for certain toppings), simply simmer the crushed tomato mixture over low heat for about 20-30 minutes until slightly thickened. Let it cool completely before using.
Remember: less is more with sauce! A thin layer spreads beautifully during baking and prevents a soggy crust. I’ve made this mistake before and ended up with a pizza swimming pool – not cute!
Traditional Italian Pizza Toppings Combinations
Let’s talk toppings! While American pizzas often pile on ingredients, traditional Italian pizzas are more restrained, focusing on quality over quantity.
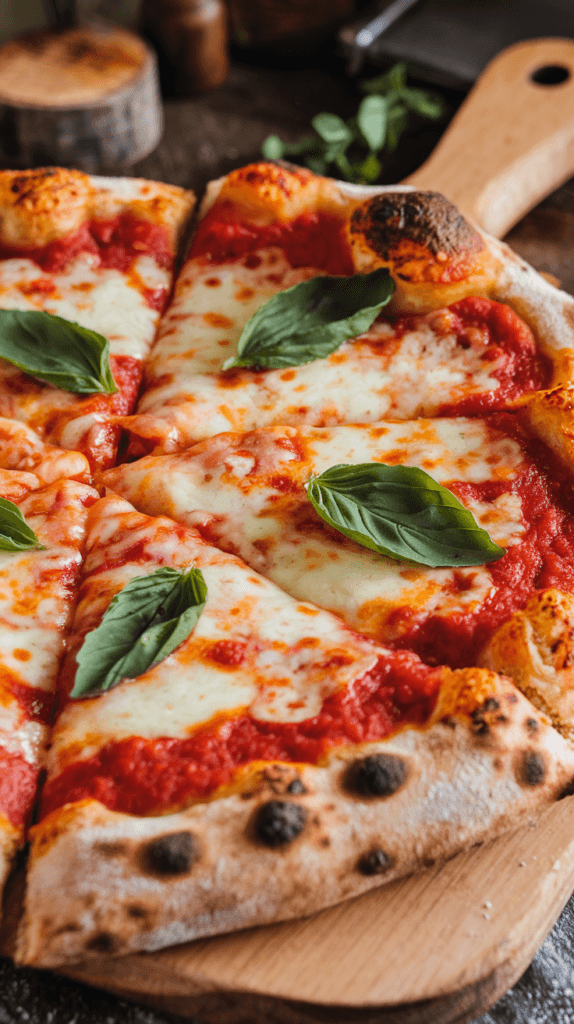
The classic Margherita is pizza perfection: tomato sauce, fresh mozzarella (torn into pieces, not grated!), fresh basil leaves (added after baking to preserve their flavor), and a drizzle of good olive oil. This simple combination highlights each ingredient beautifully.
Some of my other favorite Italian combinations:
- Quattro Formaggi: A blend of four cheeses – typically mozzarella, gorgonzola, parmesan, and fontina or taleggio
- Prosciutto e Funghi: Tomato sauce, mozzarella, sautéed mushrooms, and prosciutto added after baking
- Capricciosa: Tomato sauce, mozzarella, artichokes, mushrooms, olives, and prosciutto
- Marinara: A sauce-lovers dream with just tomato sauce, garlic, oregano, and olive oil (no cheese!)
Whatever toppings you choose, remember less is more! Too many toppings weigh down the dough and often lead to a soggy middle. Been there, done that, learned my lesson!
Mastering the Pizza Assembly Process
Assembly is where pizza art happens! Here’s how to build your masterpiece:
- About 45 minutes before baking, place your pizza stone or steel in the oven and preheat to the highest possible temperature (usually 500-550°F/260-290°C).
- On a floured surface, gently press outward on your dough ball, preserving the air in the outer edge (this will become your beautiful cornicione – the puffy outer rim). I NEVER use a rolling pin as it crushes all those beautiful gas bubbles we developed.
- Once the dough is about 6 inches in diameter, I pick it up and drape it over my knuckles, gently stretching by rotating and letting gravity do the work. Don’t worry if your first attempts look like abstract art – flavor is most important, and you’ll get better with practice!
- Place the stretched dough (about 10-12 inches diameter) on a peel dusted with semolina or cornmeal to prevent sticking.
- Work quickly for this next part! Spoon on a thin layer of sauce, leaving a 1-inch border. Remember, less is more!
- Add cheese and toppings sparingly. For Margherita, I tear fresh mozzarella into chunks rather than grating it – those pools of melted cheese are what dreams are made of!
- Before transferring to the oven, give the peel a gentle shake to make sure the pizza moves freely. If it sticks, carefully lift the edge and add more semolina underneath.
Baking Your Pizza to Perfection
The moment of truth! Here’s how to get that pizzeria-quality bake:
With a quick, confident motion, slide the pizza from the peel onto your preheated stone or steel. The hotter your oven, the better. If you can get to 550°F (290°C), that’s perfect!
Baking time varies depending on your oven and preferred doneness, but generally, it takes 8-12 minutes. I look for a deep golden brown crust with some darker charred spots, bubbling cheese, and a slightly puffed edge.
One game-changing tip: about halfway through baking, I rotate the pizza for even browning. Use the peel to carefully turn it 180 degrees.
Once done, transfer the pizza to a cutting board and let it rest for a minute or two – I know it’s hard to wait, but this allows the cheese to set slightly so it doesn’t all slide off with your first bite (we’ve all experienced that pizza chin burn!).
Serving and Enjoying Authentic Italian Pizza
In Italy, pizza is often served uncut, and each person uses a knife and fork to cut their own portions. But at home, I usually cut it into slices with kitchen shears or a pizza wheel. Pro tip: wait a minute before cutting to let the cheese set slightly!
Nothing pairs better with pizza than a nice Chianti or a cold Peroni beer. For non-alcoholic options, a sparkling water with lemon complements pizza beautifully.
For leftovers (if there are any!), avoid the microwave which makes the crust soggy. Instead, reheat slices in a skillet over medium-low heat with a lid until the cheese melts, about 5 minutes. The bottom gets perfectly crispy this way!
Final Thoughts
Making pizza at home connects us to centuries of Italian tradition. It’s not just about the eating – it’s about the process, the anticipation, and the joy of creating something delicious with your own hands.
Your first homemade pizza might not be perfect, and that’s okay! My early attempts looked like map outlines of strange countries. But with each pizza you make, you’ll develop a feel for the dough and the confidence to experiment with techniques and toppings.
The best part? Pizza night can become a wonderful family tradition. Some of my favorite memories involve my kids adding their own toppings and the laughter that follows when someone’s pizza turns out in a… creative shape!

Italian Homemade Pizza Recipe: Authentic, Easy
Course: Main CourseCuisine: ItalianDifficulty: Intermediate4
servings30
minutes40
minutes520
kcalCreate authentic Italian pizza at home with this traditional recipe featuring a perfectly chewy yet crispy crust, simple San Marzano tomato sauce, and creamy fresh mozzarella. This homemade pizza rivals your favorite pizzeria with its classic Margherita topping and time-tested techniques. The secret lies in the slow-fermented dough that develops incredible flavor and texture, making every bite a taste of Italy. Perfect for family dinners, weekend cooking projects, or impressing guests with your culinary skills.
Ingredients
For the Pizza Dough:
500g (4 cups) strong bread flour or tipo 00 flour
325ml (1⅓ cups) lukewarm water
7g (2¼ tsp) active dry yeast
2 tsp sea salt
2 tbsp extra virgin olive oil
1 tsp sugar
- For the Pizza Sauce:
400g (14 oz) can whole San Marzano tomatoes
2 cloves garlic, minced
1 tsp dried oregano
1 tsp sea salt
½ tsp black pepper
1 tbsp extra virgin olive oil
Fresh basil leaves
- For Toppings (Classic Margherita):
200g (7 oz) fresh mozzarella, torn into pieces
2 tbsp extra virgin olive oil
Fresh basil leaves
Sea salt to taste
Freshly ground black pepper
Directions
Prepare the Dough:
- In a small bowl, combine lukewarm water, sugar, and yeast. Let stand for 5-10 minutes until foamy.
- In a large bowl, combine flour and salt. Make a well in the center.
- Pour the yeast mixture and olive oil into the well. Mix until a rough dough forms.
- Turn dough onto a floured surface and knead for 8-10 minutes until smooth and elastic.
- Place dough in an oiled bowl, cover with damp towel, and let rise for 1-2 hours until doubled in size.
- For best flavor, refrigerate dough for 24 hours after first rise.
- Prepare the Sauce:
- Crush tomatoes by hand or pulse briefly in food processor.
- Mix crushed tomatoes with minced garlic, oregano, salt, pepper, and olive oil.
- Let sauce sit at room temperature for flavors to meld.
- Assemble and Bake:
- Preheat oven to 475°F (245°C). If using pizza stone, place in oven while preheating.
- Divide dough into 2 equal portions.
- On floured surface, stretch each portion into 12-inch circles, leaving edges slightly thicker.
- Transfer to pizza stone or baking sheet lined with parchment paper.
- Spread thin layer of sauce, leaving 1-inch border for crust.
- Add torn mozzarella pieces evenly across surface.
- Drizzle with olive oil and season with salt and pepper.
- Bake for 12-15 minutes until crust is golden and cheese is bubbly.
- Remove from oven and immediately top with fresh basil leaves.
- Let cool for 2-3 minutes before slicing.
Notes
- Flour Tip: Tipo 00 flour creates the most authentic texture, but bread flour works well too
Dough Storage: Dough can be refrigerated up to 3 days or frozen up to 3 months
Sauce Consistency: Keep sauce chunky and don’t over-sauce to prevent soggy pizza
Cheese Quality: Use high-quality fresh mozzarella for the best flavor and texture
Oven Temperature: If your oven goes higher than 475°F, use the maximum temperature for a crispier crust
