Few aromas fill a home with warmth and comfort quite like the sweet, spiced fragrance of banana bread baking in the oven. Whether you’re looking for a delicious way to use up overripe bananas or simply craving a homemade treat, this ultimate moist banana bread recipe will become your new go-to favorite. Not only is this recipe incredibly easy to make, but it also produces consistently perfect results – a tender, moist crumb with intense banana flavor that far surpasses anything you can buy at a bakery.
Why This Banana Bread Recipe Stands Out From the Rest
Let’s begin by understanding what makes this particular banana bread recipe so special. First and foremost, the texture is absolutely perfect – neither too dense nor too crumbly, with just the right amount of moisture that keeps it fresh for days. The secret lies in using very ripe bananas, which provide natural sweetness and moisture, combined with the perfect ratio of wet to dry ingredients.
Moreover, this recipe offers incredible versatility. While delicious on its own, it serves as an excellent base for countless variations. You can add chocolate chips for a decadent twist, mix in nuts for extra crunch, or even swirl in peanut butter for a flavor boost. The possibilities are truly endless, making this a recipe you’ll return to again and again.
The Science Behind Perfect Banana Bread
Understanding the science behind baking can help you achieve consistently excellent results. Let’s examine the key components that make this banana bread so exceptional:
The Role of Bananas in Baking
Bananas serve multiple crucial functions in this recipe. First, they provide natural sweetness, allowing you to reduce the amount of added sugar. Second, their high moisture content keeps the bread tender. Third, the natural pectin in bananas helps bind the ingredients together. For best results, always use bananas that have developed plenty of brown spots – these overripe bananas are sweeter and mash more easily than their yellow counterparts.
Flour: The Structural Backbone
All-purpose flour gives this bread its perfect structure. The gluten in flour provides the necessary framework, but we must be careful not to overmix the batter. Overworking the flour develops too much gluten, resulting in a tough, chewy texture rather than the desired tender crumb.
Leavening Agents: Baking Soda’s Crucial Role
This recipe uses baking soda rather than baking powder because the natural acids in ripe bananas activate the baking soda, creating the perfect rise. The reaction begins immediately when the wet and dry ingredients combine, so it’s important to bake the bread promptly after mixing.
Step-by-Step Instructions for Perfect Banana Bread
Now that we understand the science, let’s walk through the baking process step by step to ensure your banana bread turns out perfectly every time.
Step 1: Preparing Your Ingredients
Before beginning, gather all your ingredients and measure them accurately. This “mise en place” (everything in its place) approach ensures a smooth baking process. Bring your eggs to room temperature by placing them in warm water for 5-10 minutes if you forgot to take them out earlier. Room temperature eggs incorporate more evenly into the batter.
Step 2: Mashing the Bananas
In a large mixing bowl, peel and mash your ripe bananas with a fork or potato masher. You want them well broken down but with some small lumps remaining for texture. If your bananas aren’t quite ripe enough, you can microwave them for 30 seconds to soften them first.
Step 3: Combining Wet Ingredients
To the mashed bananas, add the melted butter (or oil), sugar, eggs, and vanilla extract. Whisk these together until fully incorporated. The mixture should be smooth and slightly frothy. At this stage, you can taste the mixture and adjust sweetness if desired.
Step 4: Incorporating Dry Ingredients
In a separate bowl, whisk together the flour, baking soda, salt, and cinnamon. This ensures even distribution of the leavening agent. Gradually add the dry ingredients to the wet mixture, folding gently with a spatula just until combined. Remember: less mixing means a more tender crumb.
Step 5: Adding Mix-Ins (Optional)
This is where you can get creative. Gently fold in chocolate chips, nuts, or any other additions you desire. For chocolate chips, toss them with a teaspoon of flour first – this helps prevent them from sinking to the bottom during baking.
Step 6: Baking to Perfection
Pour the batter into your prepared loaf pan and smooth the top. Bake in the preheated oven for 50-60 minutes. To test for doneness, insert a toothpick into the center – it should come out clean or with just a few moist crumbs. If the top is browning too quickly, tent it loosely with aluminum foil.
Step 7: Cooling Properly
Resist the temptation to slice into your banana bread immediately! Allow it to cool in the pan for 10 minutes, then transfer to a wire rack to cool completely. This resting period allows the structure to set properly and makes for cleaner slices.
Expert Tips for Next-Level Banana Bread
While the basic recipe is foolproof, these professional tips will elevate your banana bread from good to extraordinary:
Choosing the Best Bananas
The ideal bananas for banana bread have black spots covering at least 50% of their peel. If your bananas aren’t quite ripe enough, you can speed up the process by placing them in a paper bag with an apple overnight. For maximum flavor, some bakers even let their bananas ripen until the peels are completely black.
Enhancing Moisture and Flavor
For an even moister loaf, substitute half the butter with Greek yogurt or sour cream. These dairy products add tenderness while providing a slight tang that balances the sweetness. Alternatively, you can replace some of the sugar with honey or maple syrup for added moisture and depth of flavor.
Creating the Perfect Crust
For a bakery-worthy crust, brush the top of the loaf with melted butter as soon as it comes out of the oven. You can also sprinkle the batter with coarse sugar before baking for a delightful crunch. Some bakers swear by starting with a higher oven temperature (375°F) for the first 15 minutes, then reducing to 350°F for the remaining bake time.
Creative Variations to Try
Once you’ve mastered the basic recipe, experiment with these delicious variations:
Decadent Chocolate Chip Banana Bread
Add ¾ cup of semi-sweet chocolate chips to the batter. For an extra indulgent version, sprinkle chocolate chunks on top before baking. The chocolate melts into gooey pockets of deliciousness throughout the bread.
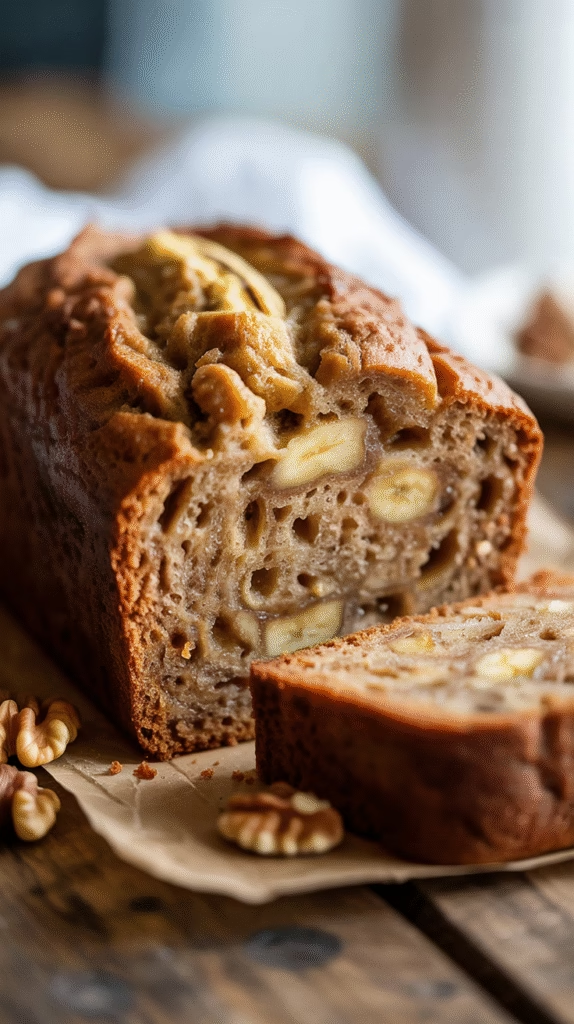
Nutty Banana Bread with Crunchy Topping
Fold ½ cup of chopped walnuts or pecans into the batter, then sprinkle another ¼ cup mixed with brown sugar on top before baking. The nuts toast as the bread bakes, adding wonderful texture and flavor.
Cinnamon Swirl Banana Bread
Mix ¼ cup sugar with 1 tablespoon cinnamon. Pour half the batter into the pan, sprinkle with half the cinnamon sugar, add remaining batter, then top with the rest of the cinnamon sugar. Use a knife to swirl gently before baking.
Healthy Whole Grain Banana Bread
Replace half the all-purpose flour with whole wheat flour and reduce the sugar to ½ cup. Add 2 tablespoons of ground flaxseed for extra nutrition. The result is a heartier but equally delicious loaf.
Troubleshooting Common Banana Bread Problems
Even experienced bakers encounter occasional issues. Here’s how to solve common banana bread problems:
Problem: Dry or Crumbly Texture
Solution: Increase the number of bananas or add ¼ cup of applesauce to the batter. Make sure you’re not overbaking – check for doneness 5-10 minutes before the suggested time.
Problem: Dense or Gummy Center
Solution: This usually results from overmixing the batter or using too much banana. Measure ingredients carefully and mix just until combined. Also ensure your baking soda is fresh.
Problem: Bread Sinks in Middle
Solution: This typically means the bread needed more baking time or your oven temperature is off. Use an oven thermometer to verify accuracy. Don’t open the oven door during the first 45 minutes of baking.
Problem: Overly Browned Top
Solution: Tent the loaf with aluminum foil after the first 30 minutes of baking. You can also bake at 325°F for a longer period for more even browning.
Storing and Freezing for Maximum Freshness
Proper storage ensures your banana bread stays moist and delicious:
Room Temperature Storage
Wrap cooled bread tightly in plastic wrap or store in an airtight container at room temperature for up to 4 days. The flavor actually improves after the first day as the ingredients continue to meld.
Refrigerator Storage
For longer storage (up to 1 week), refrigerate in an airtight container. Bring to room temperature or warm slightly before serving for best texture.
Freezing Instructions
Banana bread freezes beautifully for up to 3 months. Wrap individual slices or the whole loaf tightly in plastic wrap, then place in a freezer bag. Thaw at room temperature or toast frozen slices directly.
Serving Suggestions and Presentation Ideas
While delicious plain, here are some ways to elevate your banana bread presentation:
Breakfast Upgrade
Toast slices and top with almond butter, sliced bananas, and a drizzle of honey. Serve with Greek yogurt for a balanced breakfast.
Dessert Transformation
Warm slices and serve with vanilla ice cream and caramel sauce for an impressive dessert. Add a sprinkle of sea salt to balance the sweetness.
Gift-Worthy Presentation
Bake mini loaves in small pans, wrap in parchment paper, and tie with twine for thoughtful homemade gifts. Include a handwritten tag with reheating instructions.
Final Thoughts and Encouragement to Bake
Now that you’re armed with all this knowledge, it’s time to put it into practice! Remember, baking is both a science and an art – while precision matters, don’t be afraid to make the recipe your own. Each time you bake this banana bread, you’ll refine your technique and perhaps discover new favorite variations.
The beauty of this recipe lies in its simplicity and versatility. Whether you’re baking for a special occasion, as a weekend treat, or just to use up those ripe bananas on your counter, this banana bread will never disappoint. The comforting aroma filling your kitchen as it bakes is just the prelude to the delicious results.
So preheat your oven, mash those bananas, and get ready to enjoy the best homemade banana bread you’ve ever tasted. Don’t forget to share your creations and any unique twists you’ve developed – after all, half the joy of baking is sharing it with others. Happy baking!
Super Moist Banana Bread Recipe: The Only One You’ll Ever Need
Course: Dessert, BreakfastCuisine: AmericanDifficulty: Easy10-12
servings15
minutes1
hour195
kcal1
hour20
minutesThis incredibly moist and tender banana bread is the perfect way to use up overripe bananas! Made with simple pantry ingredients, this easy one-bowl recipe delivers bakery-quality results every time. The secret to its amazing texture is using very ripe bananas and melted butter, creating a perfectly sweet loaf that’s ideal for breakfast, snacking, or dessert. Whether you’re a beginner baker or seasoned pro, this foolproof recipe will become your go-to banana bread.
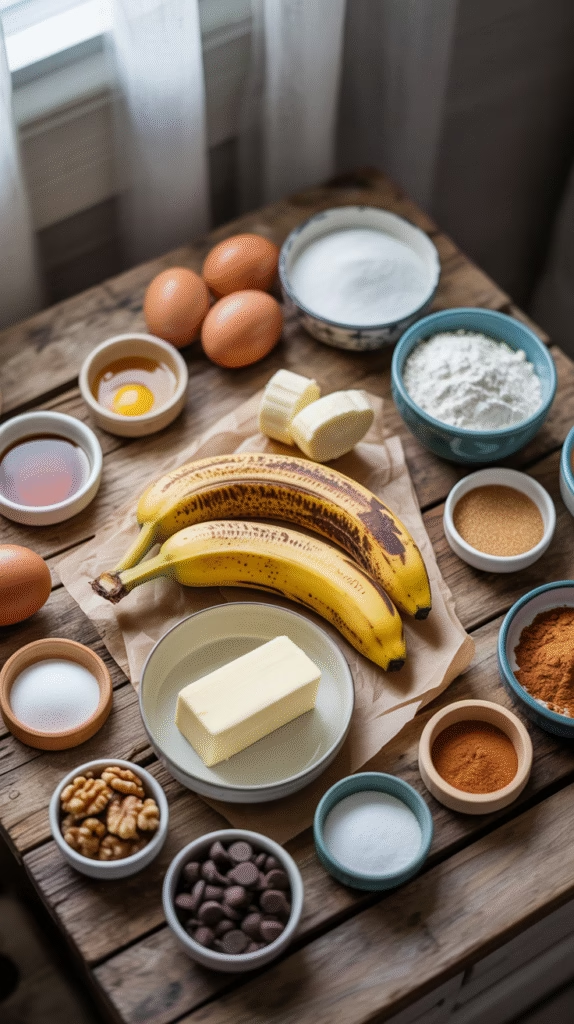
Ingredients
3 large ripe bananas (about 1½ cups mashed)
⅓ cup melted butter or vegetable oil
¾ cup granulated sugar
1 large egg, beaten
1 teaspoon vanilla extract
1 teaspoon baking soda
Pinch of salt
1½ cups all-purpose flour
Optional: ½ cup chopped walnuts or chocolate chips
Directions
- Preheat your oven to 350°F (175°C). Grease a 9×5 inch loaf pan with butter or cooking spray.
- In a large mixing bowl, mash the ripe bananas with a fork until smooth. A few small lumps are fine and add texture.
- Add the melted butter to the mashed bananas and mix well. Stir in the sugar, beaten egg, and vanilla extract until combined.
- Sprinkle the baking soda and salt over the mixture and mix. Add the flour and stir until just combined – don’t overmix. If using nuts or chocolate chips, fold them in now.
- Pour the batter into the prepared loaf pan and smooth the top. Bake for 60-65 minutes, or until a toothpick inserted into the center comes out clean or with just a few moist crumbs.
- Let the bread cool in the pan for 10 minutes, then turn out onto a wire rack to cool completely before slicing.
Notes
- For extra moist bread: Use very ripe bananas with brown spots – they’re sweeter and more flavorful
Oil vs butter: Oil creates a more tender, moist texture; butter adds richer flavor
Don’t overmix: Stir just until flour disappears to avoid tough bread
Storage: Wrap cooled bread tightly and store at room temperature for up to 4 days
Freezing: Wrap well and freeze for up to 3 months