
Ever tried store-bought lemon curd and thought, “This could be better”? You’re right! Nothing beats homemade lemon curd with its bright, sunny flavor that makes your taste buds dance.
I discovered the magic of homemade lemon curd ten years ago and haven’t looked back since. This simple recipe transforms basic ingredients into liquid gold in just 15 minutes!
Did you know lemon curd was a staple at English afternoon teas in the 1800s? This traditional treat has stood the test of time because it’s simply that good.
My recipe strikes the perfect balance between tangy lemon and creamy sweetness. The smooth texture is pure heaven, whether you’re spreading it on toast or using it to fill tarts. Let’s dive in and make some kitchen magic together!
What is Lemon Curd?
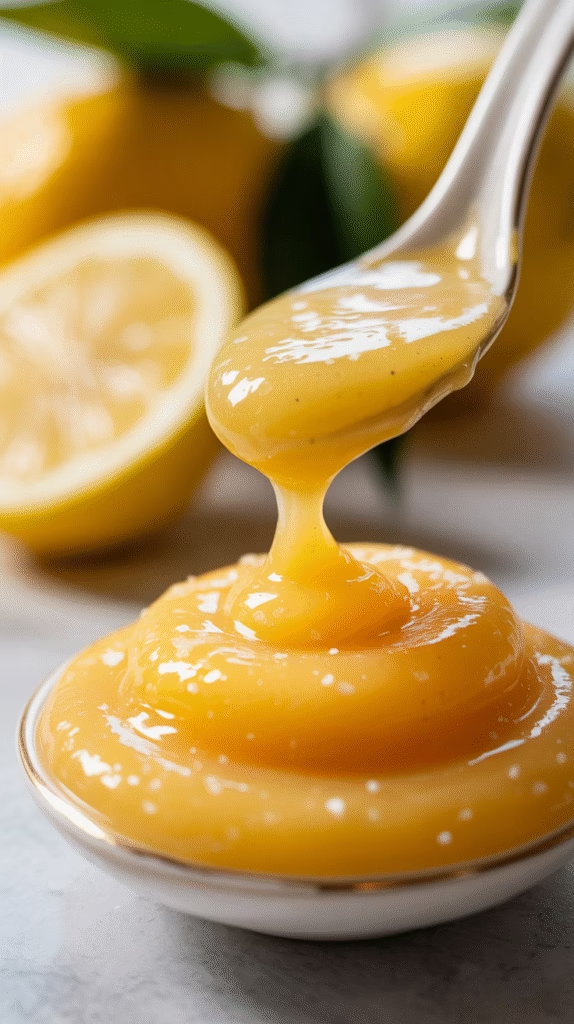
Lemon curd is a spread made from lemon juice, zest, sugar, eggs, and butter. It’s thicker than sauce but smoother than jam. The texture is silky and rich, while the flavor is the perfect mix of sweet and tart.
Unlike lemon pie filling, traditional lemon curd contains no cornstarch or thickeners. The eggs and butter create that luxurious texture naturally.
The British originally called it “lemon cheese” because of how the ingredients come together, similar to how milk curdles when making cheese. They served it alongside scones at afternoon tea.
Today, lemon curd has broken free from formal tea settings. You’ll find it in tarts, between cake layers, swirled into yogurt, or simply enjoyed by the spoonful!
Homemade lemon curd tastes fresher and brighter than anything from a jar. Plus, you control exactly how sweet or tangy you want it. Once you make your own, there’s no going back!
Ingredients You’ll Need
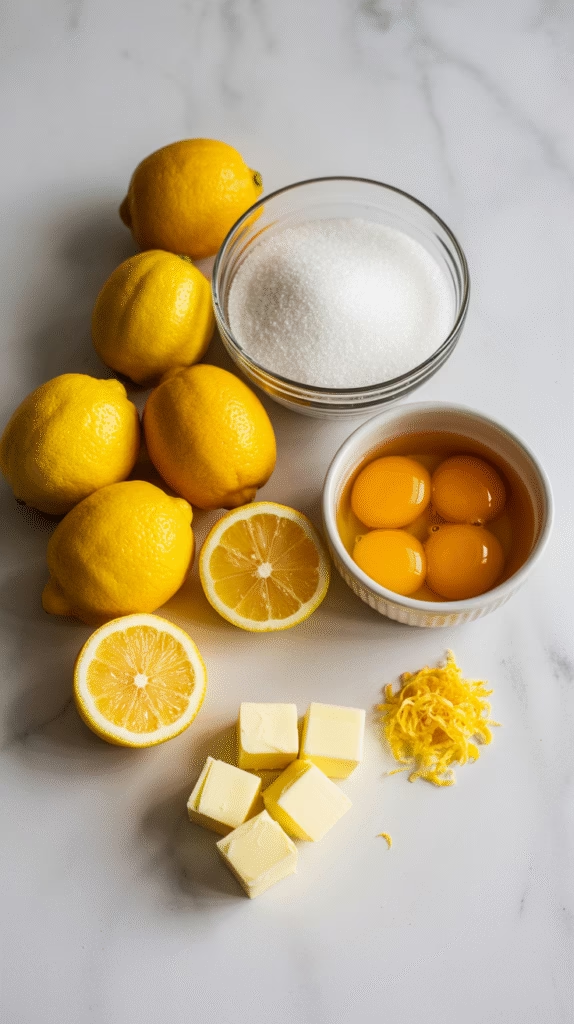
Making perfect lemon curd requires just five simple ingredients:
- 4 fresh lemons – You’ll need both juice (about ½ cup) and zest. Choose bright, heavy lemons with smooth skin for best flavor.
- 1 cup granulated sugar – Regular white sugar works perfectly. For a smoother texture, use superfine (caster) sugar.
- 4 large eggs – Some recipes use only yolks, but I find whole eggs create a perfect balance of richness and lightness.
- ½ cup unsalted butter (1 stick) – Cut into small pieces for faster melting. Unsalted lets you control the salt level.
- Pinch of salt – Just a tiny bit enhances all the flavors.
Optional add-ins include 1 teaspoon vanilla extract or a tablespoon of limoncello for extra flavor depth.
Kitchen Tools Required
You don’t need fancy equipment to make great lemon curd. Here’s what to gather:
- Medium saucepan – Heavy-bottomed works best to prevent hot spots
- Whisk – Essential for smooth curd without lumps
- Citrus juicer – Makes extracting juice easier
- Microplane or zester – For removing just the yellow zest (avoid the bitter white pith)
- Glass jars – For storing your finished curd
- Fine-mesh strainer – Optional but recommended for the smoothest texture
No double-boiler needed for this recipe! My method uses direct heat with careful temperature control for faster results without sacrificing quality.
Step-by-Step Instructions
Prep Work (5 minutes)
- Prepare your lemons: Wash them well. Zest all 4 lemons using a microplane (just the yellow part). Then juice them until you have ½ cup juice.
- Get ingredients ready: Cut butter into small pieces. Crack eggs into a bowl and whisk them lightly.
Cooking Process (10 minutes)
- Start the base: In your saucepan, combine lemon juice, lemon zest, and sugar. Heat on medium-low, stirring until sugar dissolves completely.
- Add eggs: Slowly pour a little of the warm lemon mixture into your beaten eggs while whisking constantly. This tempers the eggs so they don’t scramble. Then pour the egg mixture back into the saucepan.
- Cook until thickened: Keep the heat on medium-low and whisk constantly. Don’t rush this step! The mixture will thicken gradually, usually in 5-7 minutes. You’ll know it’s ready when it coats the back of a spoon and you can draw a line through it that holds.
- Add butter: Remove from heat and add butter pieces one at a time, whisking until completely melted before adding the next piece.
- Strain (optional): For ultra-smooth curd, pour through a fine-mesh strainer to remove zest and any tiny egg bits.
- Cool: Transfer to clean jars and let cool completely before refrigerating. The curd will continue to thicken as it cools.
That’s it! Your lemon curd will keep in the refrigerator for up to 2 weeks (if it lasts that long!).
Common Mistakes to Avoid
Even experienced cooks can hit snags when making lemon curd. Here’s how to avoid the most common problems:
- Scrambled eggs: Using too high heat or not whisking constantly can cook the eggs too quickly. Keep heat moderate and your whisk moving!
- Too runny: Undercooking is usually the culprit. The curd should reach about 170°F if you’re using a thermometer. If you don’t have one, the spoon test works great – it should coat the back of a spoon and hold a line when you run your finger through it.
- Bitter taste: This happens if you grate too deeply into the lemon and get the white pith. Stick to the yellow zest only.
- Metallic taste: Don’t use reactive metal bowls or pans (like aluminum or copper) with acidic lemon. Stick to stainless steel, glass, or ceramic.
- Lumpy texture: Strain your finished curd if you notice any lumps or want to remove the zest pieces.
Remember that lemon curd continues to thicken as it cools, so don’t panic if it seems a bit fluid while hot!
Helpful Tips for Perfect Lemon Curd Every Time
After years of making lemon curd, I’ve picked up some tricks:
- Room temperature ingredients work better than cold ones. Take eggs and butter out 30 minutes before starting.
- Roll your lemons firmly on the counter before juicing to get more juice.
- Taste as you go! Before adding the butter, taste your curd (carefully – it’s hot). Adjust sweetness if needed by adding a bit more sugar.
- For thicker curd, cook it a minute or two longer. For thinner curd, cook it less.
- No thermometer? The curd is ready when it thickens enough to coat the back of a wooden spoon and holds a clear path when you run your finger through it.
- Rescue overcooked curd by blending it with a small amount of warm lemon juice to smooth it out.
Flavor Variations to Try
The basic lemon curd recipe is amazing, but don’t be afraid to experiment:
- Meyer Lemon Curd: Meyer lemons have a sweeter, less acidic flavor with floral notes. Reduce sugar by 2 tablespoons if using these.
- Citrus Medley: Replace half the lemon juice with orange, lime, or grapefruit juice for a complex flavor.
- Herbal Infusions: Add a sprig of fresh rosemary, thyme, or lavender to the heating mixture, then remove before adding eggs.
- Vanilla Bean Curd: Split a vanilla bean and scrape the seeds into your curd for amazing depth of flavor.
- Boozy Twist: Stir in 1-2 tablespoons of limoncello after cooking for a sophisticated adult version.
- Reduced-Sugar Version: Cut sugar to ¾ cup for a more pronounced tang.
Each variation keeps the basic technique the same – just adjust flavors to your taste!
Storage and Shelf Life
Your delicious lemon curd won’t last long once family and friends discover it, but here’s how to store any leftovers:
- Refrigerator: Transfer cooled curd to clean glass jars with tight-fitting lids. Store in the refrigerator for up to 2 weeks.
- Freezer: Lemon curd freezes beautifully! Pour into freezer-safe containers, leaving ½-inch headspace for expansion. It keeps for up to 1 year frozen. Thaw overnight in the refrigerator.
- Canning: For shelf-stable lemon curd, process in a water bath using proper canning techniques. This is more advanced, so follow tested canning recipes for acid levels and processing times.
- Gift giving: Pour into pretty jars, add a cute label, and refrigerate until gifting. Tell recipients to refrigerate promptly.
You’ll know lemon curd has spoiled if it develops an off smell, changes color dramatically, or grows mold. But honestly, it rarely lasts long enough for that to happen!
Delicious Ways to Use Lemon Curd
Now for the fun part – enjoying your creation! Here are my favorite ways to use lemon curd:
Breakfast Ideas
- Spread on toast, English muffins, or scones
- Swirl into yogurt or oatmeal
- Dollop on pancakes or waffles
- Fill crepes with lemon curd and fresh berries
Dessert Applications
- Fill tart shells for mini lemon tarts
- Use as cake filling between layers
- Spread between cookies for lemon sandwich cookies
- Top pavlova with lemon curd and fresh fruit
- Swirl into cheesecake batter before baking
- Fill doughnuts or cream puffs
- Mix with whipped cream for a quick mousse
Quick Treats
- Top vanilla ice cream with a spoonful
- Dip fresh strawberries directly into the jar
- Spread on shortbread cookies
- Sandwich between two meringue cookies
The possibilities are endless! I’d love to hear your favorite ways to enjoy lemon curd in the comments below.
Final Thoughts
There you have it – the easiest, most foolproof lemon curd recipe that delivers perfect results every time! In just 15 minutes of active cooking time, you’ve created something truly special that will elevate everything from your morning toast to your fanciest desserts.
The bright, sunny flavor of homemade lemon curd is like bottled happiness. Once you master this basic recipe, you’ll find yourself making it regularly and experimenting with different variations.
Trust me, once you’ve made your own lemon curd, you’ll never go back to store-bought again. The difference in flavor and texture is simply remarkable!
I’d love to see your lemon curd creations! Tag me on social media or share your experiences in the comments below. Did you try any of the variations? What’s your favorite way to enjoy lemon curd?
Happy cooking, and enjoy every tangy, sweet spoonful!
FAQ
Can I use bottled lemon juice instead of fresh?
Fresh is best for flavor, but in a pinch, bottled will work. Use the same amount but skip the zest and add ¼ teaspoon lemon extract for better flavor.
How do I know when my lemon curd is thick enough?
It should coat the back of a spoon and hold a line when you run your finger through it. Remember it thickens more as it cools!
Can I make lemon curd in the microwave?
Yes! Mix all ingredients in a microwave-safe bowl and cook in 1-minute intervals, whisking thoroughly between each until thickened (usually 3-4 minutes total).
Is lemon curd gluten-free?
Yes, this recipe is naturally gluten-free.
Can I use a sugar substitute?
Yes, but texture may vary. Monkfruit sweetener works well at a 1:1 ratio. Adjust to taste.
How long does homemade lemon curd last?
Up to 2 weeks in the refrigerator or 1 year in the freezer.
Tangy Homemade Lemon Curd Recipe – Sweet, Creamy
Course: CondimentsCuisine: AmericanDifficulty: Easy4
servings5
minutes12
minutes80
kcal17
minutesThis Homemade Lemon Curd is silky-smooth, tangy, sweet, and bursting with real citrus flavor. Made with just five simple ingredients, it’s the perfect spread or filling for tarts, cupcakes, scones, pancakes, or even just a spoon! Once you try it fresh, you’ll never go back to store-bought.
Ingredients
3 large eggs
1/2 cup (120ml) fresh lemon juice (about 2–3 lemons)
1 tablespoon lemon zest
3/4 cup (150g) granulated sugar
1/2 cup (115g) unsalted butter, cut into cubes
Directions
- In a medium saucepan (off the heat), whisk together the eggs, sugar, lemon juice, and lemon zest until fully combined.
- Place the pan over medium-low heat and add the butter cubes.
- Stir constantly with a rubber spatula or wooden spoon, making sure to scrape the bottom and sides to prevent curdling.
- Cook for about 10–12 minutes, until the mixture thickens and coats the back of a spoon. Do not boil.
- Once thickened, remove from heat and strain through a fine-mesh sieve into a clean bowl to remove any cooked egg bits or zest (optional but recommended for silky texture).
- Let cool to room temperature, then transfer to a jar or airtight container.
- Refrigerate for at least 2 hours to fully set. Store in the fridge for up to 1 week, or freeze for up to 3 months.
Notes
- Butter: Use real unsalted butter for best flavor.
Zest: Zest the lemons before juicing—it’s hard to do afterward!
Texture Tip: Straining is optional but ensures a creamy, silky finish.
Serving Ideas: Use it in pies, parfaits, between cake layers, or spoon it over pancakes and yogurt!
