We’ve all had those moments where a recipe looks more like a high school chemistry project than a meal. You see words like “julienne” or “deglaze” and suddenly, the cereal box on the counter starts looking like a very reasonable dinner option. But here’s the truth: You don’t need to be a chef to make a meal that tastes like you are one.
Cooking is a skill, just like anything else, and every pro you see on TV once struggled to flip a pancake or boil an egg. The secret isn’t a fancy kitchen or expensive gadgets; it’s starting with recipes that are designed to work every single time.
I’ve curated 15 easy recipes that are the perfect entry point for anyone looking to build their kitchen confidence. We’re focusing on big flavors, simple techniques, and ingredients you can actually find at your local store. Whether you’re cooking for yourself for the first time or just want to expand your repertoire beyond toast, these dishes are your new best friends. Let’s get that apron on!
Easy Chicken Tacos

Chicken tacos are a fantastic dish for beginners. They are quick to prepare, which is perfect when you’re starting in the kitchen. In the image, we see a beautiful plate of chicken tacos beautifully layered with fresh ingredients like diced tomatoes, avocado slices, and a sprinkle of cilantro. The colorful ingredients make these tacos not only delicious but also visually appealing.
Making chicken tacos is simple and fun. Grab your corn or flour tortillas, some cooked chicken, and your favorite toppings. You can customize these tacos with whatever you like. It’s a great opportunity to experiment with flavors and textures!
Ingredients
- 1 lb cooked chicken, shredded
- 8 small corn or flour tortillas
- 1 cup diced tomatoes
- 1 avocado, sliced
- 1/2 cup shredded lettuce
- 1/4 cup chopped cilantro
- 1 lime, cut into wedges
- Salt and pepper to taste
- Salsa or hot sauce (optional)
Instructions
- Prepare the Chicken: If you haven’t done so, shred the cooked chicken into bite-sized pieces. Season with salt and pepper.
- Warm the Tortillas: Heat the tortillas in a dry skillet over medium heat for about 30 seconds on each side, until warm.
- Assemble the Tacos: Place a portion of shredded chicken in each tortilla. Top with diced tomatoes, avocado slices, and shredded lettuce.
- Add Flavor: Sprinkle chopped cilantro on top and serve with lime wedges for that extra zing!
- Serve: You can also add your favorite salsa or hot sauce for some heat. Enjoy your delicious chicken tacos!
Fluffy Pancakes with Maple Syrup

Fluffy pancakes are a breakfast classic that is perfect for beginners. They are soft, light, and make for a delicious start to your day. Imagine stacking a few golden pancakes on a plate, drizzled with rich maple syrup, and topped with fresh berries. Yum!
Making pancakes at home is so simple and fun. You really can’t mess it up! Whether you enjoy them plain, or love adding fruits or chocolate chips, the choice is yours. Plus, they can be whipped up in no time.
Ingredients
- 1 cup all-purpose flour
- 2 tablespoons sugar
- 2 teaspoons baking powder
- 1/2 teaspoon salt
- 1 cup milk
- 1 large egg
- 2 tablespoons melted butter
- Maple syrup, for serving
- Fresh berries, for topping
Instructions
- Mix Dry Ingredients: In a bowl, combine flour, sugar, baking powder, and salt.
- Add Wet Ingredients: Stir in milk, egg, and melted butter until just combined. Don’t over mix; a few lumps are okay!
- Heat the Pan: Preheat a non-stick skillet over medium heat. If you prefer, lightly grease it with a bit of butter.
- Cook the Pancakes: Pour about 1/4 cup of the batter onto the skillet for each pancake. Cook until bubbles form on the surface, then flip and cook until both sides are golden brown.
- Serve: Stack pancakes on a plate, drizzle with warm maple syrup, and top with fresh berries. Enjoy your fluffy pancakes!
Classic Spaghetti Aglio e Olio
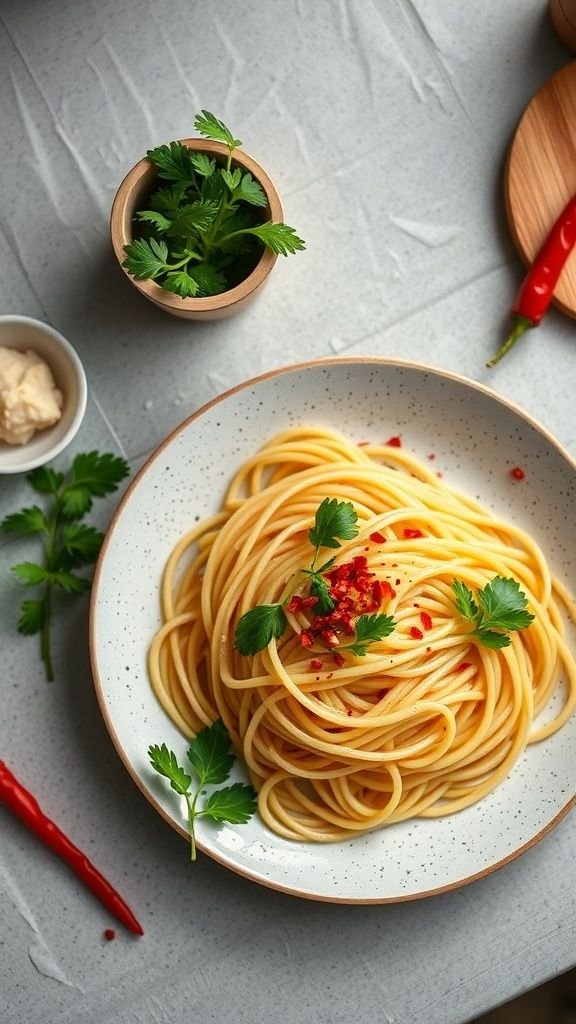
Spaghetti Aglio e Olio is a simple yet delicious recipe that anyone can master. The image beautifully showcases a plate of spaghetti tossed in a light olive oil and garlic sauce, garnished with fresh parsley and sprinkled with chili flakes for a bit of heat. It’s a perfect dish for a quick weeknight dinner or a cozy evening at home.
This classic Italian dish is all about quality ingredients and timing. The combination of garlic and olive oil creates a fragrant base that is both comforting and satisfying. Plus, it’s easy to customize! You can add vegetables, proteins, or even more spices based on your preference.
Ingredients
- 400g spaghetti
- 6 cloves garlic, thinly sliced
- 100ml extra virgin olive oil
- 1 teaspoon red pepper flakes (adjust to taste)
- Fresh parsley, chopped
- Salt, to taste
- Grated Parmesan cheese (optional)
Instructions
- Cook the Spaghetti: In a large pot, boil salted water and cook the spaghetti according to package instructions until al dente. Reserve about 1 cup of pasta water before draining.
- Sauté the Garlic: In a large skillet, add the olive oil and sliced garlic. Sauté on medium heat until the garlic turns golden brown, but be careful not to burn it.
- Add the Pasta: Once the garlic is ready, add the drained spaghetti to the skillet. Toss to combine, adding a little reserved pasta water to help the sauce coat the pasta.
- Season: Mix in the red pepper flakes and season with salt. Toss in the fresh parsley for added flavor and color.
- Serve: Plate the spaghetti and sprinkle with grated Parmesan cheese if desired. Enjoy your delicious plate of Spaghetti Aglio e Olio!
Savory Egg Fried Rice
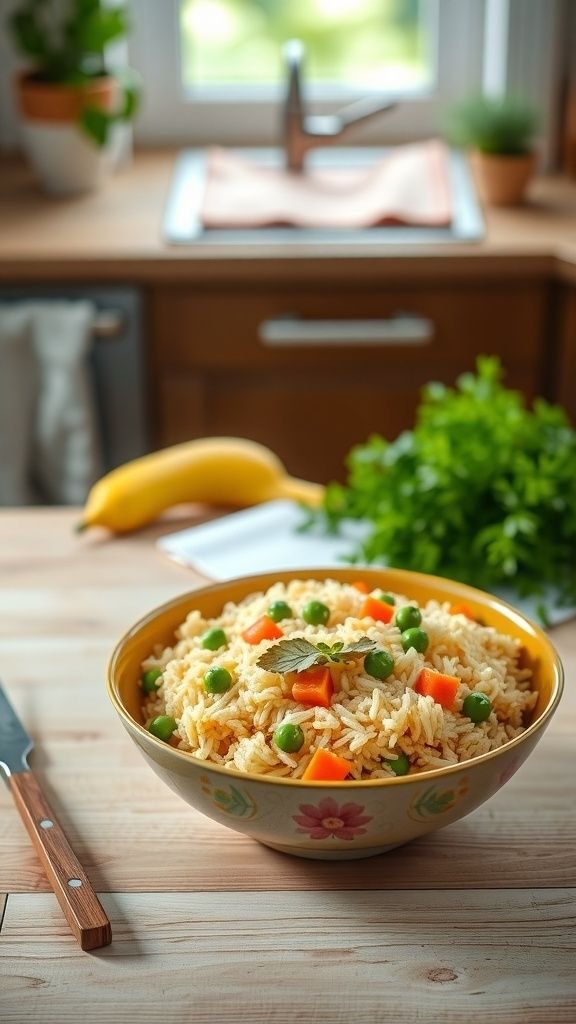
Egg fried rice is a comforting and delicious dish that brings together flavors and textures in every bite. It’s colorful with green peas and vibrant carrots, making it visually appealing as well. This dish is perfect for a quick meal, and it’s also a great way to use leftover rice!
The beauty of this recipe lies in its simplicity. You can easily adjust the ingredients based on what you have in your fridge. Whether you’re cooking for yourself or a family, this egg fried rice can quickly become a go-to option on busy nights.
Ingredients
- 2 cups cooked jasmine rice (preferably cold)
- 2 large eggs
- 1/2 cup green peas (fresh or frozen)
- 1/2 cup carrots, diced
- 2 tablespoons soy sauce
- 2 tablespoons vegetable oil
- 1 teaspoon sesame oil
- 2 green onions, chopped
- Salt and pepper to taste
Instructions
- Heat 1 tablespoon of vegetable oil in a large skillet over medium heat.
- Beat the eggs in a bowl and pour them into the skillet. Scramble until fully cooked, then remove from the pan and set aside.
- Add the remaining oil to the skillet, then toss in the carrots and peas. Sauté for about 3-4 minutes until tender.
- Add in the cold jasmine rice, breaking up any clumps with a spatula. Stir-fry for 5 minutes, ensuring it gets a bit crispy.
- Mix in the soy sauce, sesame oil, scrambled eggs, and green onions. Stir everything together and season with salt and pepper to taste. Cook for an additional 2-3 minutes.
And there you have it: a bowl of savory egg fried rice that is not only easy to make but also packed with flavor. Enjoy!
Creamy Tomato Soup with Grilled Cheese

Creamy tomato soup paired with a crunchy grilled cheese sandwich is a classic comfort food duo. The vibrant orange color of the soup is inviting, and the crispy, golden-brown grilled cheese looks irresistible. The plate is simply styled, showcasing the bright tomato flavor and the delightful crunch of the toasted bread.
This dish is perfect for beginners. It’s quick, easy, and requires just a few ingredients. Imagine dipping that gooey, cheesy sandwich into the warm, smooth soup. It’s cozy, satisfying, and hits the spot on a chilly day.
Ingredients
- 1 can (15 oz) crushed tomatoes
- 1 cup vegetable broth
- 1/2 cup heavy cream
- 1 small onion, chopped
- 2 cloves garlic, minced
- 2 tablespoons olive oil
- Salt and pepper to taste
- 4 slices of bread
- 4 slices of cheese (cheddar or your choice)
- Butter for grilling
Instructions
- In a pot, heat olive oil over medium heat. Add chopped onion and garlic, cooking until softened.
- Stir in the crushed tomatoes and vegetable broth. Simmer for 10-15 minutes.
- Reduce heat and add heavy cream, stirring until mixed. Season with salt and pepper to taste.
- Meanwhile, heat a skillet over medium heat. Butter one side of each slice of bread.
- Place cheese between two slices of bread, buttered side out. Grill until golden brown on both sides and the cheese is melted.
- Serve the soup in bowls with grilled cheese on the side. Enjoy your delicious meal!
Simple Vegetable Stir-Fry
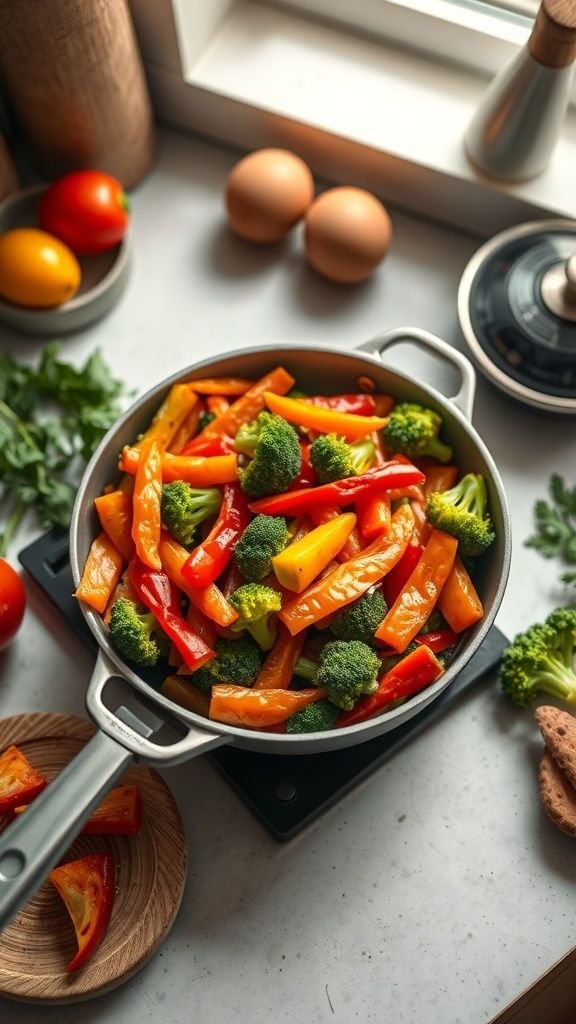
When it comes to quick and easy meals, a vegetable stir-fry is a fantastic choice. This dish is colorful and vibrant, filled with fresh, crunchy vegetables like bell peppers and broccoli. It’s not just delicious; it’s also packed with nutrients, making it a healthy option for any meal. You can enjoy it on its own or pair it with rice or noodles for a more filling experience.
The great thing about stir-fries is their versatility. You can throw in whatever veggies you have in your fridge. Whether it’s carrots, snap peas, or mushrooms, every combination makes for something unique and delightful. The recipe below is simple, beginner-friendly, and sure to impress.
Ingredients
- 2 cups broccoli florets
- 1 red bell pepper, sliced
- 1 yellow bell pepper, sliced
- 1 tablespoon minced garlic
- 1 tablespoon minced ginger
- 2 tablespoons soy sauce
- 1 tablespoon olive oil
- 1 teaspoon sesame oil (optional)
- Salt and pepper to taste
Instructions
- Prep the Ingredients: Wash and chop the broccoli and bell peppers. Mince the garlic and ginger.
- Heat the Oil: In a large pan or wok, heat the olive oil over medium-high heat.
- Add Garlic and Ginger: Once the oil is hot, add the minced garlic and ginger, stirring for about 30 seconds until fragrant.
- Cook the Vegetables: Add the broccoli and bell peppers to the pan. Stir-fry for about 5-7 minutes until they’re tender but still crisp.
- Add Soy Sauce: Pour the soy sauce over the veggies and stir well. Add salt and pepper to taste. If using sesame oil, drizzle that in and stir to combine.
- Serve: Once everything is well combined and heated through, serve your vegetable stir-fry hot. Enjoy it on its own or over a bed of rice or noodles.
One-Pan Baked Lemon Chicken
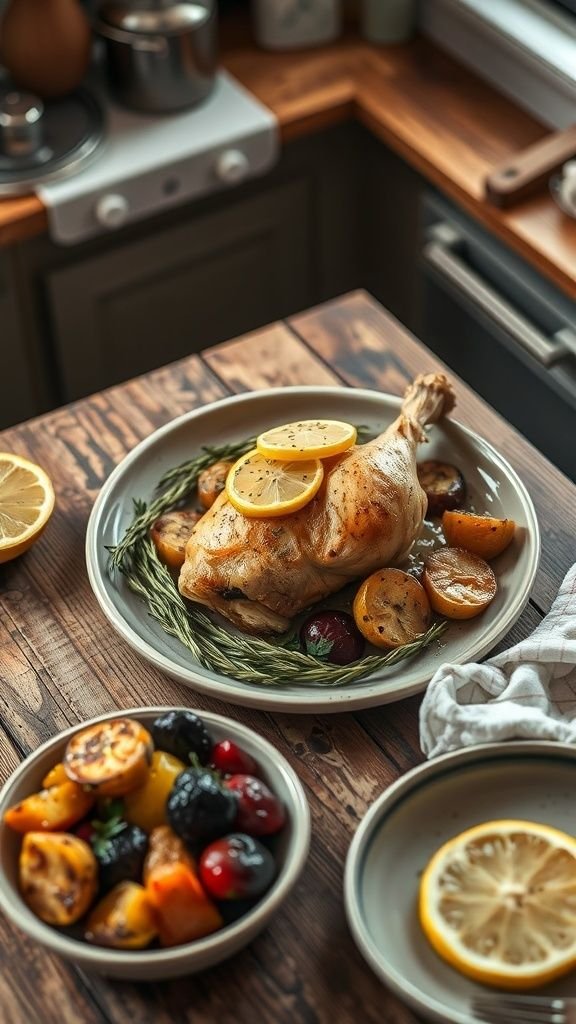
One-Pan Baked Lemon Chicken is the perfect beginner-friendly recipe anyone can tackle with ease. This dish not only boasts vibrant flavors but also saves you the hassle of washing multiple pots and pans. Imagine tender chicken, beautifully roasted with a zesty lemon glaze alongside seasonal vegetables. The smell wafting through your kitchen will have your mouth watering in anticipation!
To make this dish, you’ll need a few simple ingredients. You’ll want a chicken leg or thigh (bone-in for juicy flavor), fresh lemons, a mix of your favorite vegetables, olive oil, garlic, salt, and pepper. The beauty of this recipe is that you can use whatever veggies you have on hand, so feel free to get creative!
Let’s dive into making this delightful dish. It’s time to impress your family or friends with a meal that looks gourmet but is super simple.
Ingredients
- 4 chicken thighs (bone-in, skin-on)
- 2 lemons (sliced)
- 1 tablespoon olive oil
- 4 cloves garlic (minced)
- 1 teaspoon salt
- 1/2 teaspoon black pepper
- 2 cups assorted vegetables (like potatoes, carrots, and bell peppers)
- Fresh rosemary (optional, for garnish)
Instructions
- Prep the Oven: Preheat your oven to 400°F (200°C).
- Season the Chicken: In a bowl, mix the chicken thighs with olive oil, minced garlic, salt, and pepper. Ensure each piece is well coated.
- Arrange Ingredients: Place the seasoned chicken on a baking tray or a large oven-safe skillet. Scatter the sliced lemons and your choice of vegetables around the chicken.
- Bake: Place the tray in the preheated oven. Bake for about 40-45 minutes or until the chicken reaches an internal temperature of 165°F (75°C) and the skin is golden brown.
- Garnish and Serve: Once done, take it out of the oven and let it rest for a few minutes. Garnish with fresh rosemary if desired. Serve hot and enjoy your delicious meal!
Vegetarian Chili
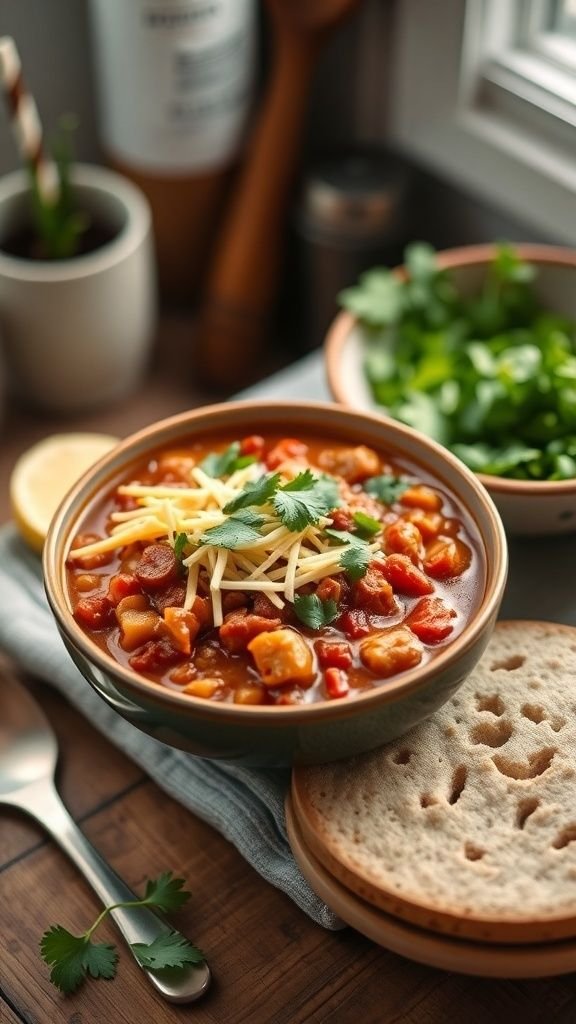
This vegetarian chili is a warm and hearty dish that you can whip up in no time. It’s perfect for chilly days when all you want is something cozy and satisfying. The image shows a bowl of rich and colorful chili topped with fresh cilantro and shredded cheese, ready to warm you up.
Vegetarian chili is not just filling; it’s also packed with nutrients. You get a delicious mix of beans, vegetables, and spices that make each bite a burst of flavor. The bright colors of the peppers and tomatoes in the bowl look so inviting, and the side of bread adds a perfect touch for scooping.
Making this chili is super easy, even for beginners. You just toss everything into the pot, let it simmer, and enjoy! Plus, it’s a great dish to enjoy with friends or family, making meal time extra special.
Oven-Baked Salmon with Herbs
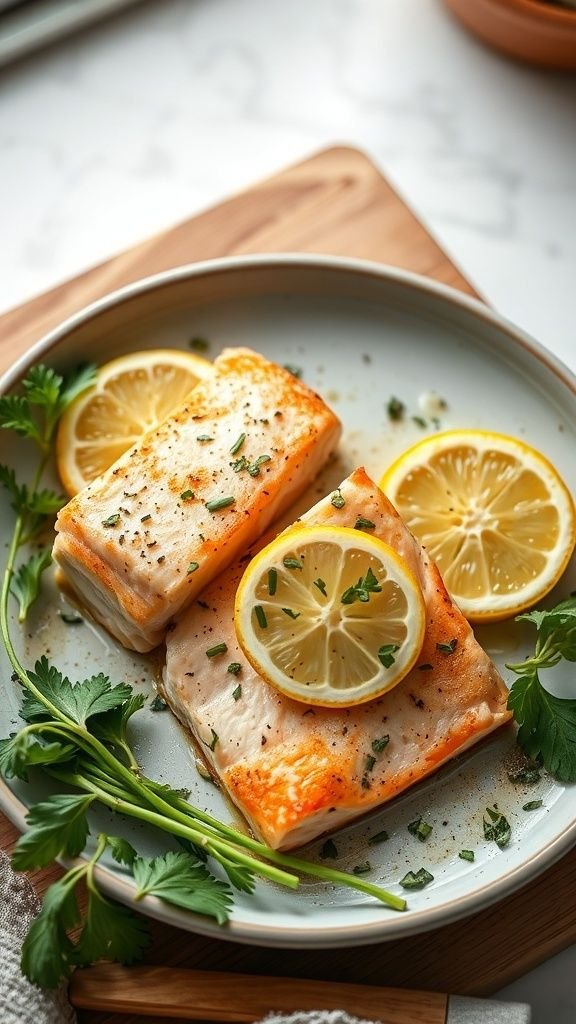
If you’re looking for a simple yet delicious dish, oven-baked salmon with herbs is perfect. Not only is it easy to prepare, but it’s also packed with flavor. With a beautiful golden hue and the freshness of herbs, this meal looks as good as it tastes. The combination of salmon, lemon, and fresh herbs creates a delightful aroma that fills your kitchen, inviting everyone to the table.
This recipe is beginner-friendly and requires minimal ingredients, making it an ideal option for anyone new to cooking. Plus, it pairs well with various sides, so you can customize your meal however you like.
Ingredients
- 2 salmon fillets
- 1 tablespoon olive oil
- 1 lemon, sliced
- 1 teaspoon dried thyme
- 1 teaspoon dried parsley
- Salt and pepper to taste
Instructions
- Preheat your oven to 400°F (200°C).
- Place the salmon fillets on a baking sheet lined with parchment paper.
- Drizzle olive oil over the fillets and rub it in gently.
- Sprinkle dried thyme, parsley, salt, and pepper on top.
- Lay lemon slices over each fillet.
- Bake in the preheated oven for 12-15 minutes, or until the salmon is cooked through and flakes easily with a fork.
- Serve warm, garnished with extra herbs if desired.
Quick Vegetable Quesadillas

Quick Vegetable Quesadillas are a fun and easy dish perfect for any beginner in the kitchen. Just take a look at the image, and you’ll see those delicious golden-brown quesadillas, beautifully sliced and served with tangy salsa and a dollop of sour cream. They not only look appetizing but are also packed with flavors and nutrients.
This recipe is incredibly versatile. You can throw in your favorite veggies like bell peppers, spinach, or mushrooms. Quesadillas can be made with just a few ingredients, making them ideal for a quick meal or snack. Plus, they’re great for using up leftover vegetables from your fridge!
To make your quick vegetable quesadillas, gather the following ingredients:
Ingredients
- 4 flour tortillas
- 1 cup shredded cheese (cheddar, mozzarella, or your favorite)
- 1 cup mixed vegetables (bell peppers, onions, spinach)
- 1 tablespoon olive oil
- Sour cream, for serving
- Salsa, for serving
Instructions
- Heat olive oil in a skillet over medium heat.
- Add the mixed vegetables and sauté for about 3-5 minutes until they are soft.
- Take one tortilla and sprinkle some cheese on one half. Add a portion of the sautéed vegetables over the cheese and fold the tortilla.
- Place the quesadilla in the skillet and cook for 2-3 minutes on each side, or until it’s golden brown and the cheese has melted.
- Repeat with the remaining tortillas.
- Cut each quesadilla into wedges and serve hot with sour cream and salsa on the side.
These quick vegetable quesadillas are not only delicious but also super fun to prepare. Enjoy a satisfying meal that’s ready in just under 20 minutes!
Simple Fruit Salad
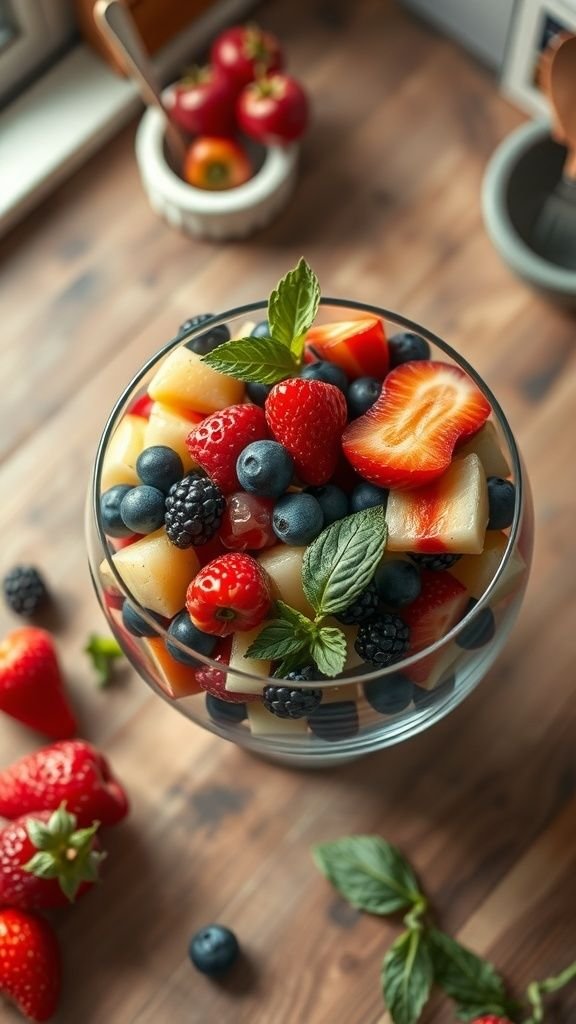
Fruit salads are the perfect go-to for making something quick, fresh, and delicious. They’re colorful, packed with nutrients, and can be made with just about any fruit you have on hand. This simple fruit salad is not only easy to whip up but also a fantastic way to use seasonal fruits. Plus, it’s something everyone can enjoy!
The vibrant mix of strawberries, blueberries, blackberries, and melon creates a feast for the eyes and the palate. Add a sprig of mint for a pop of color and a refreshing aroma that lifts the dish. Kids love fruit salad, making it a great addition to snacks or parties.
Let’s dive into the ingredients and steps to make this delightful fruit salad!
Ingredients
- 1 cup strawberries, hulled and halved
- 1 cup blueberries
- 1 cup blackberries
- 1 cup cantaloupe or honeydew, diced
- 2 tablespoons honey (optional)
- 1 tablespoon fresh lime juice
- Fresh mint leaves for garnish
Instructions
- Prepare the Fruit: Rinse all the berries under cold water. Hull and halve the strawberries, and dice the cantaloupe or honeydew into small pieces.
- Mix the Ingredients: In a large bowl, combine all the fruits. If you want a little sweetness, drizzle honey over the mixture.
- Add Lime Juice: Squeeze in the fresh lime juice and gently toss everything together to coat the fruit without mashing it.
- Garnish: Transfer the fruit salad to a serving bowl and adorn with fresh mint leaves on top.
- Serve: Enjoy immediately or chill in the refrigerator for about 30 minutes for a refreshing treat!
This simple fruit salad not only refreshes but also can be used as a side dish or dessert. The best part? You can customize it with your favorite fruits. Have fun and make it your own!
Baked Ziti with Cheese
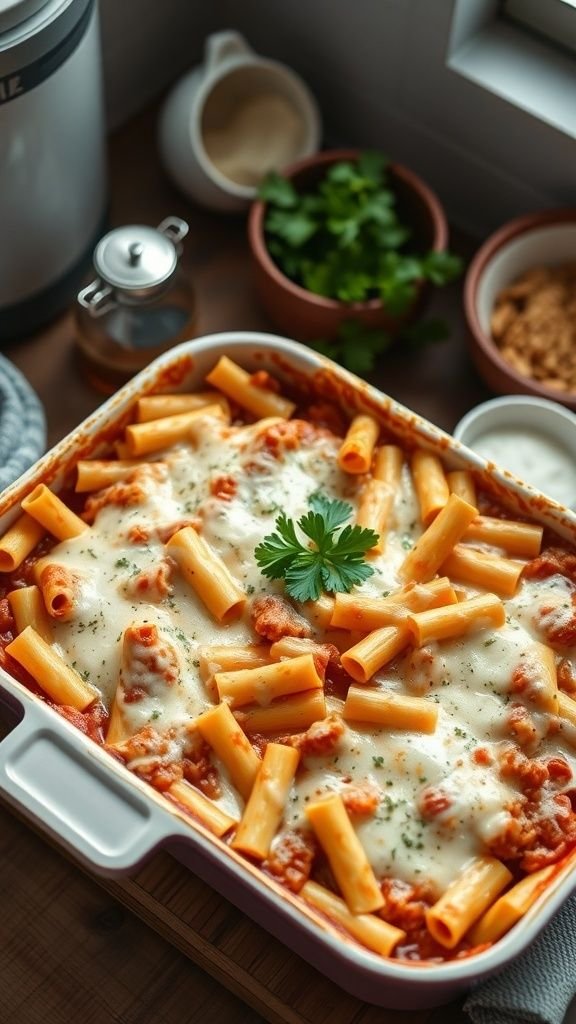
Baked Ziti is a classic dish that combines simple ingredients into a comforting meal. The image shows a bubbling tray of ziti topped with melted cheese, inviting anyone to dig in. This dish is perfect for beginners because it requires minimal cooking skills and is hard to mess up!
Picture a cheesy, tomato-sauced pasta, just waiting to be served. This recipe allows you to familiarize yourself with baking while creating something delicious that friends and family will love.
Gather your ingredients, and let’s get cooking!
Ingredients
- 1 pound ziti pasta
- 2 cups ricotta cheese
- 3 cups marinara sauce
- 2 cups shredded mozzarella cheese
- 1/2 cup grated Parmesan cheese
- 1 egg
- 2 teaspoons dried Italian herbs
- Salt and pepper to taste
Instructions
- Preheat your oven to 375°F (190°C).
- Cook the ziti pasta according to package instructions until al dente. Drain and set aside.
- In a bowl, mix ricotta cheese, egg, dried herbs, salt, and pepper until well combined.
- In a large baking dish, layer half of the marinara sauce, followed by half the ziti, and dollops of the ricotta mixture. Sprinkle with half the mozzarella. Repeat the layers once more.
- Top with the remaining marinara sauce and sprinkle the rest of the mozzarella and Parmesan on top.
- Cover with foil and bake for 25 minutes. Remove the foil and bake for an additional 15 minutes until cheese is bubbly and golden.
- Let it rest for a few minutes before serving. Enjoy your cheesy, delicious baked ziti!
Simple Beef Stir-Fry
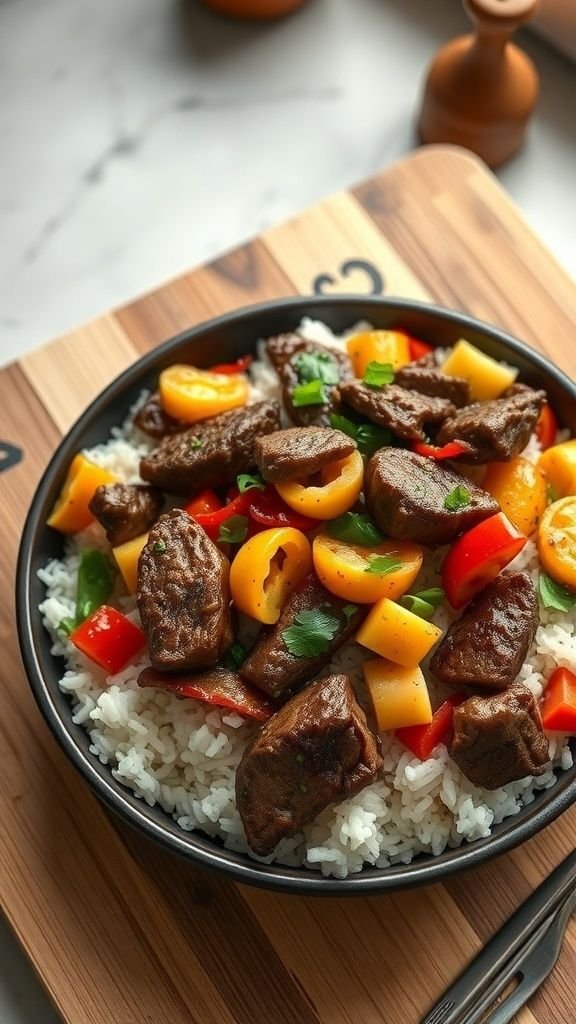
Beef stir-fry is a quick and satisfying dish that’s perfect for beginners! The colorful mix of veggies and tender beef makes it not only delicious but also visually appealing. Plus, it can be on the table in less than 30 minutes, making it an easy choice for busy nights.
To whip up this fantastic meal, you’ll need fresh vegetables like bell peppers and onions, along with some juicy beef. It’s all cooked together in a savory sauce that brings everything to life. The best part? You can customize it with your favorite veggies!
Ingredients
- 1 lb beef (sirloin or flank steak), thinly sliced
- 2 cups mixed bell peppers (red, green, yellow), sliced
- 1 cup onions, sliced
- 3 cloves garlic, minced
- 2 tablespoons soy sauce
- 1 tablespoon oyster sauce (optional)
- 2 tablespoons vegetable oil
- Salt and pepper to taste
- Cooked rice, for serving
Instructions
- Prepare Ingredients: Start by slicing the beef and vegetables. Having everything ready makes the cooking process quick and smooth.
- Heat the Oil: In a large skillet or wok, heat vegetable oil over medium-high heat.
- Cook the Beef: Add the sliced beef in a single layer and let it sear for about 2-3 minutes until browned. Stir-fry until cooked through, then remove the beef from the pan.
- Add Veggies: In the same pan, toss in the bell peppers and onions. Stir-fry for about 3-4 minutes until the veggies are tender but still crisp.
- Combine: Add the minced garlic and cooked beef back to the pan. Pour in the soy sauce and oyster sauce. Stir to combine and coat everything in the sauce.
- Season: Taste and adjust with salt and pepper if needed. Cook for another 1-2 minutes.
- Serve: Ladle the stir-fry over a bed of rice. Enjoy your colorful and flavorful beef stir-fry!
Homemade Guacamole and Tortilla Chips
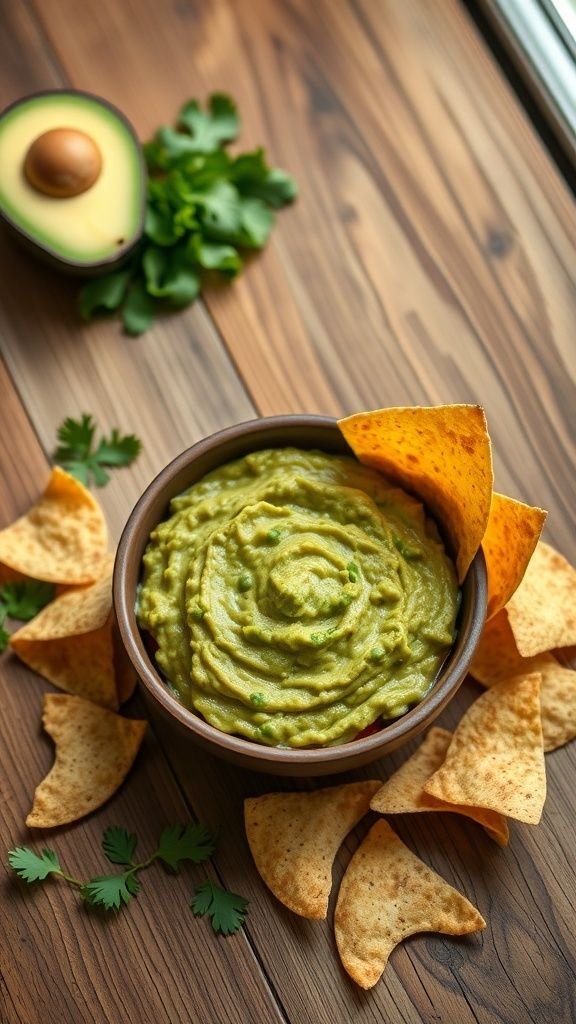
Homemade guacamole paired with crispy tortilla chips is a delightful snack that anyone can whip up in no time. This classic combination offers a burst of flavors that are sure to impress. The creamy texture of the guacamole complements the crunchiness of the chips perfectly.
Making guacamole is simple, and you only need a few fresh ingredients to create a tasty dip. Avocados are the star of the show, bringing richness and healthy fats to the mix. Add lime juice, garlic, cilantro, and a pinch of salt to elevate the flavors. For the tortilla chips, you can either buy them or make your own. When baked, they come out golden and crispy, ideal for dipping!
This recipe is great for gatherings or just a cozy night in. Plus, it’s customizable! Feel free to add tomatoes, jalapeños, or onions to your guacamole based on your taste preferences.
Ingredients
- 2 ripe avocados
- 1 lime, juiced
- 1 clove garlic, minced
- 1/4 cup fresh cilantro, chopped
- Salt to taste
- 2 cups tortilla chips (store-bought or homemade)
Instructions
- Prepare the Avocados: Cut the avocados in half, remove the pit, and scoop the flesh into a bowl.
- Mash the Avocado: Use a fork to mash the avocado to your desired consistency. Some like it smooth, while others prefer a chunkier texture.
- Mix Ingredients: Add lime juice, minced garlic, chopped cilantro, and salt to the mashed avocado. Stir until well combined.
- Taste and Adjust: Taste the guacamole and add more salt or lime juice as needed.
- Serve: Enjoy your guacamole immediately with tortilla chips or chill it for a short while. If you’re making tortilla chips, preheat the oven to 350°F (175°C), spread tortilla triangles on a baking sheet, drizzle with oil, and bake for 10-15 minutes until golden.
This quick and easy recipe for guacamole and tortilla chips is perfect for any occasion. Serve it up and watch everyone dive in!
Classic Caesar Salad
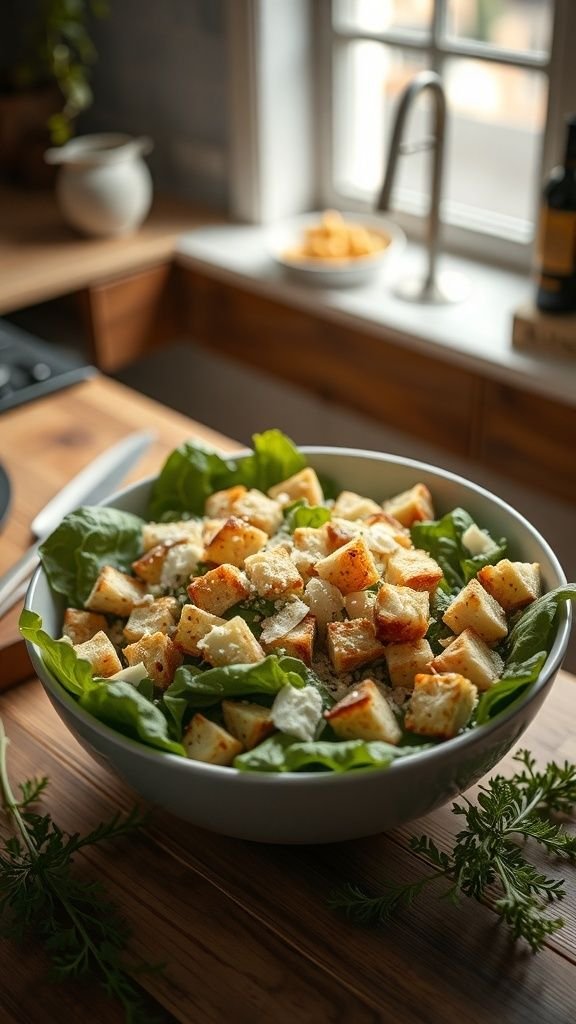
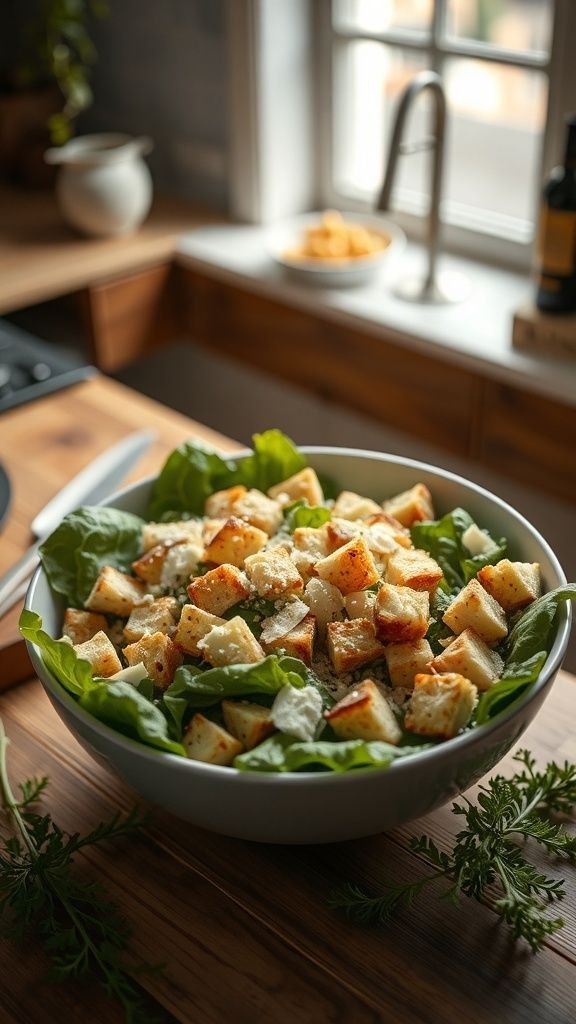
There’s something so satisfying about a classic Caesar salad, don’t you think? With crisp greens, crunchy croutons, and that unmistakable creamy dressing, it’s a go-to dish for many. This image perfectly captures the essence of a Caesar salad, where fresh romaine leaves cradle golden-brown croutons and a sprinkle of cheese. It’s both simple and elegant, making it a fantastic choice for any meal.
Making a Caesar salad is surprisingly easy, even for beginners. The combination of textures and flavors is delightful, and you can customize it to your taste. Whether you want to add grilled chicken or keep it vegetarian, this salad is versatile!
Ingredients
- 1 large head of romaine lettuce
- 1 cup homemade or store-bought croutons
- 1/2 cup grated Parmesan cheese
- 1 clove garlic, minced
- 1 tablespoon Worcestershire sauce
- 2 tablespoons lemon juice
- 1/2 cup mayonnaise
- Salt and pepper to taste
Instructions
- Prepare the Dressing: In a bowl, mix the mayonnaise, minced garlic, Worcestershire sauce, lemon juice, salt, and pepper until smooth.
- Wash the Lettuce: Rinse and dry the romaine lettuce leaves, then chop them into bite-sized pieces.
- Toss the Salad: In a large bowl, combine the chopped romaine, croutons, and Parmesan cheese. Drizzle the dressing over the salad and toss until everything is well-coated.
- Serve: Enjoy the salad immediately, or refrigerate it for a short while before serving for an even cooler taste!
Final Thoughts
The most important ingredient in any of these recipes isn’t the salt or the olive oil—it’s the confidence you feel when you take that first bite and realize, “Wait, I actually made this!” Don’t worry about making it look like a magazine cover; focus on how good it feels to create something from scratch.
Every meal you make is a little more experience under your belt. Before you know it, you’ll be the one giving out tips to your friends!
Now, I want to hear from you: Which of these 15 recipes are you going to try first? Or is there a specific kitchen “fear” you’re trying to conquer this year? Let’s chat in the comments and celebrate those small kitchen victories together. Happy cooking!