
There is a common misconception that to make a “blog-worthy” meal, you need a grocery cart full of expensive oils, rare spices, and ingredients you’ll only use once before they migrate to the back of the cupboard. But if I’ve learned anything from years in the kitchen, it’s this: The best flavors usually come from the simplest places.
Think about it—some of the world’s most iconic dishes are just a handful of basic elements treated with a little love. We’re talking about those humble staples like eggs, pasta, canned beans, and frozen veggies that are probably sitting in your kitchen right now.
Today, I’m stripping away the fluff and focusing on 20 easy recipes that prove you don’t need a massive budget or a professional pantry to put a delicious meal on the table. These are straightforward, no-nonsense dishes that rely on simple ingredients to do the heavy lifting. Let’s head to the pantry and see what we can find!
Chickpea Salad with Cucumber and Feta
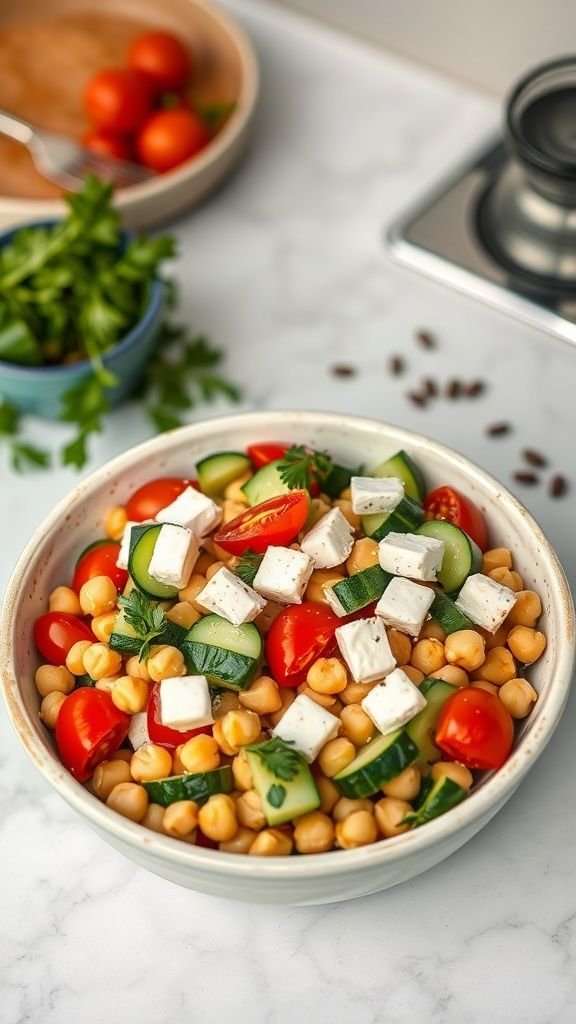
If you’re looking for a vibrant and refreshing dish, this chickpea salad is a great choice. Packed with fresh ingredients, this recipe is simple yet full of flavor. The little pops of cherry tomatoes, crunchy cucumber, and creamy feta cheese create a delightful combination that will make your taste buds sing.
This salad is not only tasty but also loaded with nutrition. Chickpeas are a fantastic source of protein and fiber, making this dish satisfying and perfect for a light lunch or a side at dinner. Plus, it takes just a few minutes to prepare!
Ingredients
- 1 can chickpeas, drained and rinsed
- 1 cucumber, diced
- 1 cup cherry tomatoes, halved
- 1 cup feta cheese, cubed
- 1/4 cup fresh parsley, chopped
- 2 tablespoons olive oil
- 1 tablespoon red wine vinegar
- Salt and pepper to taste
Instructions
- In a large bowl, combine the chickpeas, cucumber, cherry tomatoes, and feta cheese.
- Add the chopped parsley, olive oil, and red wine vinegar. Toss gently to combine.
- Season with salt and pepper to taste, adjusting to your liking.
- Let the salad sit for a few minutes before serving. This allows the flavors to meld beautifully.
- Serve chilled or at room temperature and enjoy your refreshing chickpea salad!
Easy Beef Tacos with Fresh Salsa
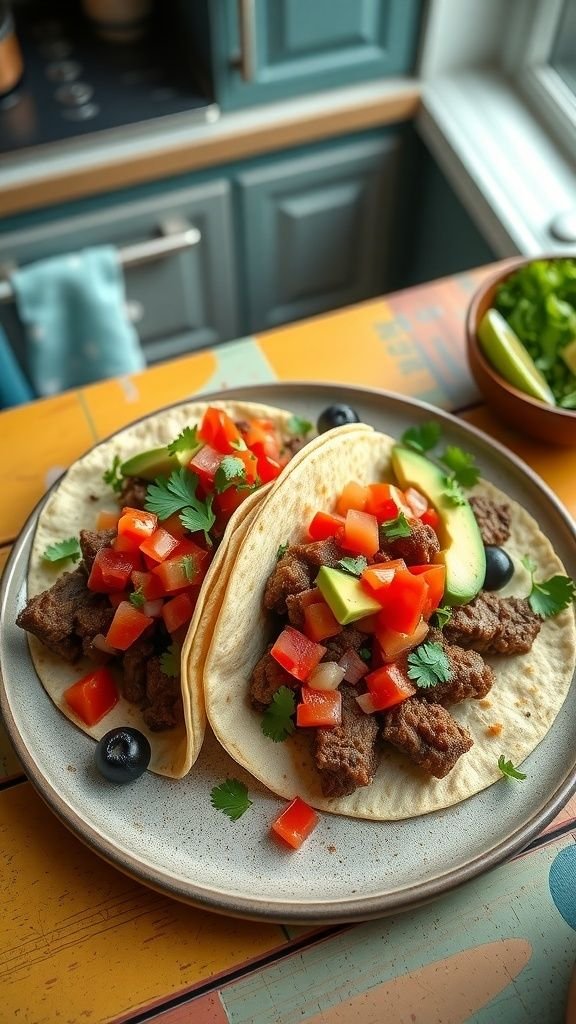
If you’re looking for a simple and delicious meal, you’ve found it! These easy beef tacos topped with fresh salsa are a winner every time. They are not just tasty but also quick to prepare, making them perfect for busy weeknight dinners or casual gatherings with friends.
The image showcases two hearty tacos filled with seasoned beef, bright red tomatoes, and fresh herbs. The vibrant colors make these tacos as appealing as they are mouthwatering. Plus, the fresh ingredients add a burst of flavor that will leave everyone asking for seconds!
Let’s dive into what you need to make these tasty tacos. With just a handful of ingredients, you can whip up a satisfying meal in no time!
Ingredients
- 1 lb ground beef
- 1 tablespoon taco seasoning
- 8 small flour tortillas
- 1 cup diced tomatoes
- 1/2 cup diced onion
- 1 avocado, sliced
- 1/4 cup fresh cilantro, chopped
- Fresh lime wedges
Instructions
- Cook the Beef: In a skillet over medium heat, add the ground beef. Cook until browned, breaking it up as you go. Drain any excess fat.
- Add Seasoning: Sprinkle the taco seasoning over the beef. Stir in a little water if needed and cook for another 2 minutes until heated through.
- Warm the Tortillas: In another skillet or microwave, warm the tortillas until soft and pliable.
- Assemble the Tacos: Place a generous portion of beef on each tortilla. Top with diced tomatoes, onion, avocado, and cilantro.
- Serve: Squeeze fresh lime juice over the tacos for an extra zing and enjoy immediately!
One-Pan Garlic Herb Chicken

Imagine walking into your kitchen and being greeted by the mouthwatering aroma of garlic and herbs. That’s the magic of this one-pan garlic herb chicken! It’s not just a dish; it’s comfort food made easy. With tender chicken pieces basking in a flavorful herb-infused sauce, your weeknight dinners just got a serious upgrade.
This dish is all about simple ingredients that pack a punch. You’ll find juicy chicken, fresh herbs, and a touch of garlic, all coming together in one convenient pan. It’s perfect for busy days when you want a delicious meal without spending hours in the kitchen.
Cooking this chicken is a breeze. Everything happens in one pan, minimizing cleanup time and making it easier to whip up. Just toss the ingredients together, let the oven work its magic, and voilà! Dinner is served!
Ingredients
- 4 chicken thighs
- 4 chicken drumsticks
- 4 cloves garlic, minced
- 1 tablespoon olive oil
- 1 teaspoon dried oregano
- 1 teaspoon dried thyme
- Salt and pepper to taste
- Fresh parsley for garnish
- 1 lemon, sliced
Instructions
- Preheat your oven to 400°F (200°C).
- In a large bowl, combine the chicken pieces, minced garlic, olive oil, oregano, thyme, salt, and pepper. Mix well to coat the chicken.
- Transfer the chicken to a large oven-safe skillet. Scatter lemon slices around the chicken for extra flavor.
- Bake for 35-40 minutes, or until the chicken reaches an internal temperature of 165°F (75°C) and the skin is golden brown.
- Remove from the oven and let it rest for a few minutes. Garnish with fresh parsley before serving.
Classic Pancakes with Maple Syrup

There’s something special about waking up to a stack of golden pancakes. They are fluffy and comforting, making them a perfect breakfast choice any day of the week. Topped with fresh berries and drizzled with maple syrup, these pancakes become irresistible. The simple ingredients required make them easy to whip up, whether it’s a lazy Sunday or a busy weekday morning.
All you need is a few pantry staples to create this delight. The combination of flour, milk, eggs, and a bit of sugar will transform into something delicious. Plus, adding fruits like strawberries, blueberries, and raspberries not only enhances the flavor but also adds a pop of color!
So, get ready to enjoy a classic breakfast experience that everyone loves. Here’s the complete recipe so you can make your own classic pancakes!
Ingredients
- 1 cup all-purpose flour
- 2 tablespoons sugar
- 2 teaspoons baking powder
- 1/2 teaspoon salt
- 1 cup milk
- 1 large egg
- 2 tablespoons unsalted butter, melted
- Maple syrup, for serving
- Fresh berries, for topping (optional)
Instructions
- Mix Dry Ingredients: In a bowl, whisk together flour, sugar, baking powder, and salt.
- Combine Wet Ingredients: In another bowl, mix milk, egg, and melted butter until combined.
- Combine Mixtures: Pour the wet ingredients into the dry ingredients and stir until just combined. A few lumps are okay!
- Cook Pancakes: Heat a non-stick skillet over medium heat. Pour about 1/4 cup of batter for each pancake onto the skillet. Cook until bubbles form on the surface, about 2-3 minutes. Flip and cook for another 1-2 minutes until golden brown.
- Serve: Stack the pancakes on a plate. Top with fresh berries and a generous drizzle of maple syrup. Enjoy!
Vegetable Stir-Fry with Soy Sauce
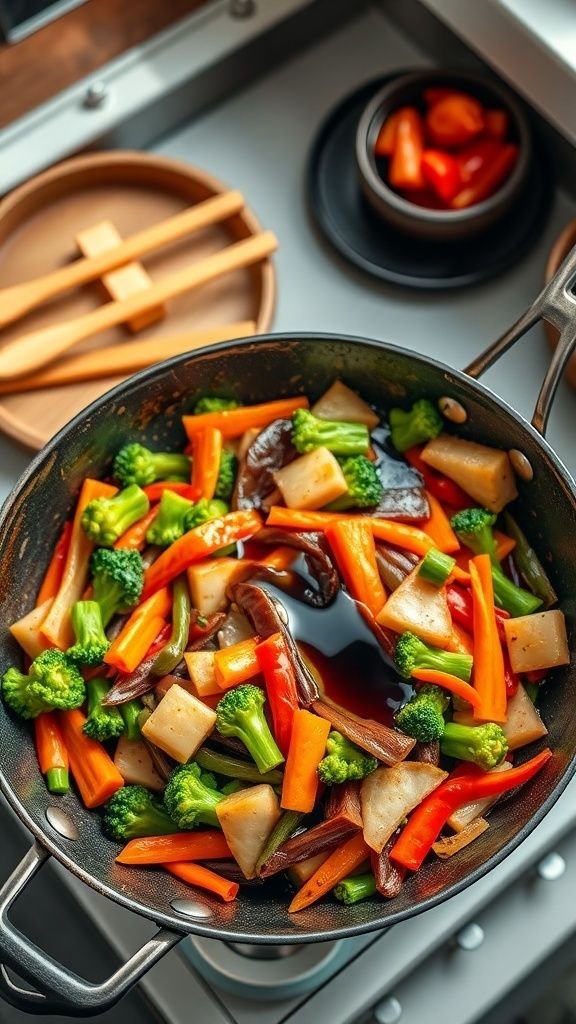
Picture a colorful mix of veggies dancing in a hot pan. That’s what makes vegetable stir-fry so exciting! This dish is not only visually pleasing but also packed with flavors and nutrients. You can easily whip this up with simple ingredients you probably already have in your kitchen.
Stir-frying is a quick cooking method that locks in the natural flavors and textures of the vegetables. In this recipe, we’ll be using soy sauce to add a delicious depth to the mix. The vibrant colors of bell peppers, broccoli, and other veggies make this dish as delicious to the eyes as it is to the palate.
This recipe doesn’t just taste great; it’s also super flexible. You can swap in nearly any vegetables you love or have on hand. Ready to bring some stir-fry magic to your dinner table? Let’s dive into the easy steps!
Ingredients
- 2 cups broccoli florets
- 1 cup bell peppers, sliced (any color)
- 1 cup carrots, sliced
- 1 cup snap peas
- 1 tablespoon vegetable oil
- 3 tablespoons soy sauce
- 1 teaspoon garlic, minced
- 1 teaspoon ginger, minced
- Salt and pepper to taste
Instructions
- Prep the Veggies: Wash and cut all your vegetables. This makes the cooking process quicker and easier.
- Heat the Pan: On medium-high heat, add the vegetable oil to a large skillet or wok.
- Add Garlic and Ginger: Once the oil is hot, toss in the minced garlic and ginger. Stir for about 30 seconds until fragrant.
- Add Veggies: Add the broccoli, bell peppers, carrots, and snap peas. Stir-fry for about 5-7 minutes until the veggies are tender-crisp.
- Add Soy Sauce: Pour in the soy sauce and stir well to coat all the veggies. Cook for another 2 minutes.
- Season: Taste and add salt and pepper as needed.
- Serve: Remove from heat and enjoy your vegetable stir-fry hot!
Creamy Tomato Basil Pasta
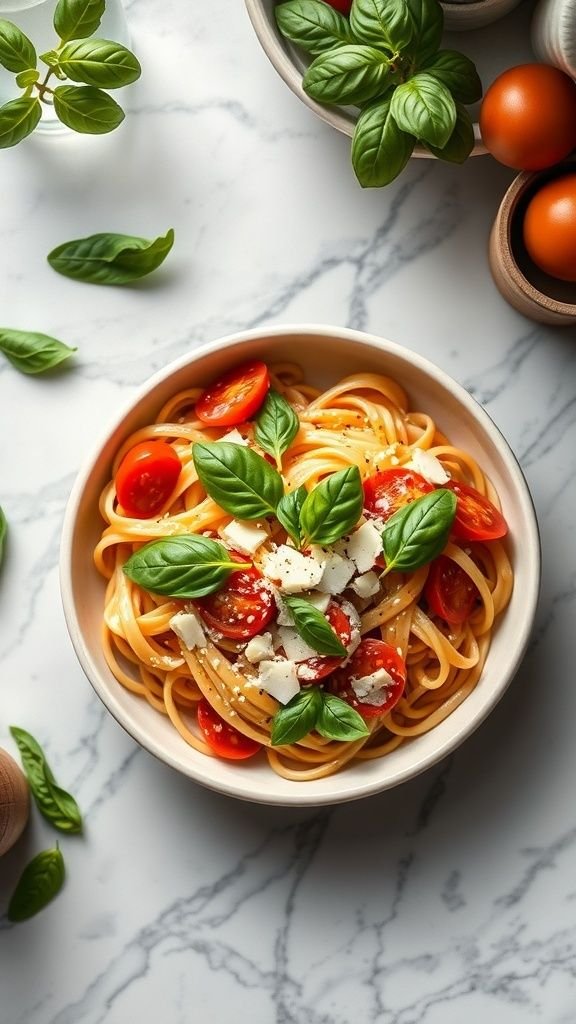
Creamy Tomato Basil Pasta is a wonderful dish that brings the cozy flavors of fresh tomatoes and fragrant basil right to your table. This recipe is perfect for those busy weeknights or when you want something hearty yet simple. The vibrant colors of the fresh ingredients make it not only delicious but also visually inviting.
In the image, you can see a beautifully plated serving of spaghetti, adorned with plump cherry tomatoes and bright green basil leaves. The creamy sauce glistens enticingly, while bits of cheese add a delightful touch. It’s the kind of meal that comforts your soul.
Gather your ingredients and get ready to whip up this deliciousness. It’s quick, easy, and full of flavor that everyone will enjoy. Let’s dive into the ingredients and steps to make your very own Creamy Tomato Basil Pasta!
Ingredients
- 8 ounces spaghetti
- 1 tablespoon olive oil
- 2 cloves garlic, minced
- 1 can (14.5 oz) diced tomatoes
- 1/2 cup heavy cream
- Salt and pepper to taste
- 1/2 cup fresh basil leaves, torn
- 1/4 cup grated Parmesan cheese
- Cherry tomatoes, halved, for garnish
Instructions
- Cook the Pasta: In a large pot of salted water, cook the spaghetti according to package instructions. Drain and set aside, reserving a little pasta water.
- Prepare the Sauce: In a pan, heat olive oil over medium heat. Add minced garlic and sauté until fragrant, about 1 minute.
- Add Tomatoes: Stir in the diced tomatoes (with their juices) and let simmer for 5 minutes. Add the heavy cream and mix well.
- Combine: Add the cooked spaghetti to the sauce. Toss to coat. If the sauce is too thick, add a splash of reserved pasta water.
- Season: Stir in salt, pepper, and torn basil leaves. Cook for another minute until everything is heated through.
- Serve: Plate the pasta and sprinkle with grated Parmesan cheese and halved cherry tomatoes for garnish.
Lemon Garlic Shrimp Skewers
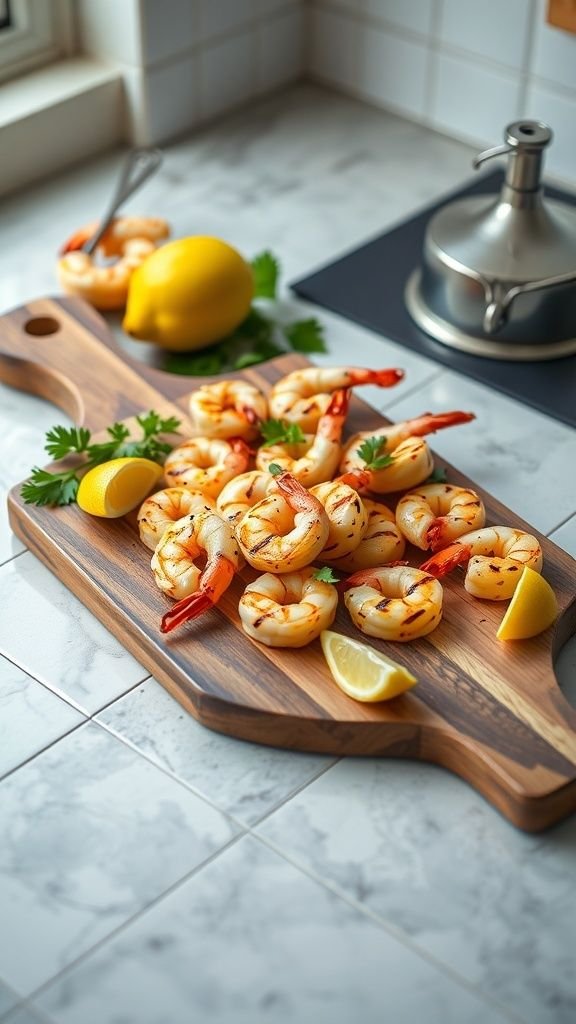
Lemon garlic shrimp skewers are a fantastic, fresh dish perfect for any occasion. The vibrant colors of the grilled shrimp against the backdrop of a wooden board create an inviting display. You can see the juicy shrimp, glistening with a hint of olive oil and fresh herbs, ready to be savored. This dish is not only visually appealing but also packed with flavor, thanks to the zesty lemon and aromatic garlic.
Making these skewers is simple, and the ingredients are quite straightforward. You’ll want to keep things light and easy, focusing on the natural taste of the shrimp. Pair these skewers with a side of rice or a crisp salad for a complete meal. They make a great appetizer or main course for gatherings.
Savory Potato and Cheese Frittata

This Savory Potato and Cheese Frittata is a delightful dish that perfectly combines comfort and flavor. It’s simple to whip up, making it ideal for brunch or a quick weeknight dinner. The golden crust and fluffy interior make it a treat for everyone.
Imagine slices of tender potatoes nestled in a rich, cheesy filling, topped with colorful bell peppers and fresh herbs. The vibrant greens and reds really pop, making it as pleasing to the eye as it is to the palate. Plus, you can use whatever veggies you have on hand, which is a fantastic way to keep things fresh and exciting.
Frittatas are all about flexibility. Whether you want to make it with leftover potatoes or add extra veggies, you’ll love how easy it is to customize this dish. Serve it with a simple green salad or some crusty bread, and you’re all set!
Ingredients
- 3 medium potatoes, peeled and diced
- 6 large eggs
- 1 cup shredded cheese (cheddar or your favorite)
- 1 bell pepper, diced
- 1/2 onion, diced
- 2 tablespoons olive oil
- Salt and pepper to taste
- Fresh herbs (like parsley or chives), for garnish
Instructions
- Preheat your oven to 375°F (190°C).
- In a skillet, heat olive oil over medium heat. Add the diced potatoes and cook for about 10 minutes until tender and slightly golden.
- Add the diced onions and bell pepper and sauté for an additional 5 minutes.
- In a bowl, whisk the eggs, and season with salt and pepper. Stir in the shredded cheese.
- Pour the egg mixture over the veggies in the skillet, making sure to evenly distribute everything.
- Cook on the stove for 3-4 minutes until the edges start to set, then transfer the skillet to the oven.
- Bake for another 15-20 minutes, or until the frittata is set and lightly golden on top.
- Once done, let it cool slightly. Slice and garnish with fresh herbs before serving.
Enjoy your delicious frittata warm or at room temperature!
Apple Cinnamon Oatmeal
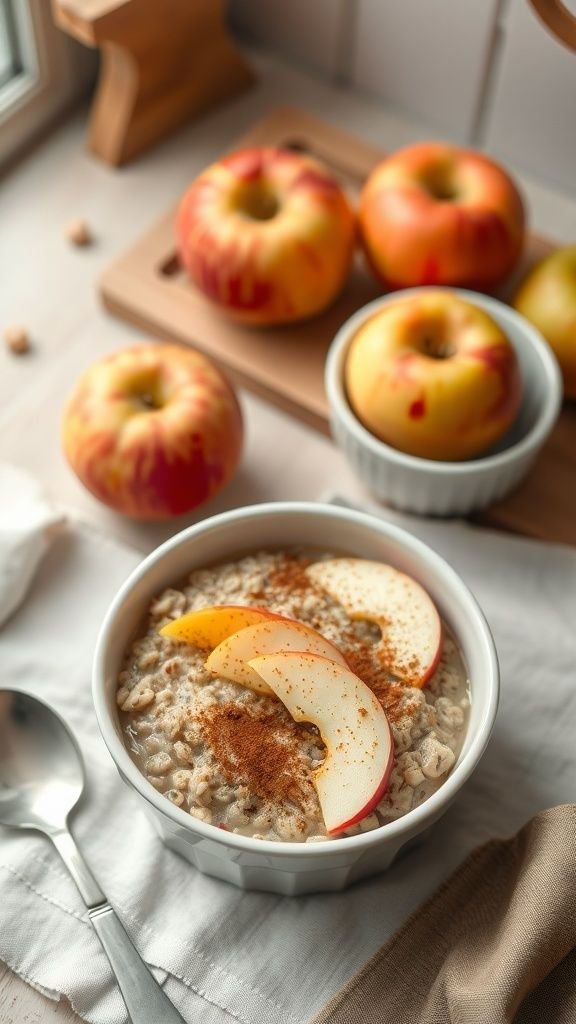
Apple Cinnamon Oatmeal is the perfect breakfast that combines warmth and comfort. This dish is easy to make and uses simple ingredients that most of us already have at home. The photo shows a delightful bowl of oatmeal topped with fresh apple slices and a sprinkle of cinnamon, making it not only tasty but visually appealing, too!
The combination of apples and cinnamon creates a classic flavor that feels nostalgic. It’s an ideal way to start your day, giving you energy and satisfying your taste buds. Plus, you can tweak the recipe to include your favorite nuts for extra crunch or a drizzle of honey for sweetness.
Making this oatmeal is a breeze. Just cook your oats, stir in apple pieces, and finish with a dusting of cinnamon. It’s a nutritious choice that can be prepared in under 10 minutes. Let’s dive into the recipe!
Caprese Salad with Balsamic Glaze

Caprese salad is a delightful dish that perfectly captures the essence of fresh ingredients. It features ripe tomatoes, creamy mozzarella, and fragrant basil, all enhanced by a drizzle of balsamic glaze. This salad not only looks beautiful on the plate but also tastes incredibly refreshing!
The vibrant colors of red tomatoes, white mozzarella, and green basil make it an eye-catching dish. The balsamic glaze adds a sweet tang that brings all the flavors together. It’s perfect as a starter or a light meal. Plus, it requires minimal preparation!
Let’s dive into making this simple yet elegant salad that everyone will love.
Ingredients
- 4 ripe tomatoes, sliced
- 8 ounces fresh mozzarella, sliced
- 1 cup fresh basil leaves
- 2 tablespoons extra virgin olive oil
- 2 tablespoons balsamic glaze
- Salt and pepper to taste
Instructions
- Arrange the tomato slices on a large plate.
- Layer the mozzarella slices between the tomato slices.
- Tuck fresh basil leaves in between the layers for flavor and color.
- Drizzle the olive oil and balsamic glaze over the salad.
- Season with salt and pepper to taste, and serve immediately.
Spicy Black Bean Quesadillas

These spicy black bean quesadillas are a delightful twist on a classic dish! Perfect for a quick lunch or dinner, they bring an exciting taste to your table. The golden crust, crispy edges, and melty cheese create the ultimate satisfying bite.
The image shows beautifully toasted quesadillas on a vibrant plate, accompanied by salsa, sour cream, and fresh veggies. It showcases a fun way to enjoy simple ingredients. The combination of spicy black beans and cheese is a fantastic way to add some flair to your meal.
Let’s dive into the ingredients you’ll need and the steps to make these delicious quesadillas.
Ingredients
- 4 flour tortillas
- 1 can of black beans, drained and rinsed
- 1 cup shredded cheese (cheddar or Monterey Jack)
- 1/2 teaspoon chili powder
- 1/4 teaspoon cumin
- Salt to taste
- 1 tablespoon olive oil
- 1/4 cup salsa
- Fresh cilantro for garnish
Instructions
- Prepare the Filling: In a mixing bowl, combine the black beans, cheese, chili powder, cumin, and salt. Mix well until everything is combined.
- Assemble the Quesadillas: Place half of the bean mixture on one side of each tortilla. Fold the tortillas in half to create half-moons.
- Cook the Quesadillas: Heat olive oil in a skillet over medium heat. Add the quesadillas in batches and cook for about 2-3 minutes on each side until golden brown and the cheese is melted.
- Slice and Serve: Remove from the skillet, slice into wedges, and serve with salsa and a dollop of sour cream. Don’t forget to sprinkle fresh cilantro on top for some added flavor!
Enjoy your spicy black bean quesadillas!
Baked Honey Mustard Chicken Thighs

Baked honey mustard chicken thighs are not just easy to prepare but also incredibly flavorful! This dish combines the sweetness of honey with the tanginess of mustard, creating a delicious glaze that seeps into the tender chicken. With minimal effort, you can have a meal that tastes like it came from a fancy restaurant right in your own kitchen.
The chicken thighs are juicy and succulent, particularly when baked correctly. The oven will work its magic, leaving you with crispy skin and bursting flavors. Serve the chicken thighs alongside roasted potatoes for a complete meal that’s sure to impress your family or guests.
Ingredients
- 4 chicken thighs, skin-on and bone-in
- 1/4 cup honey
- 1/4 cup Dijon mustard
- 2 tablespoons soy sauce
- 1 teaspoon garlic powder
- 1 teaspoon paprika
- Salt and pepper, to taste
- Fresh thyme, for garnish (optional)
Instructions
- Preheat your oven to 375°F (190°C).
- In a small bowl, whisk together the honey, Dijon mustard, soy sauce, garlic powder, paprika, salt, and pepper.
- Place the chicken thighs in a baking dish and pour the honey mustard mixture over them, ensuring they are nicely coated.
- Bake in the preheated oven for about 35-40 minutes, or until the chicken is cooked through and the skin is crispy.
- For extra flavor, broil for an additional 3-5 minutes at the end.
- Garnish with fresh thyme before serving if desired.
Crispy Baked Sweet Potato Fries

Crispy baked sweet potato fries are a delightful snack or side dish that everyone will love. These vibrant orange fries look amazing on a wooden platter, perfectly paired with tasty dipping sauces, giving them an appealing presentation. The best part? They’re healthy and easy to make!
To make these fries, you need just a few simple ingredients: fresh sweet potatoes, olive oil, salt, and some spices if you’re feeling adventurous. The process is straightforward, and you don’t need any fancy equipment—just a good knife and a baking sheet will do.
Start by cutting the sweet potatoes into even strips so they cook evenly. Toss them with olive oil, salt, and any additional spices you prefer, like garlic powder or paprika, for a flavor boost. Remember, the more spread out they are on the baking sheet, the crispier they’ll get!
Roasting them in the oven allows for that crunchy texture we all adore, while the natural sweetness of the potatoes shines through. Plus, these fries are a great alternative to regular fries and can be enjoyed guilt-free.
Now, let’s dive into the recipe!
Zucchini Noodles with Marinara Sauce
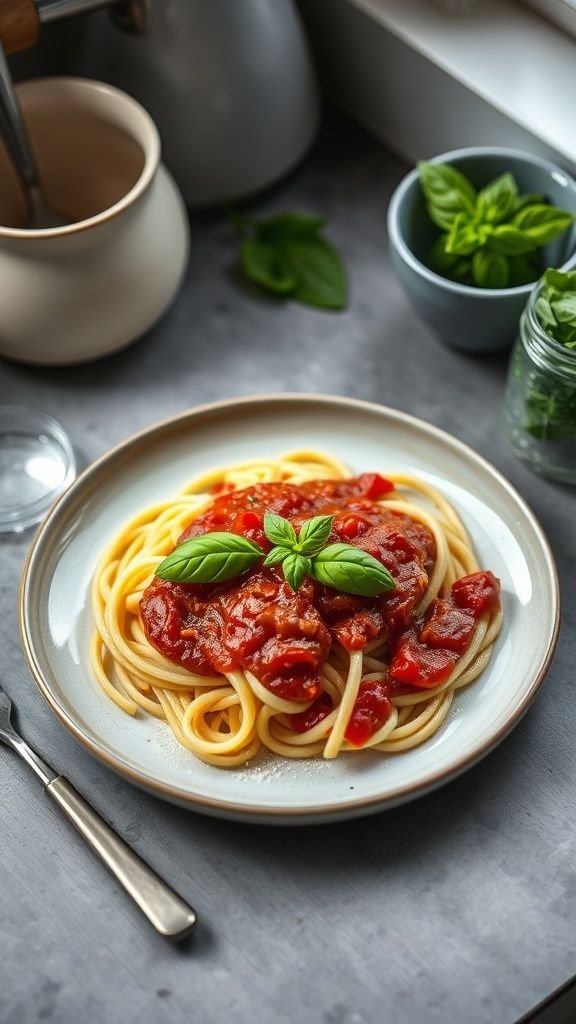
Zucchini noodles, often called “zoodles,” are a fantastic alternative to traditional pasta. They’re light, refreshing, and perfect for those looking to incorporate more vegetables into their meals. When paired with a rich marinara sauce, you get a delicious dish that is both satisfying and easy to whip up.
In the image, you can see a beautiful plate of zucchini noodles topped with marinara sauce. The vibrant red sauce is made from fresh tomatoes, herbs, and spices, creating a mouthwatering contrast with the pale noodles. A sprinkle of fresh basil on top adds a burst of color and aroma, enhancing the dish’s appeal.
This recipe is not only simple but also uses everyday ingredients you likely have in your kitchen. Making zucchini noodles is quick, and they cook in just a few minutes!
Ingredients
- 4 medium zucchinis
- 2 cups marinara sauce
- 1 tablespoon olive oil
- 1 teaspoon garlic, minced
- Salt and pepper, to taste
- Fresh basil, for garnish
Instructions
- Spiralize the Zucchini: Using a spiralizer, create noodles from the zucchinis. Alternatively, use a peeler to make thin strips if you don’t have a spiralizer.
- Cook the Zoodles: In a large skillet, heat olive oil over medium heat. Add the minced garlic and sauté for about 1 minute until fragrant. Toss in the zucchini noodles and cook for 3-4 minutes until tender. Avoid overcooking to keep them slightly crisp.
- Add the Sauce: Pour in the marinara sauce and mix until the noodles are well-coated. Season with salt and pepper to taste.
- Serve: Transfer the zucchini noodles to plates and garnish with fresh basil. Enjoy your light and tasty meal!
Garlic Butter Rice with Parsley
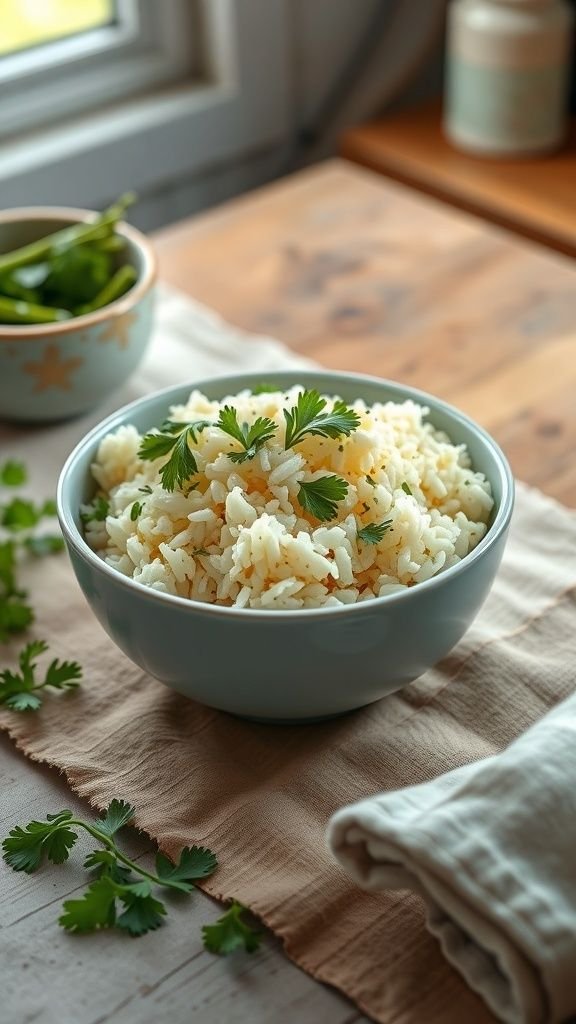
Garlic Butter Rice with Parsley is a delightful dish that’s not only simple to prepare but also packed with flavor. Imagine fluffy white rice, perfectly cooked and infused with the rich taste of garlic and butter. The vibrant green parsley adds a burst of color and freshness, making this rice an appealing side for any meal.
This recipe focuses on using straightforward ingredients that you likely have on hand. It’s a perfect option for busy weeknights or when you’re looking to elevate your meal without much fuss. Just think about the aroma of garlic gently sizzling in butter—it’s enough to make anyone hungry!
The beauty of this recipe lies in its versatility. Serve it alongside grilled chicken, stewed vegetables, or any protein of your choice. It complements a range of dishes and always comes out delicious.
Ingredients
- 1 cup white rice
- 2 cups water
- 2 tablespoons unsalted butter
- 3-4 cloves garlic, minced
- 1/4 cup fresh parsley, chopped
- Salt and pepper to taste
Instructions
- Cook the Rice: In a medium saucepan, bring the water to a boil. Add the rice and a pinch of salt. Cover and reduce the heat to low. Cook for about 15-20 minutes, or until the rice is tender and the water is absorbed.
- Sauté Garlic: In a different pan, melt the butter over medium heat. Add the minced garlic and sauté for about 1-2 minutes until fragrant but not browned.
- Combine Ingredients: Once the rice is cooked, fluff it with a fork and add it to the pan with the garlic butter. Stir to combine well.
- Add Parsley: Toss in the chopped parsley and season with salt and pepper to taste. Give it one last stir to mix everything together.
- Serve: Transfer the garlic butter rice to a serving bowl and enjoy it warm!
Simple Vegetable Soup with Herbs

There’s nothing quite like a warm bowl of vegetable soup, especially on a cool day. This soup is not just comforting, but also packed with nutrients. The image captures a vibrant bowl filled with colorful vegetables, fragrant herbs, and a rich broth. The combination of fresh ingredients makes for a heartwarming dish that anyone can whip up.
To start, gather your favorite veggies. Carrots, potatoes, and onions lend great flavor. You can also throw in any seasonal vegetables you have on hand. Fresh herbs like parsley or thyme add a delightful aroma that elevates the taste. Plus, making a soup is all about being flexible. You can customize it to suit your preferences!
Enjoying this vegetable soup is simple. It pairs perfectly with a slice of crusty bread. It’s a great way to cleanse the palate and soak up all that delicious broth. Whether for lunch or dinner, this dish delivers satisfaction in every spoonful!
Ingredients
- 2 tablespoons olive oil
- 1 medium onion, diced
- 2 cloves garlic, minced
- 3 carrots, chopped
- 2 potatoes, diced
- 4 cups vegetable broth
- 1 can diced tomatoes (14.5 ounces)
- 1 teaspoon dried thyme
- 1 teaspoon dried oregano
- 1 cup green beans, trimmed and chopped
- Salt and pepper to taste
- Fresh parsley, chopped for garnish
Instructions
- Heat the olive oil in a large pot over medium heat. Add the diced onion and garlic, sauté until soft.
- Add the carrots and potatoes. Cook for about 5 minutes, stirring occasionally.
- Pour in the vegetable broth and diced tomatoes. Stir in the thyme and oregano.
- Bring the mixture to a boil, then reduce the heat to a simmer. Let it cook for 15 minutes.
- Add the green beans and season with salt and pepper. Cook for an additional 10 minutes.
- Serve hot, garnished with fresh parsley for a burst of flavor!
Honey Garlic Glazed Carrots

If you’re looking for a delicious and easy side dish, honey garlic glazed carrots are a winner. The rich orange hue of the carrots in the image shows off their sweetness, perfectly enhanced by the sticky honey and savory garlic. They’re not just visually appealing; they burst with flavor and pair wonderfully with any main course.
The simplicity of this recipe is what makes it so special. You only need a few common ingredients to create a dish that feels elegant yet is very easy to prepare. Whether it’s a family dinner or a special occasion, these glazed carrots will impress.
Ingredients
- 1 pound baby carrots
- 2 tablespoons honey
- 2 tablespoons unsalted butter
- 2 garlic cloves, minced
- Salt and pepper to taste
- Fresh parsley for garnish (optional)
Instructions
- Prepare the Carrots: Rinse the baby carrots under cool water and set aside.
- Cook the Carrots: In a medium saucepan, add the carrots and enough water to cover them. Bring to a boil. Cook for about 5-7 minutes, or until tender.
- Make the Glaze: In a separate pan, melt the butter over medium heat. Stir in the minced garlic and sauté for about 1 minute until fragrant. Add honey and stir until well combined.
- Combine: Drain the carrots and add them to the pan with the honey garlic glaze. Toss to coat the carrots evenly in the glaze.
- Season: Sprinkle with salt and pepper to taste, and toss once again.
- Serve: Transfer to a serving dish and garnish with fresh parsley if desired. Enjoy your delicious honey garlic glazed carrots!
Lentil Curry with Coconut Milk

Lentil curry with coconut milk is a perfect dish for anyone looking for comfort food that’s easy to whip up. The vibrant colors in the bowl make it visually appealing, while the rich, creamy texture from the coconut milk adds warmth to every spoonful. Pair it with fluffy rice, and you’ve got a satisfying meal!
This dish is not just flavorful; it’s also packed with protein and fiber from the lentils, making it a nutritious choice. Whether you’re cooking for yourself or having friends over, lentil curry ticks all the boxes!
Ingredients
- 1 cup dried lentils (red or green)
- 1 can (13.5 oz) coconut milk
- 1 onion, chopped
- 2 cloves garlic, minced
- 1 inch ginger, minced
- 1 tablespoon curry powder
- 1 teaspoon turmeric
- 1 teaspoon cumin
- 2 cups vegetable broth
- Salt and pepper, to taste
- 2 tablespoons vegetable oil
- Cilantro, for garnish
- Rice, for serving
Instructions
- Prepare the Lentils: Rinse the lentils under cold water and set them aside.
- Sauté the Aromatics: In a large saucepan, heat the vegetable oil over medium heat. Add the chopped onion and sauté until translucent. Stir in garlic and ginger, cooking for another minute.
- Add Spices: Sprinkle in the curry powder, turmeric, and cumin. Stir everything together for about 30 seconds to release the flavors.
- Combine Ingredients: Pour in the vegetable broth and coconut milk. Add the rinsed lentils, stir, and bring to a boil.
- Simmer: Reduce the heat and cover the pot. Let the curry simmer for about 25-30 minutes, or until the lentils are tender. Stir occasionally and add water if it gets too thick.
- Season: Once cooked, taste and season with salt and pepper as desired.
- Serve: Ladle the lentil curry into bowls, garnish with fresh cilantro, and serve with rice on the side.
This lentil curry with coconut milk is easy to make and incredibly delicious!
Banana Bread with Walnuts

Banana bread is one of those classic comforts that brings back memories of cozy kitchens and sweet aromas. This delightful loaf, with its golden crust and soft, moist interior, is perfect for breakfast or a snack anytime. Adding walnuts not only gives it a lovely crunch but also enhances the flavor profile, making it even more irresistible.
Let’s talk about how simple this recipe can be. With just a few ingredients, you can whip up a loaf in no time. You likely have most of them already sitting in your pantry or at the bottom of your fruit bowl. The recipe is versatile, too, so feel free to experiment by adding chocolate chips or dried fruits if you’re feeling adventurous!
Ingredients
- 3 ripe bananas, mashed
- 1/3 cup melted butter
- 1 teaspoon baking soda
- Pinch of salt
- 3/4 cup sugar
- 1 large egg, beaten
- 1 teaspoon vanilla extract
- 1 cup all-purpose flour
- 1/2 cup walnuts, chopped
Instructions
- Preheat the Oven: Set your oven to 350°F (175°C) and grease a 9×5-inch loaf pan.
- Mix the Wet Ingredients: In a mixing bowl, mash the bananas with a fork. Stir in the melted butter until well combined.
- Add Sugar and Egg: Mix in the sugar, beaten egg, and vanilla extract until smooth.
- Combine the Dry Ingredients: Sprinkle the baking soda and salt over the mixture. Add the flour and stir until just combined. Do not overmix!
- Add Walnuts: Gently fold in the walnuts for that extra crunch.
- Pour and Bake: Pour the batter into the prepared loaf pan and smooth the top. Bake for 60-65 minutes, or until a toothpick inserted into the center comes out clean.
- Cool and Slice: Let the banana bread cool in the pan for a few minutes, then transfer it to a wire rack to cool completely. Slice and enjoy!
One-Pot Creamy Mushroom Risotto
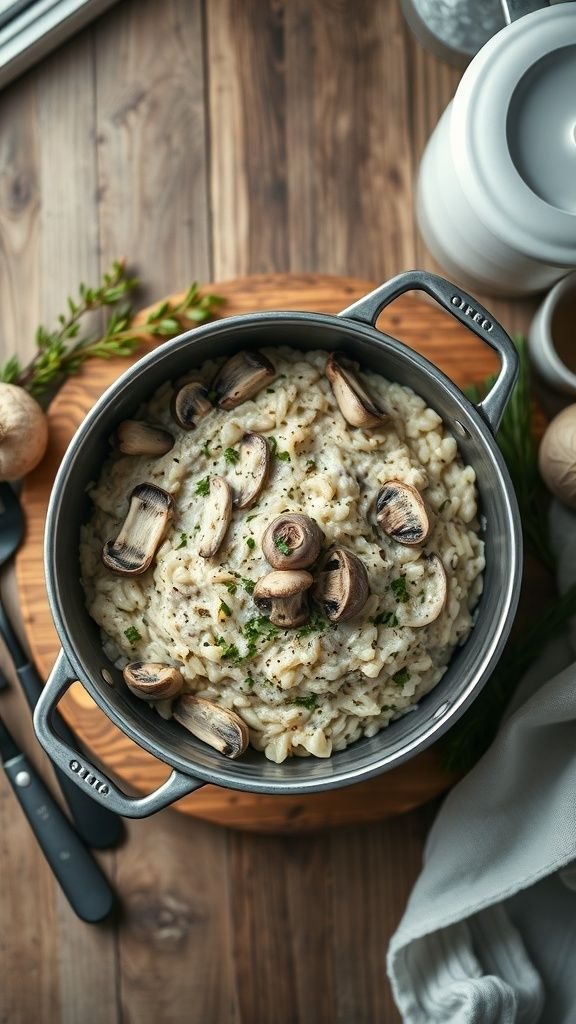
This One-Pot Creamy Mushroom Risotto is the perfect dish for a cozy dinner. It’s rich, creamy, and hearty, making it a favorite among many. The image shows a beautifully cooked risotto topped with perfectly sautéed mushrooms, adding texture and flavor. The vibrant greens sprinkled on top provide a nice touch, making the dish as visually appealing as it is delicious.
Making risotto may seem intimidating, but this recipe is easy and requires just a few simple ingredients. All you need is time and some love to create a creamy masterpiece.
Ingredients
- 1 cup Arborio rice
- 4 cups vegetable broth
- 1 cup mushrooms, sliced
- 1 small onion, diced
- 2 cloves garlic, minced
- 1/2 cup white wine (optional)
- 1/2 cup grated Parmesan cheese
- 2 tablespoons olive oil
- 2 tablespoons butter
- Salt and pepper to taste
Instructions
- Prepare the Broth: In a saucepan, heat the vegetable broth over low heat. Keep it warm but not boiling.
- Sauté the Vegetables: In a large pot, heat olive oil and butter over medium heat. Add the diced onion and cook until translucent. Stir in the garlic and sliced mushrooms, sautéing until the mushrooms are tender.
- Add the Rice: Pour in the Arborio rice and stir for about 2 minutes until the rice is coated and slightly toasted.
- Add Wine: If using wine, add it now and let it cook until mostly evaporated.
- Incorporate the Broth: Begin adding the warm broth one ladle at a time, stirring consistently. Wait until the liquid is absorbed before adding more. Continue this process for about 18-20 minutes until the rice is creamy but still has a bite to it.
- Finish with Cheese: Once cooked, remove the pot from heat. Stir in the Parmesan cheese and season with salt and pepper to taste.
- Serve: Spoon the risotto into bowls, topping with extra sautéed mushrooms and a sprinkle of fresh herbs if desired.
This One-Pot Creamy Mushroom Risotto is not just a meal; it’s a delightful experience that warms the soul. Plus, it’s easy to clean up since everything cooks in just one pot!
Final Thoughts
At the end of the day, cooking shouldn’t feel like a chore or a math problem. It should be the part of your day where things actually get simpler. I hope these recipes show you that you’re often just a few ingredients away from a fantastic dinner, even on those nights when “ordering in” feels like the only option.
The next time you’re looking at a near-empty fridge, don’t panic—just pull up this list and grab a spatula.
Now, I want to hear from you: What is the one “simple ingredient” you always have on hand? For me, it’s a good head of garlic and a box of pasta—the possibilities are endless! Let me know your pantry essentials in the comments, and if you try one of these recipes, be sure to share how it turned out!